Foreword: This page is a copy of a post over at rs25.com and is intended to serve as an archive of the post. The original post includes watermarked Photobucket images. Please click here to see original post.
You guys are going to love this. Started doing a huge picture by picture collection of how to merge a harness. This should help people know where to start and what’s involved. Again, I always suggest that if this is more of a project then you want then pay one of our wonderful vendors to do it for you. ECS, IWire, GT, etc come to mind.
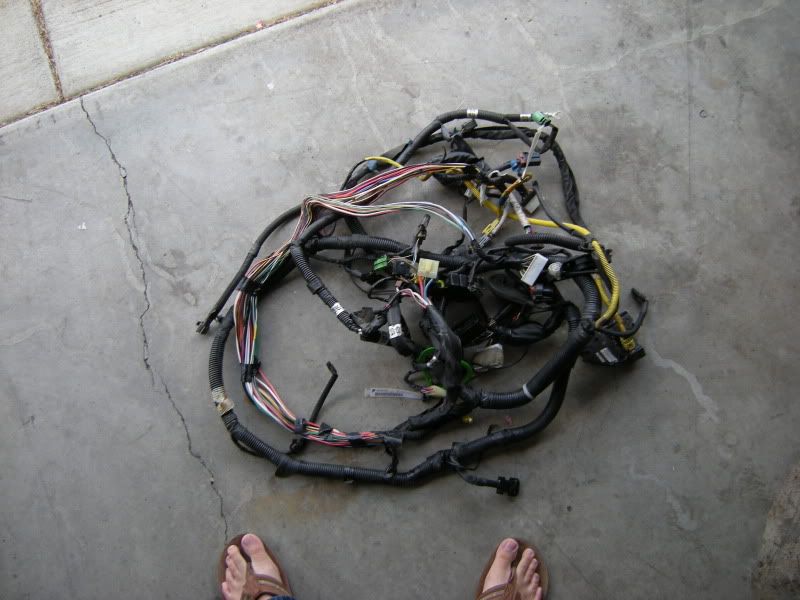
The first few pictures are just to get you familiar with the wrx harness and what you need from it. 90% of the harness goes in the trash so be aware of how little you really need. Everything in you RS/L or whatever you are swapping into will be run with the factor harness except for the engine. This ensures everything works and everything is untouched on your car. If, when you are done, something doesn’t turn on or work then it is more likely you forgot to plug in something than to suspect the swapped harness.
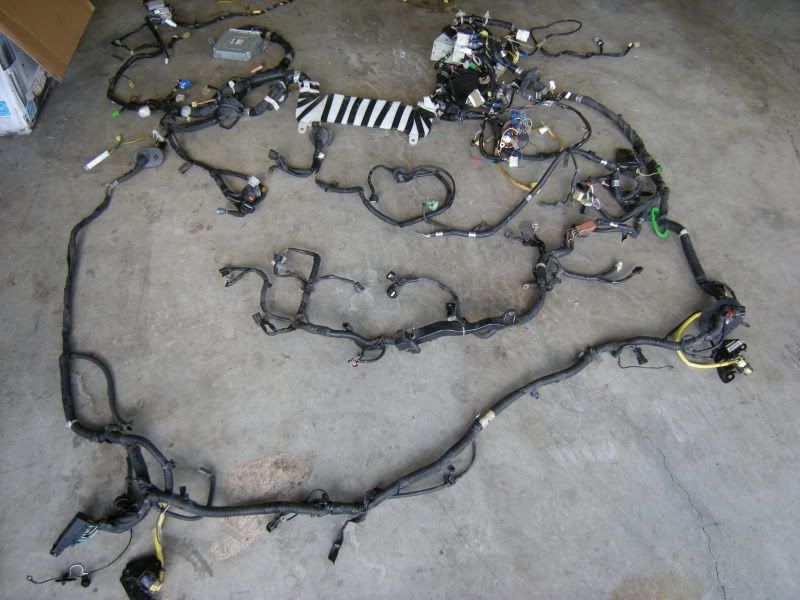
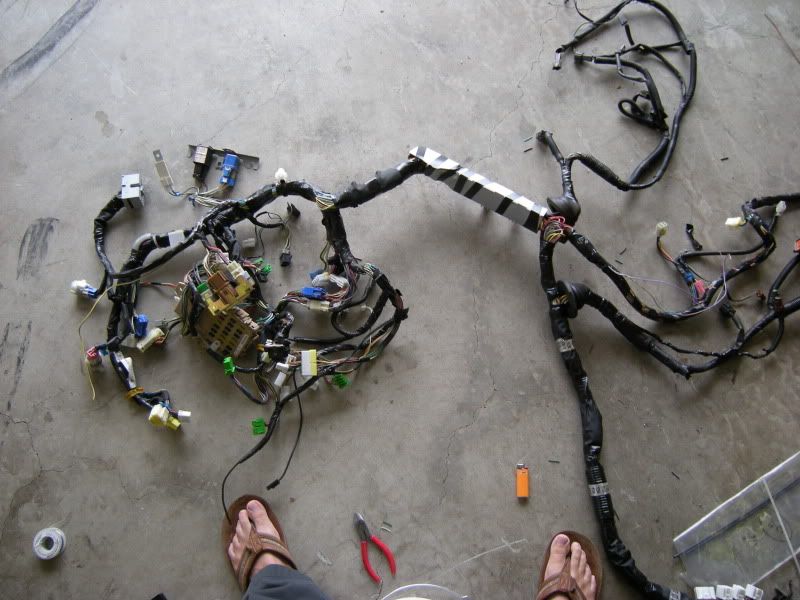
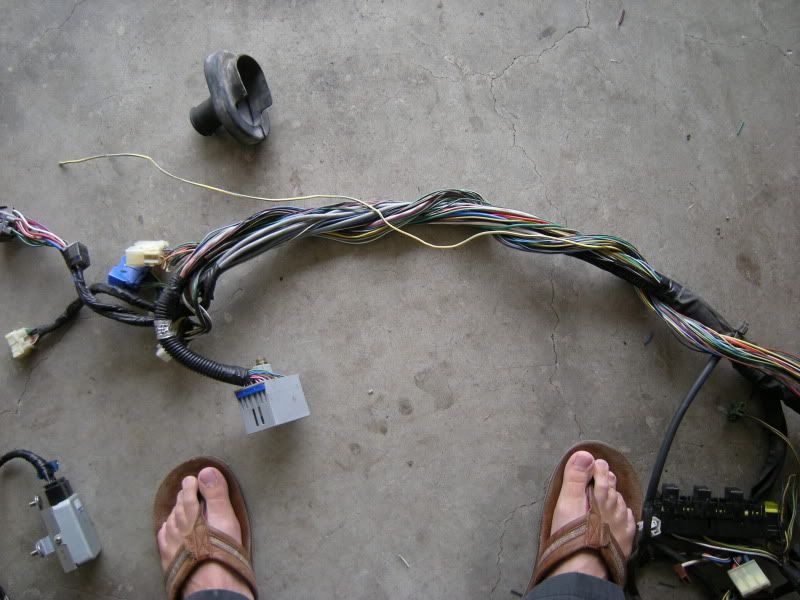
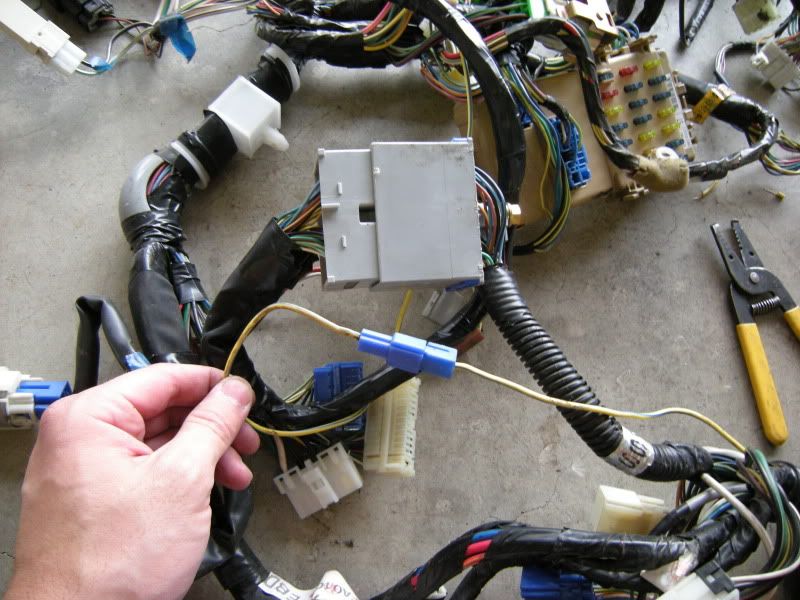
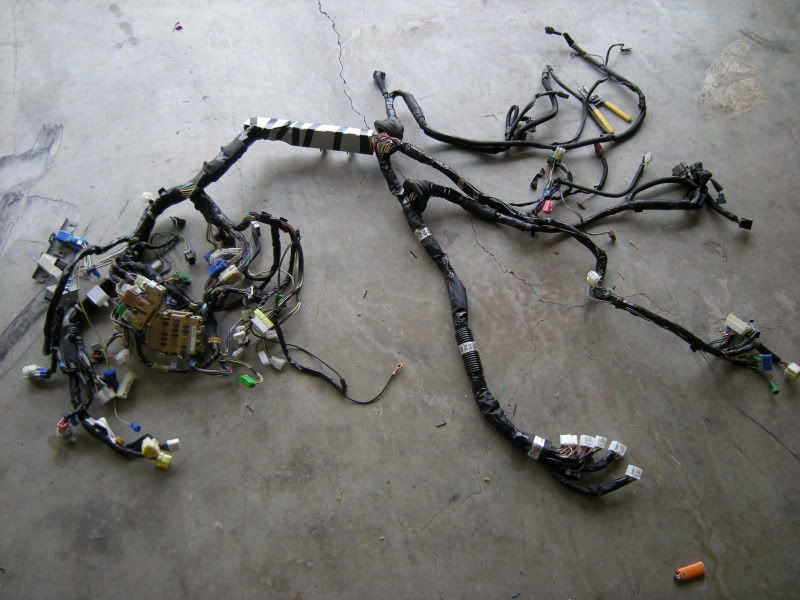
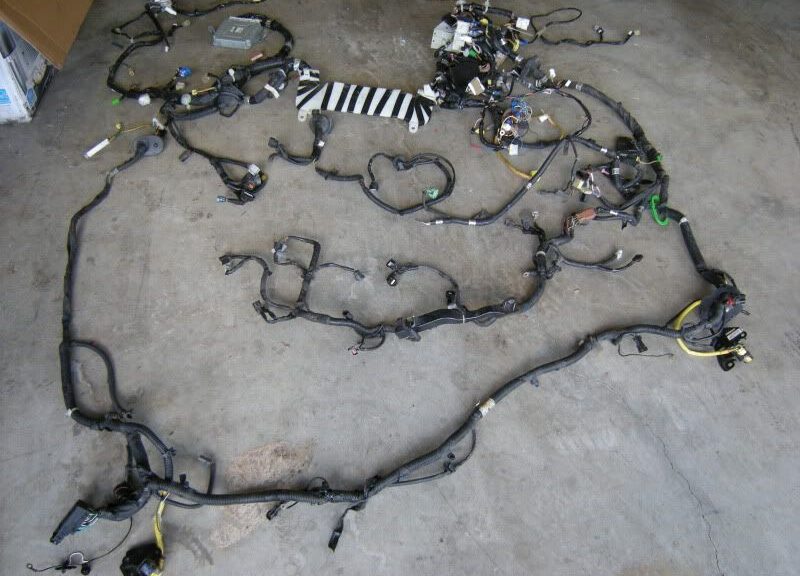
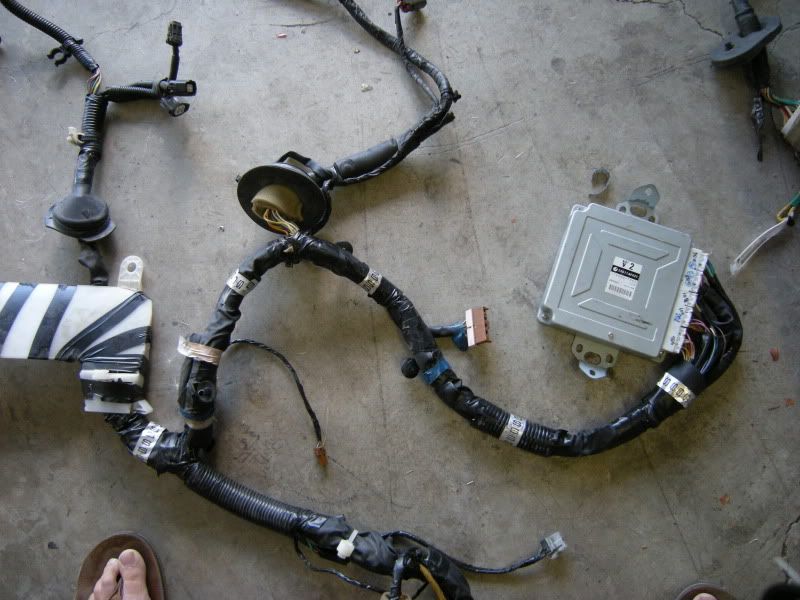
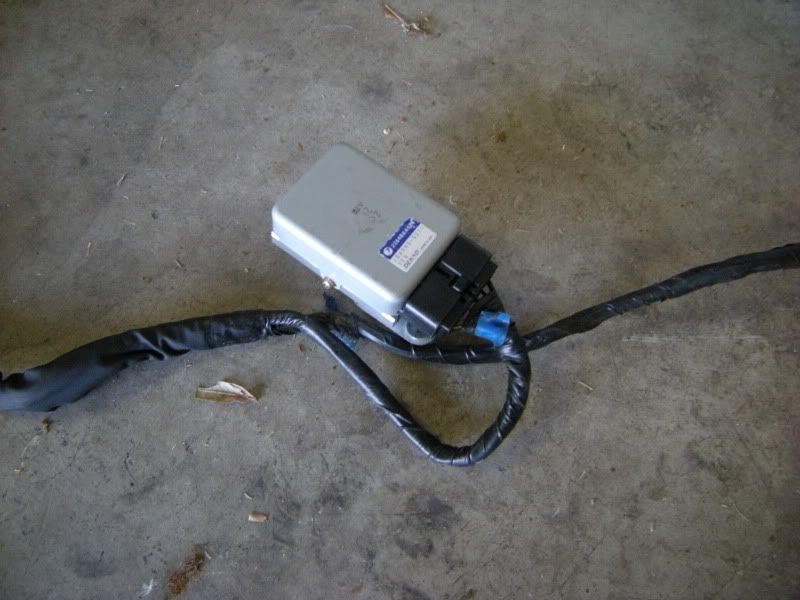
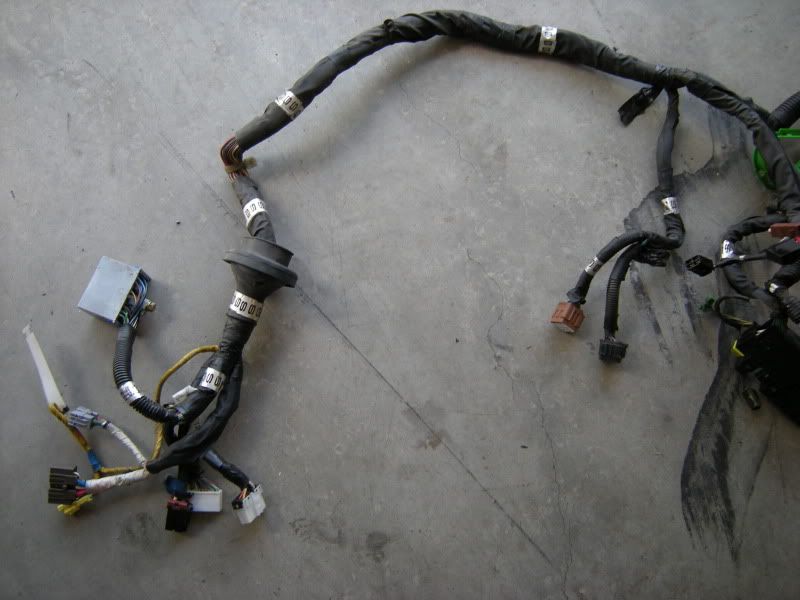
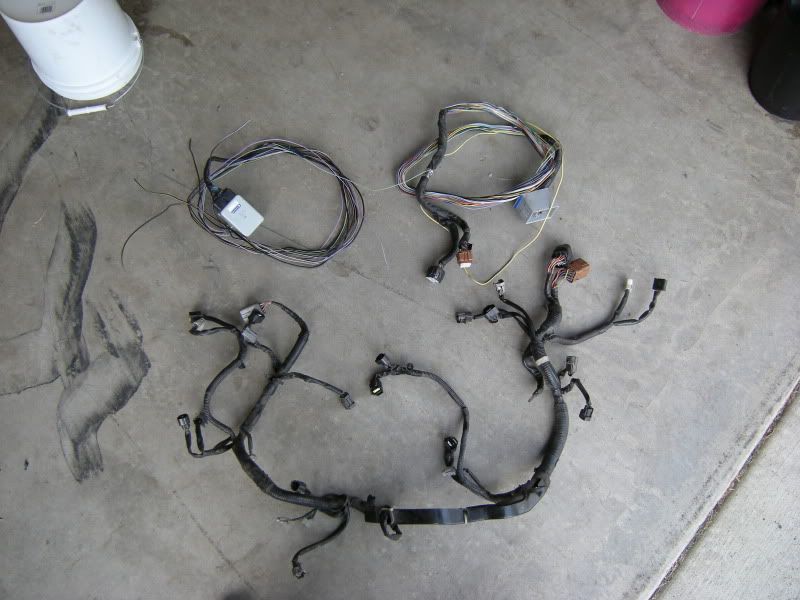
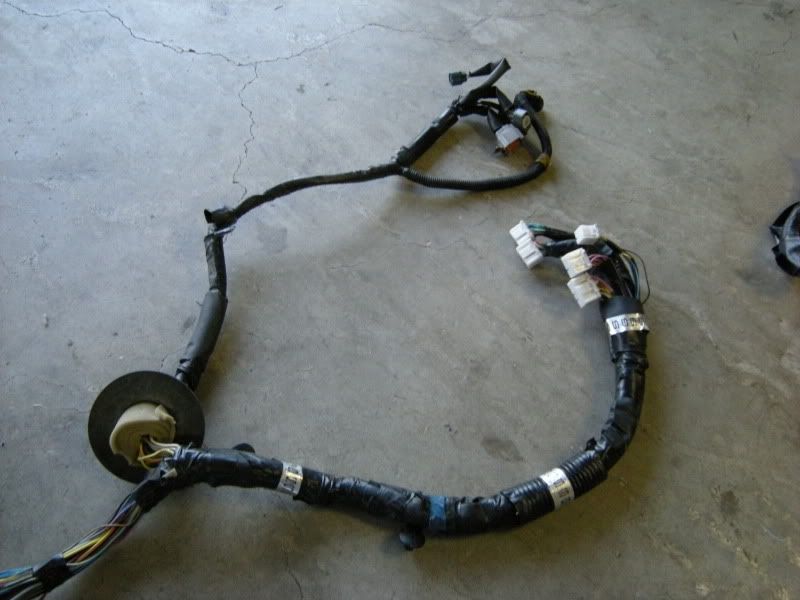
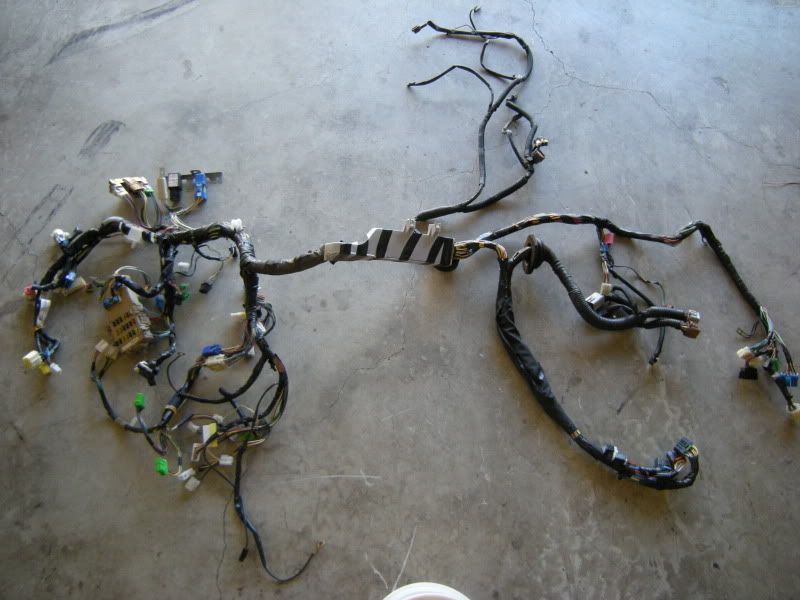
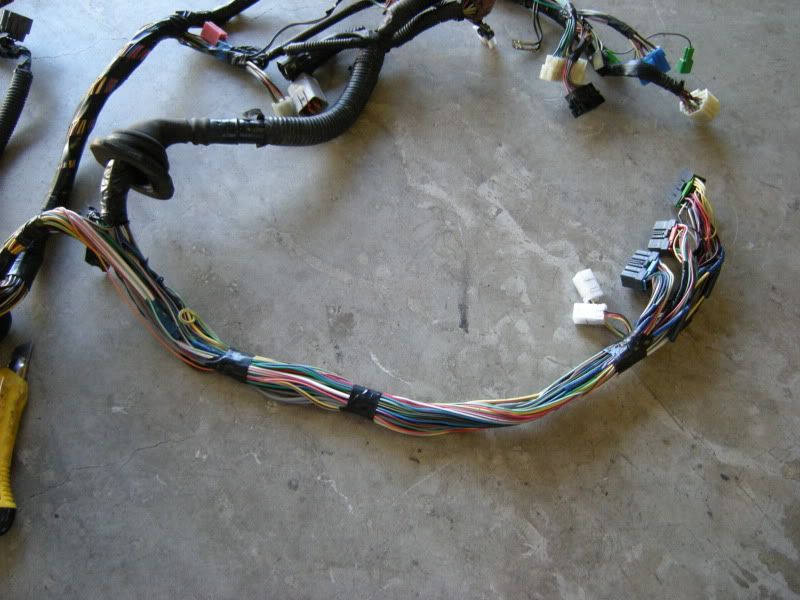
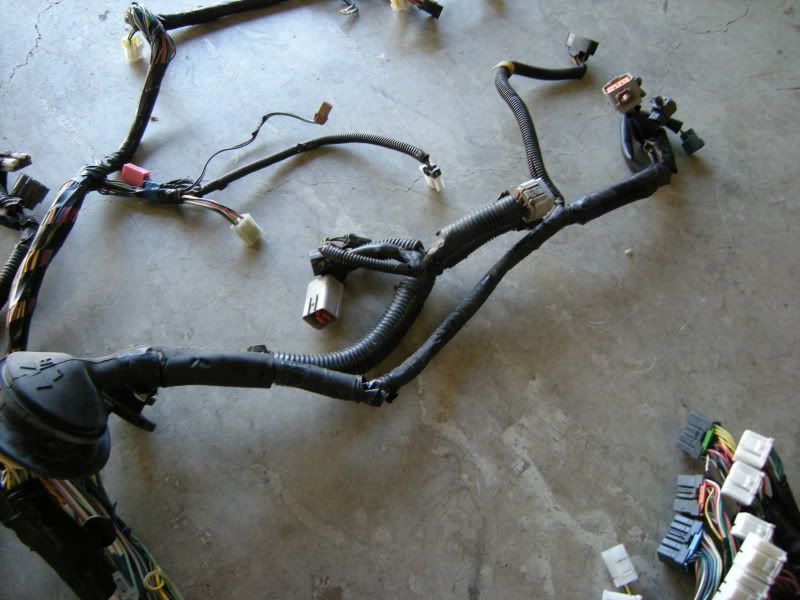
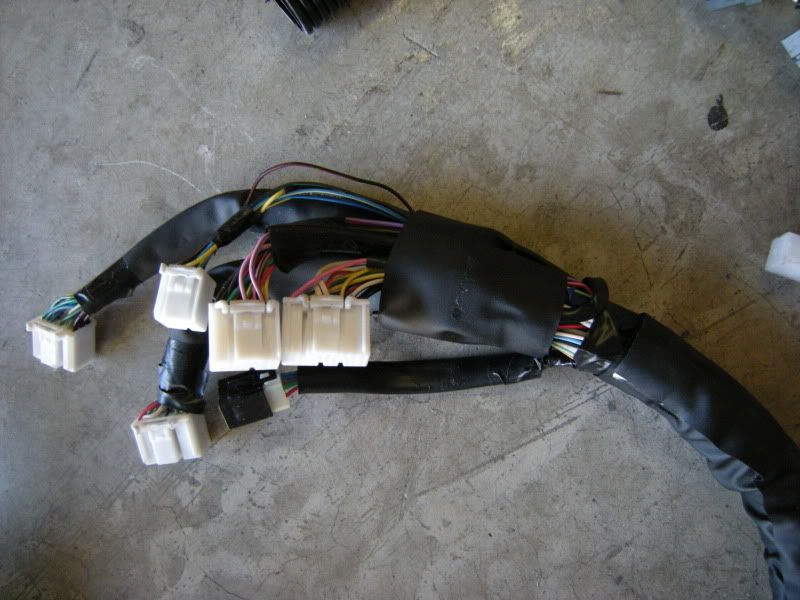
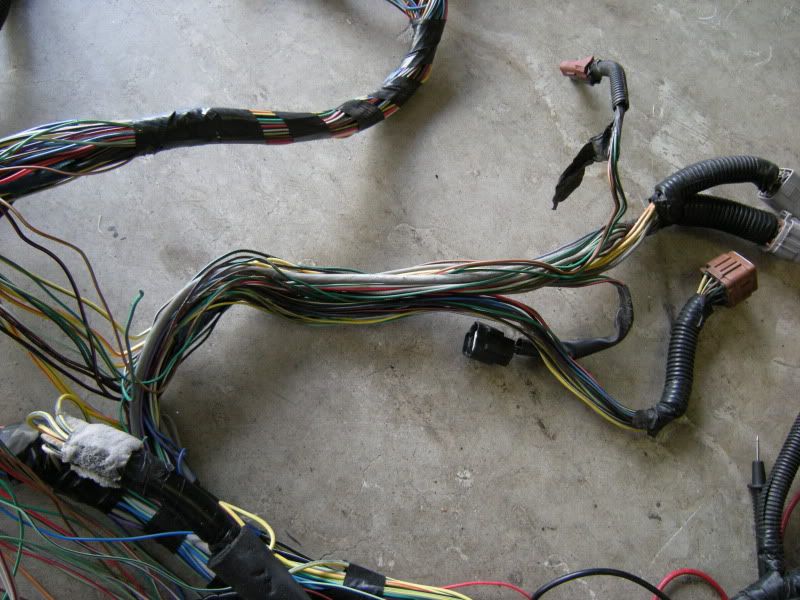
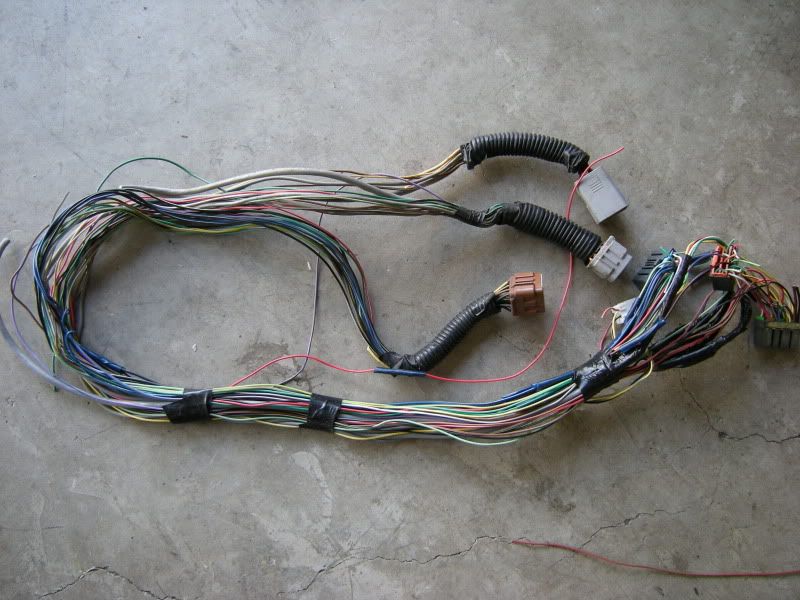
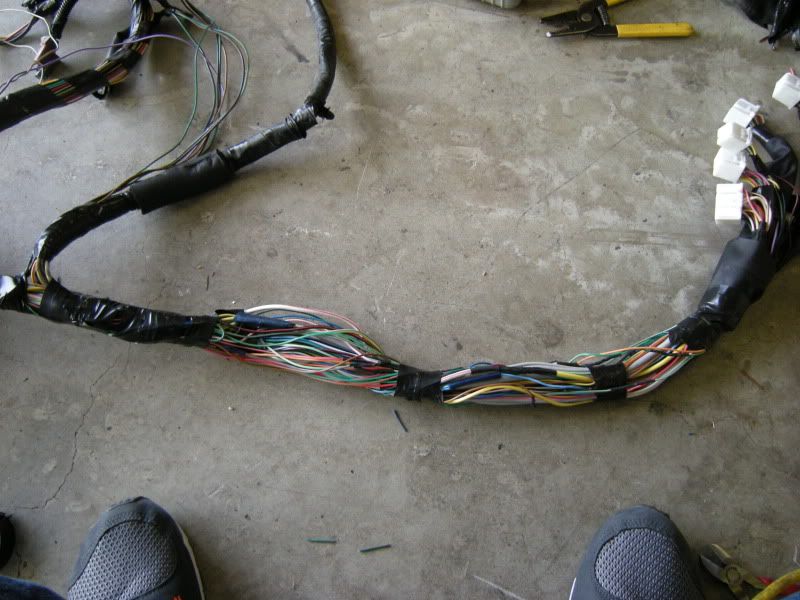
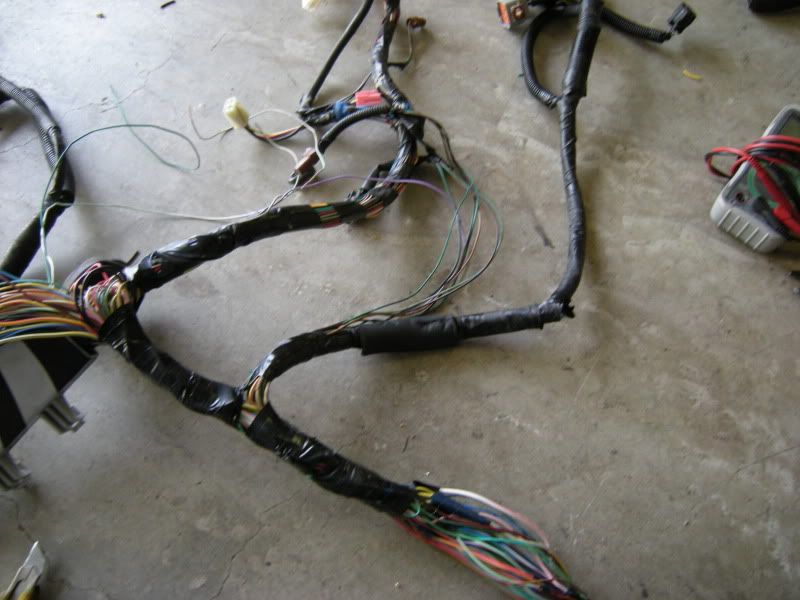
This Picture is the entire WRX harness. The harness extends to the rear of the car but this is just the bulkhead harness (harness that runs behind the dash) and the front harness (Harness the runs down the fenders and under the fans). Notice the fuse box and ECU. This is a few as if you just popped the hood and are looking down on the harness.
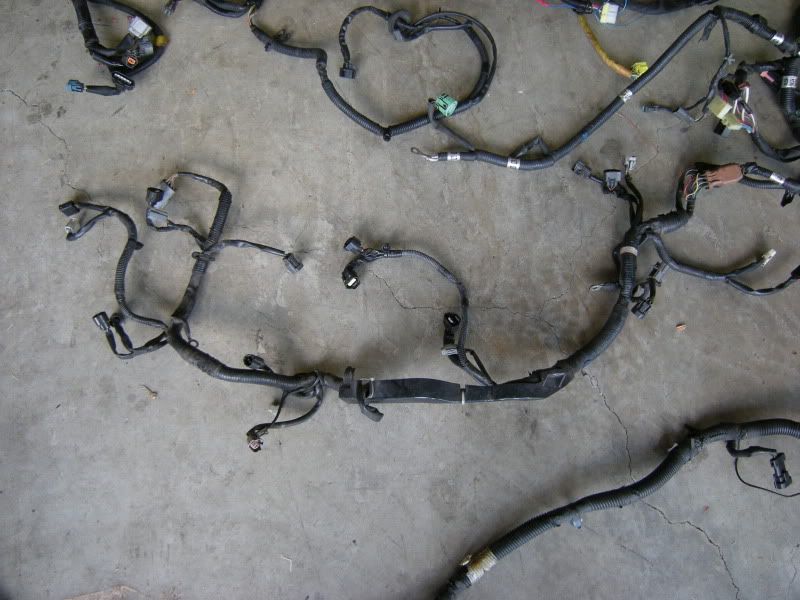
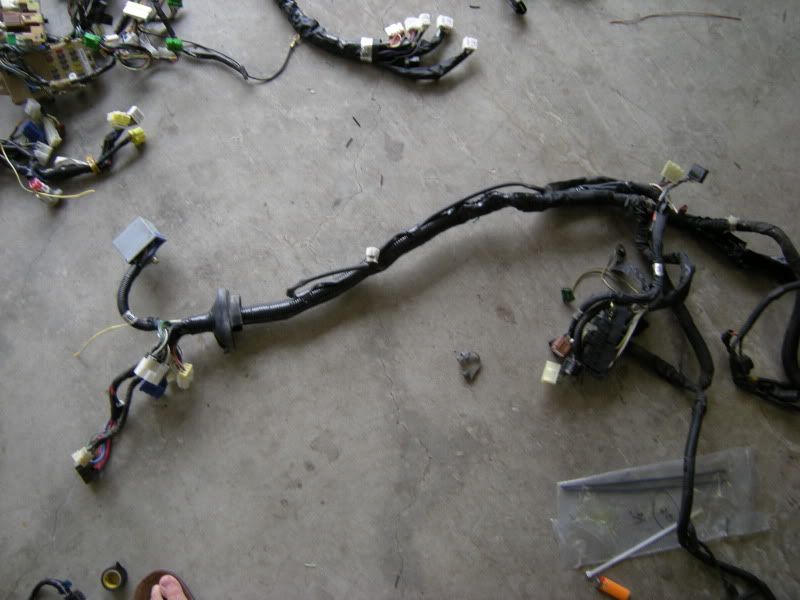
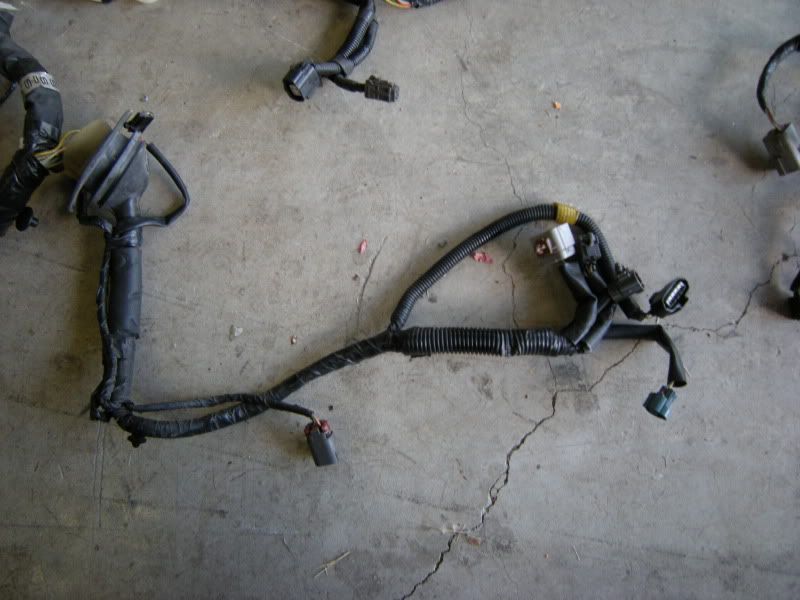
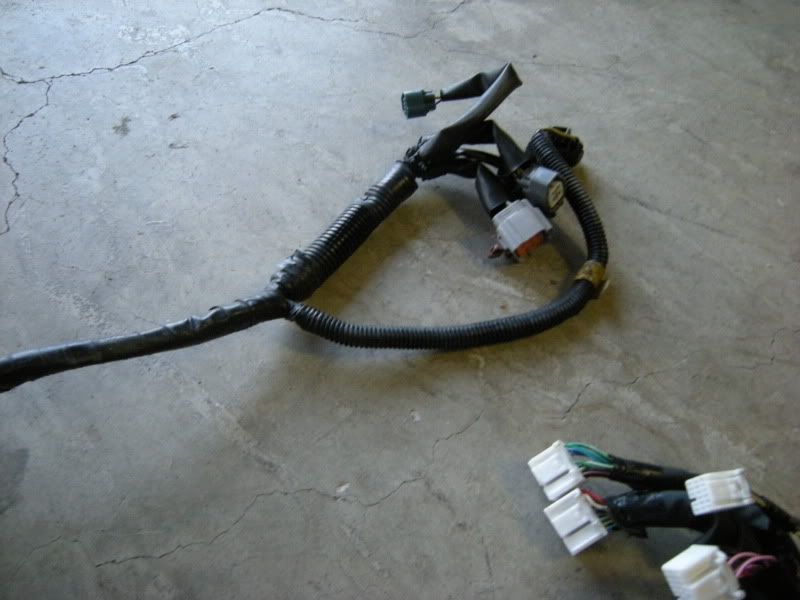
This is the engine harness. It runs under the intake manifold and never needs to be taken off for the wiring merge. The best thing to do is to leave the intake manifold and all other components on the engine bolted up until you first fire the car. This ensures other issues are not driving problems you might have.
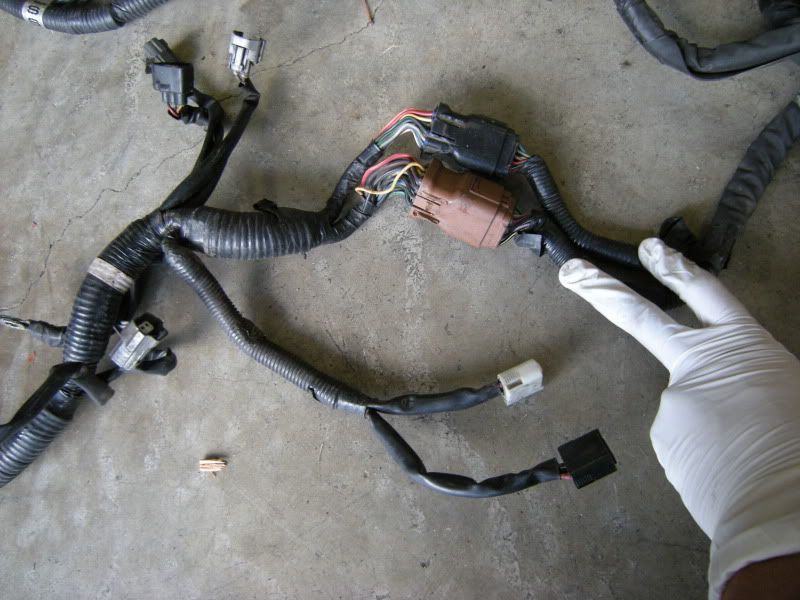
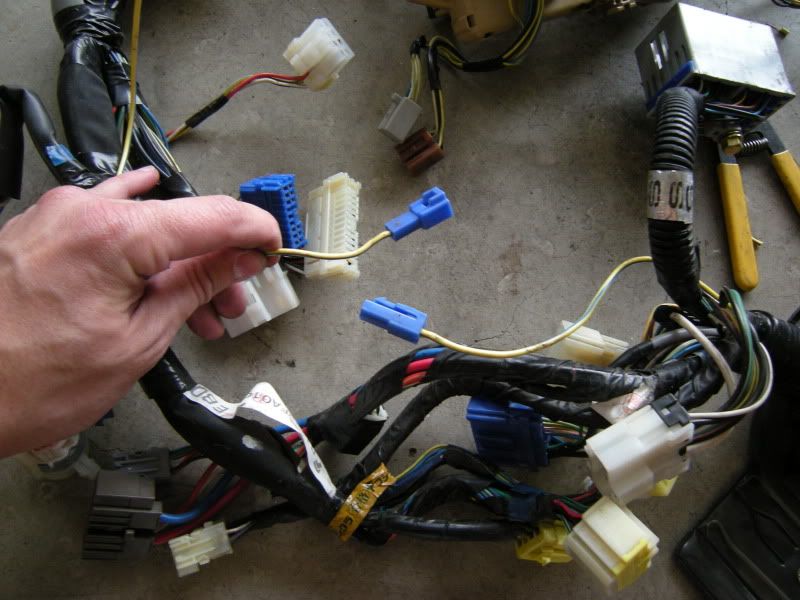
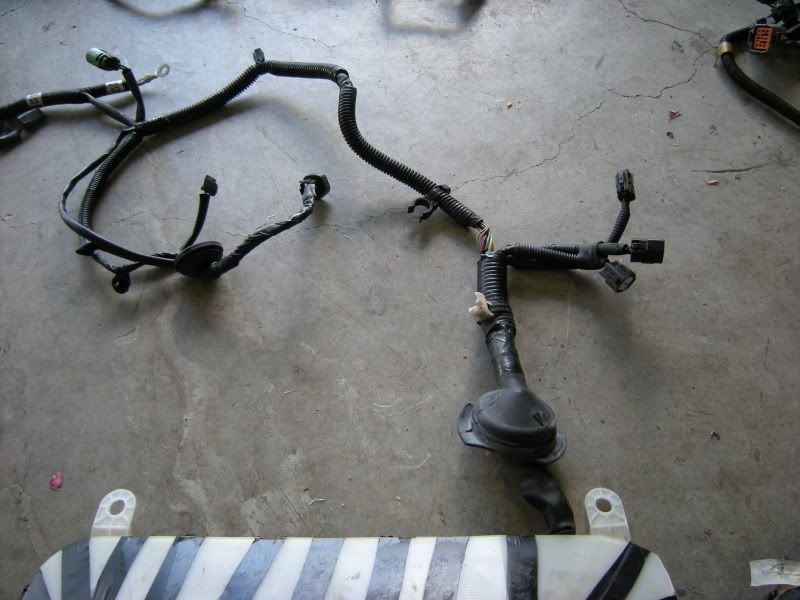
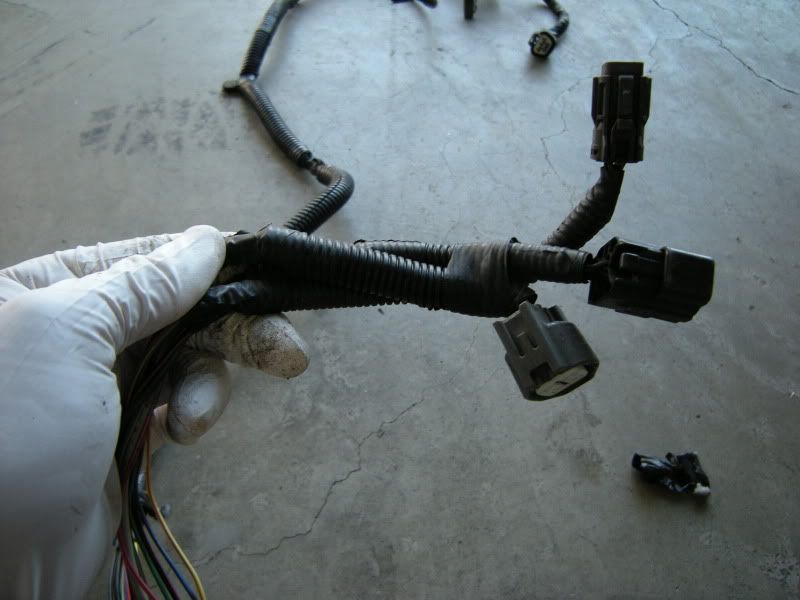
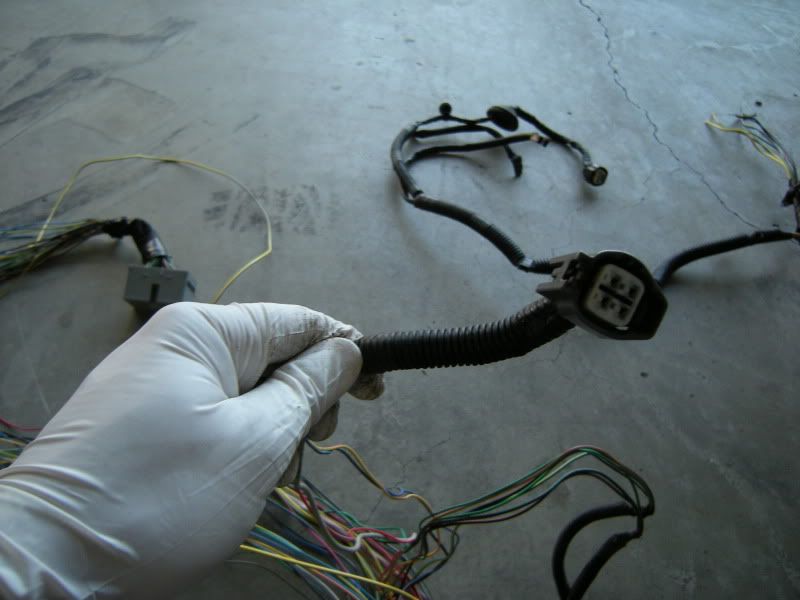
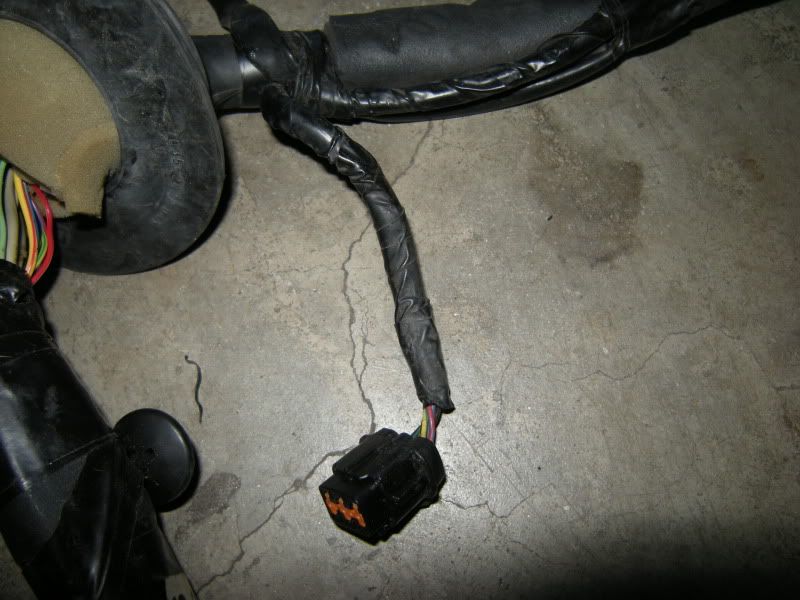
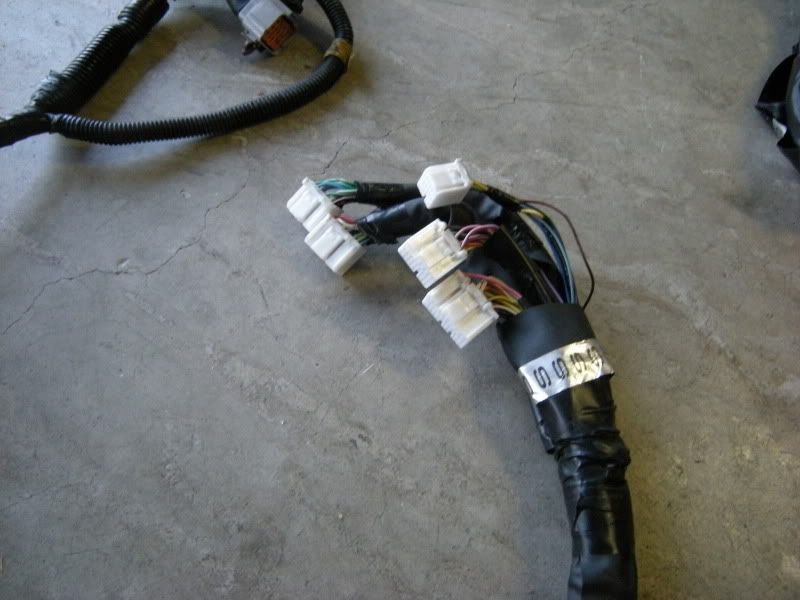
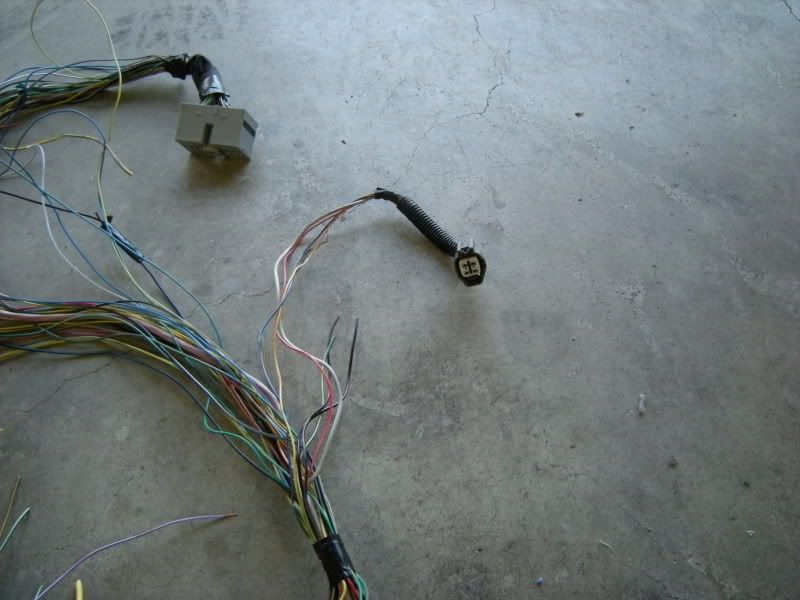
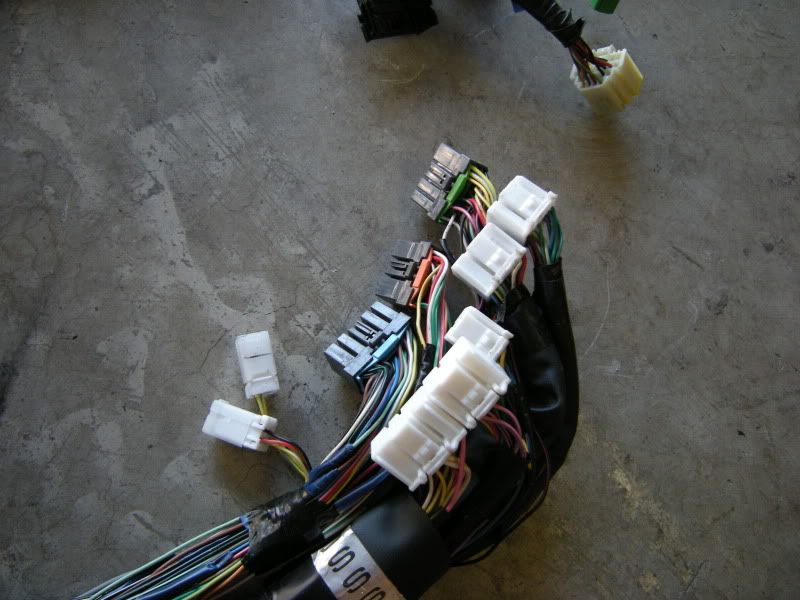
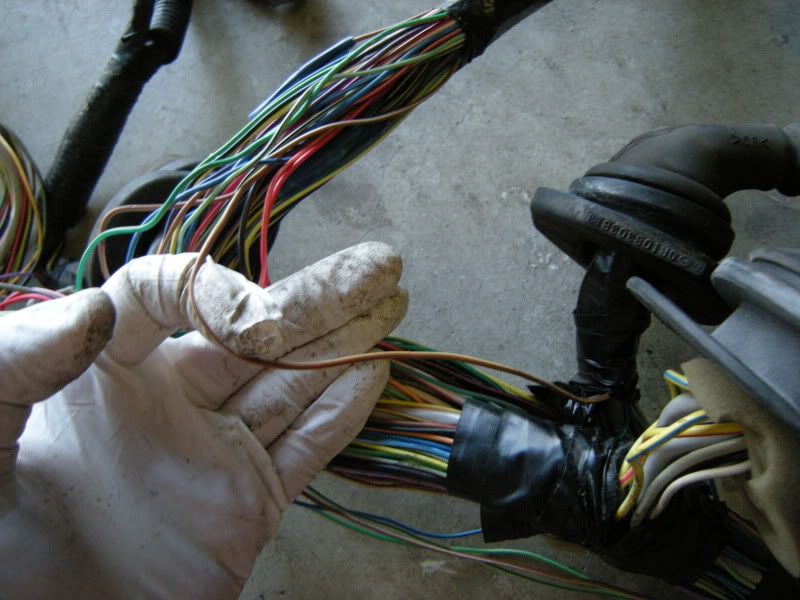
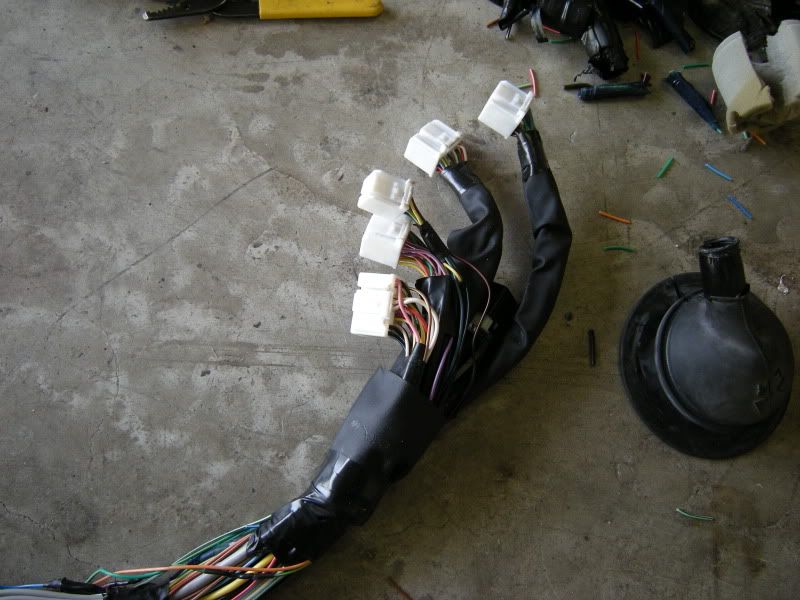
These plugs on the WRX engine harness are where the harness connects to the front harness and passes into the fender well. This is where I suggest people start as this will help you trace the path of the harness into the car and back to the ECU.
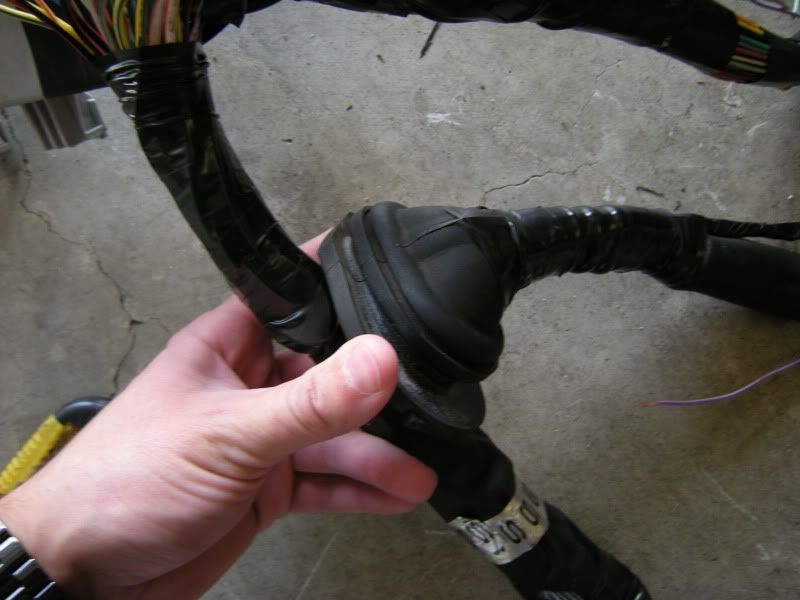
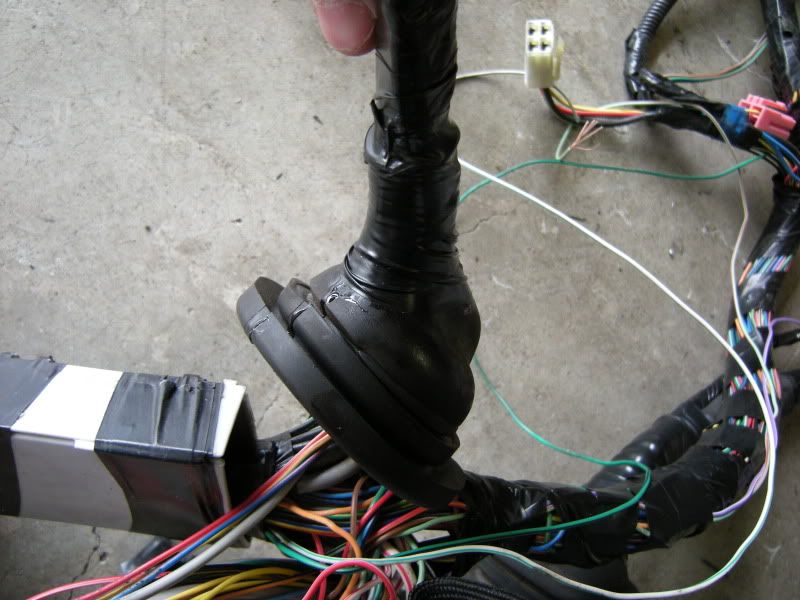
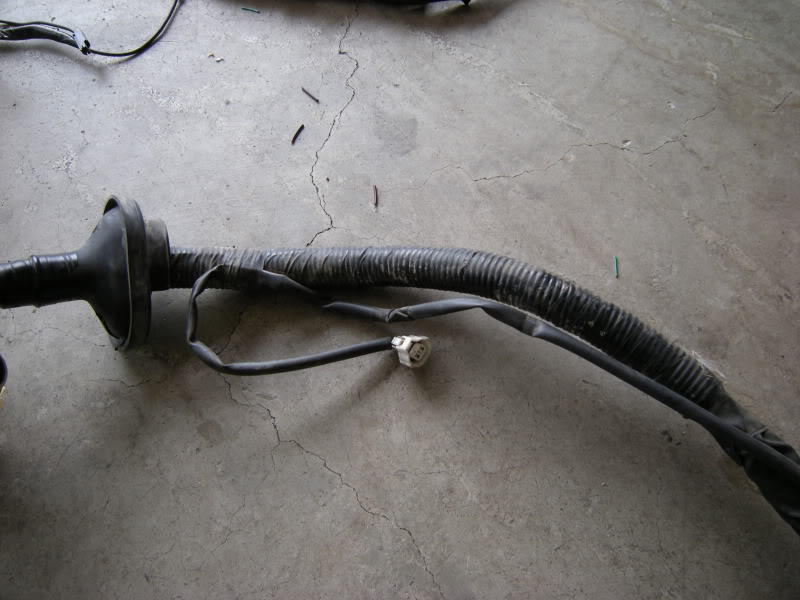
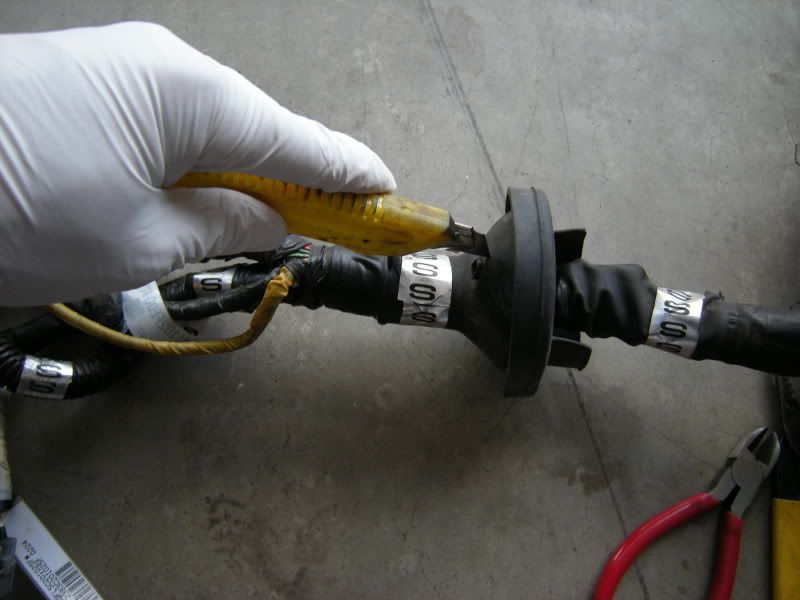
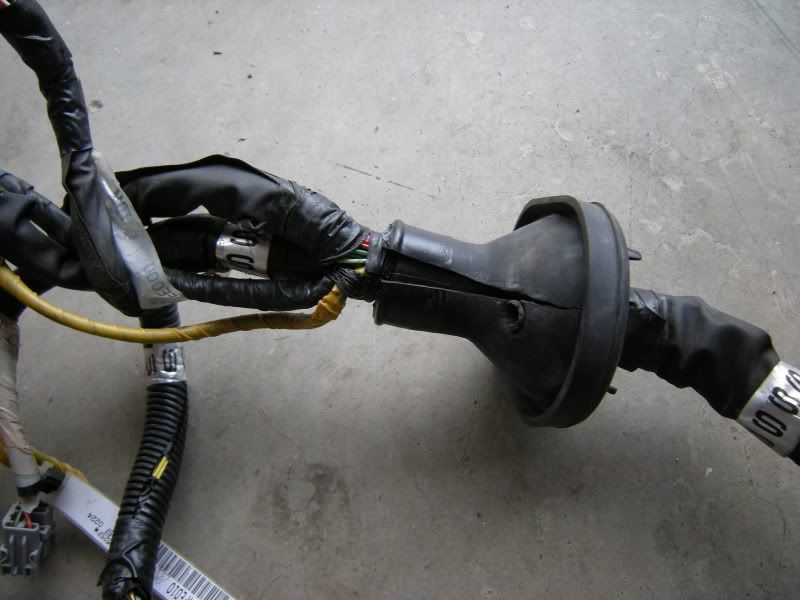
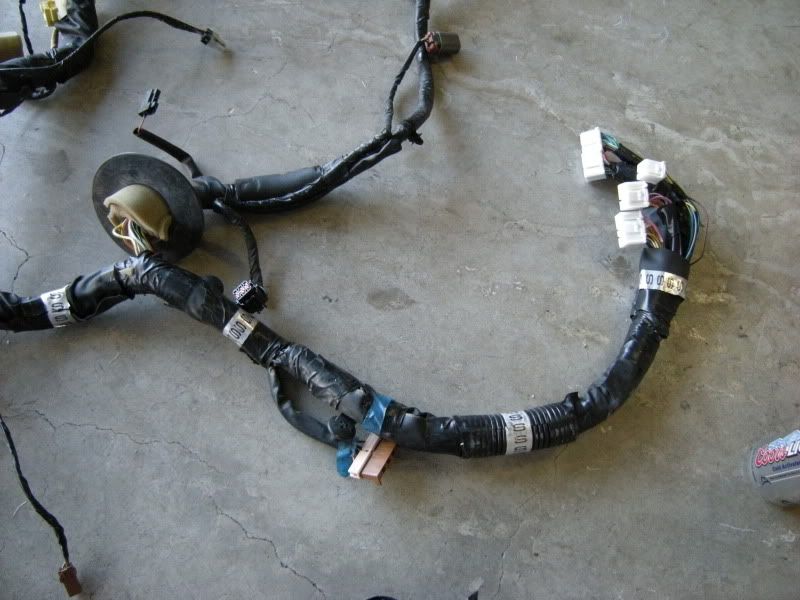
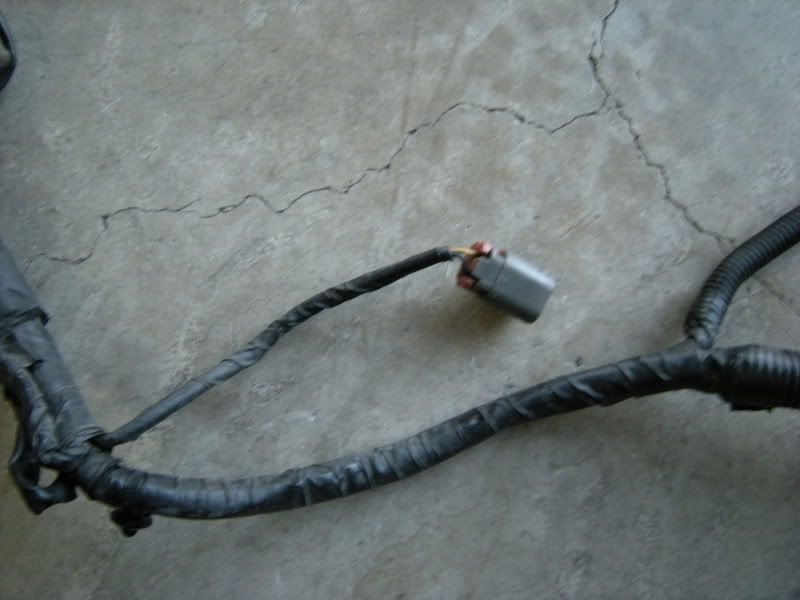
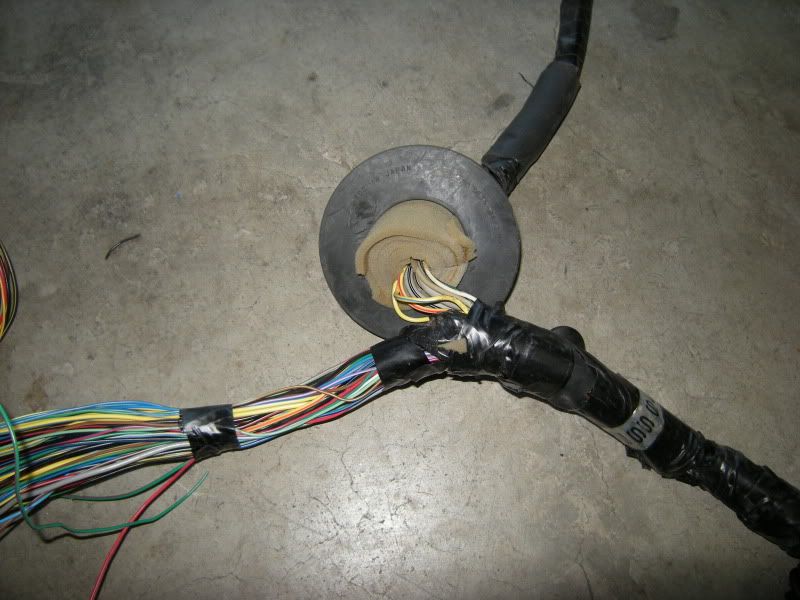
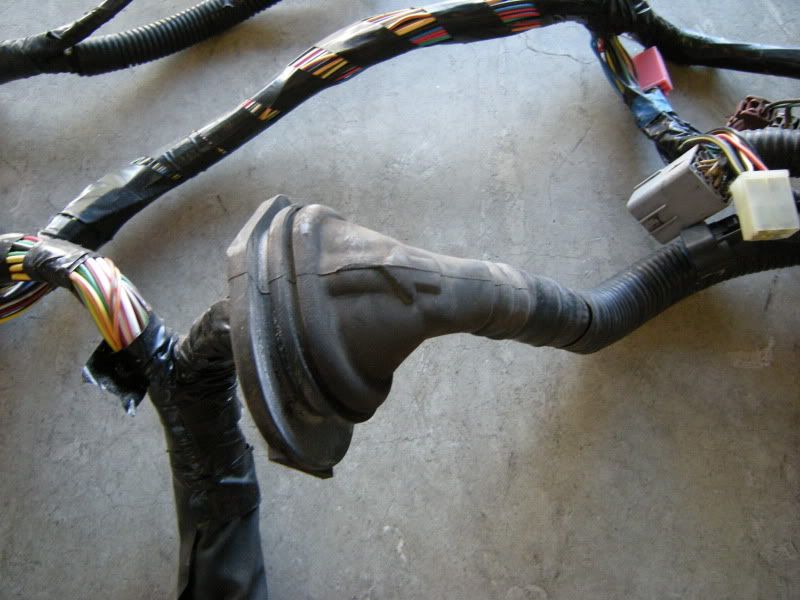
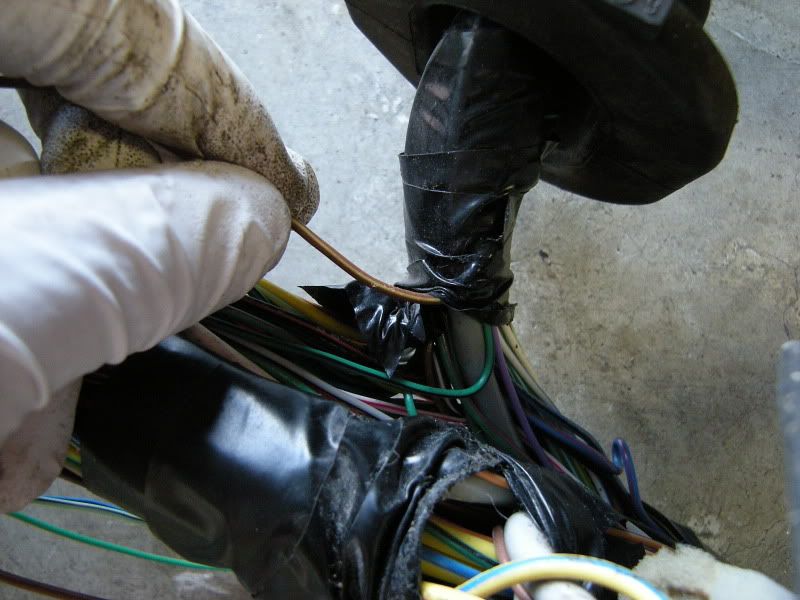
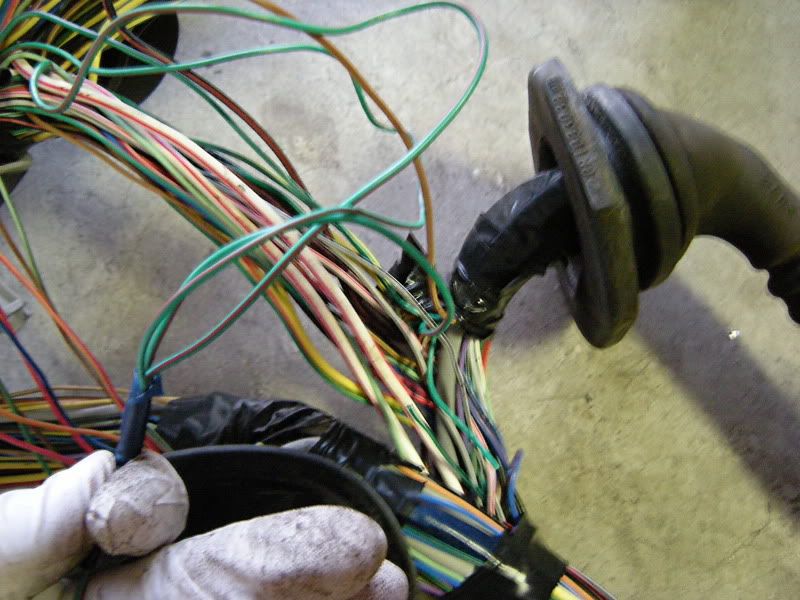
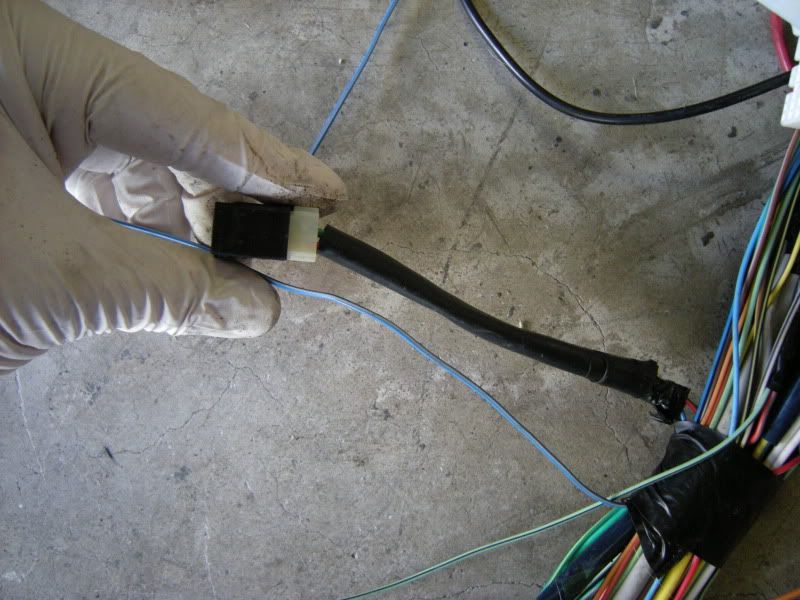
As you follow the harness into the car you will see this grommet. It is the point where the harness passes from the outside of the car to the inside of the car. This will become important in a bit.
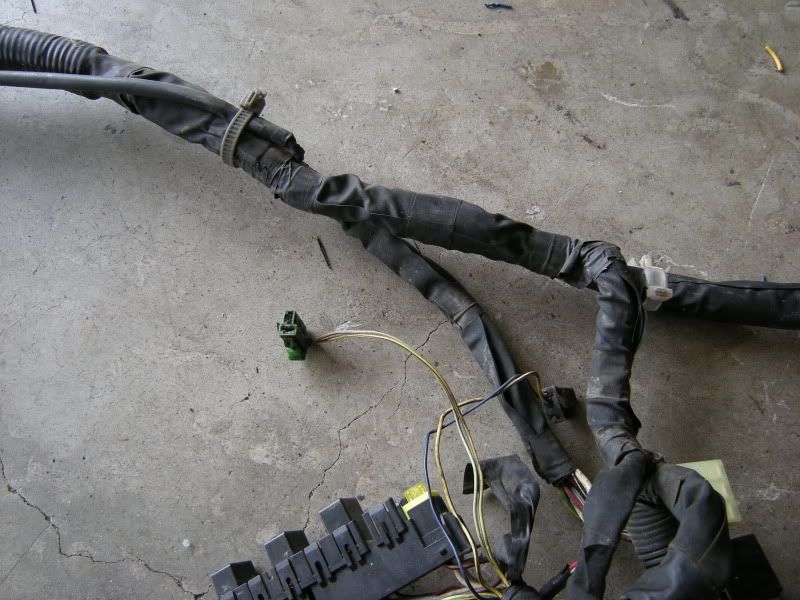
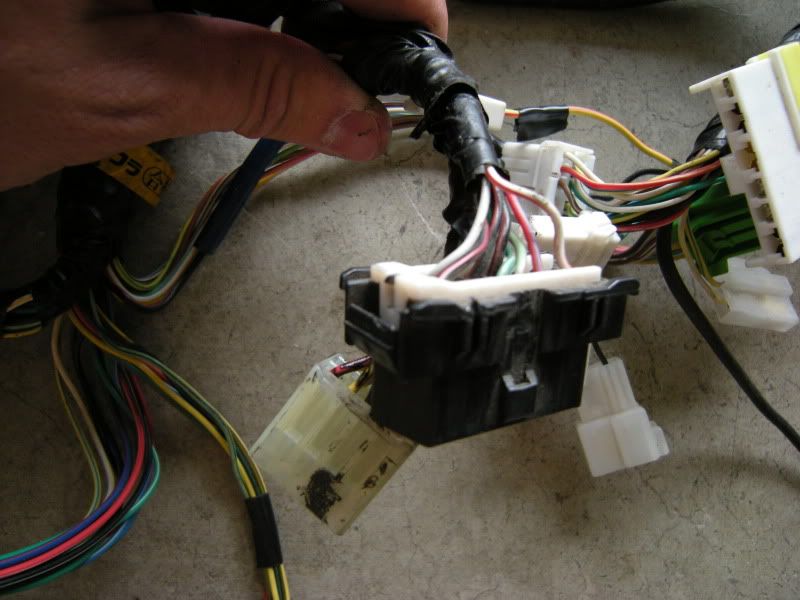
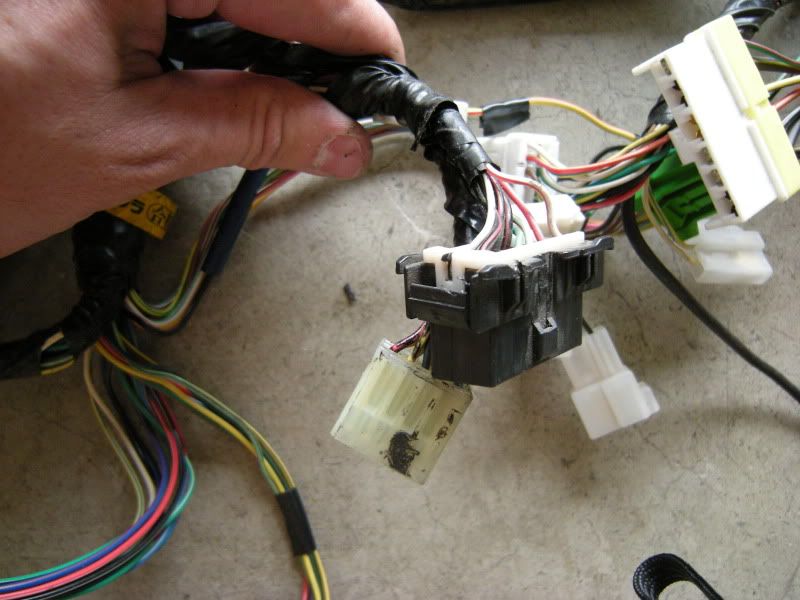
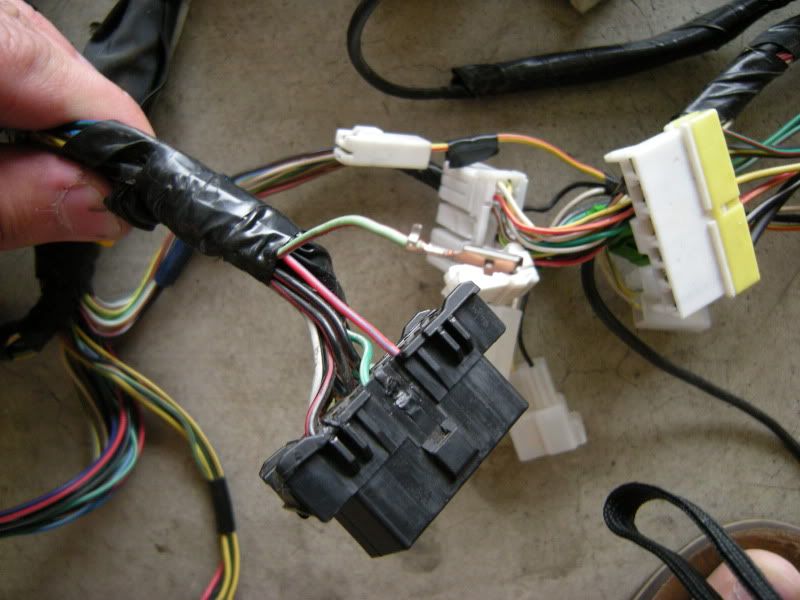
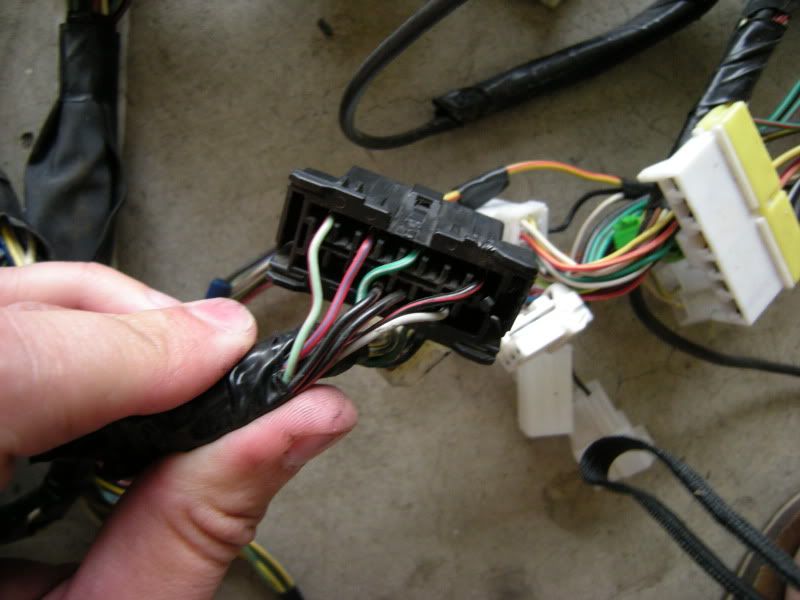
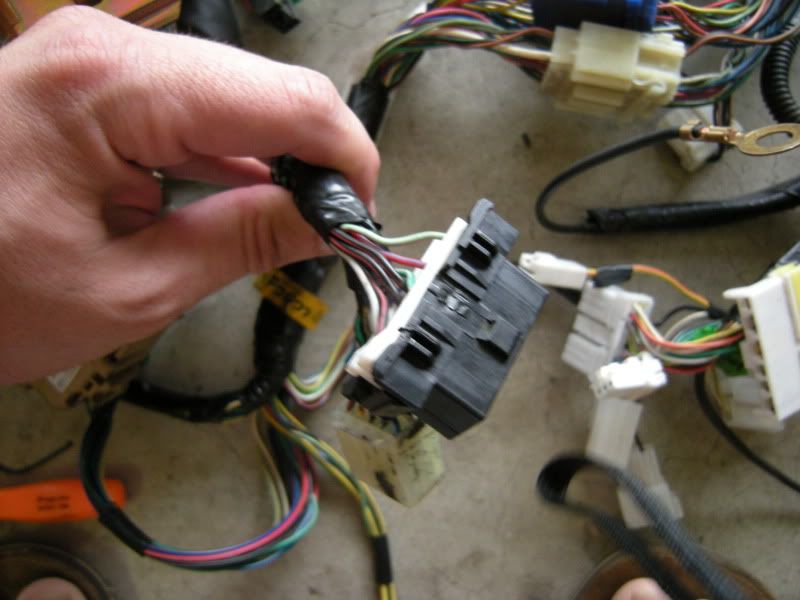
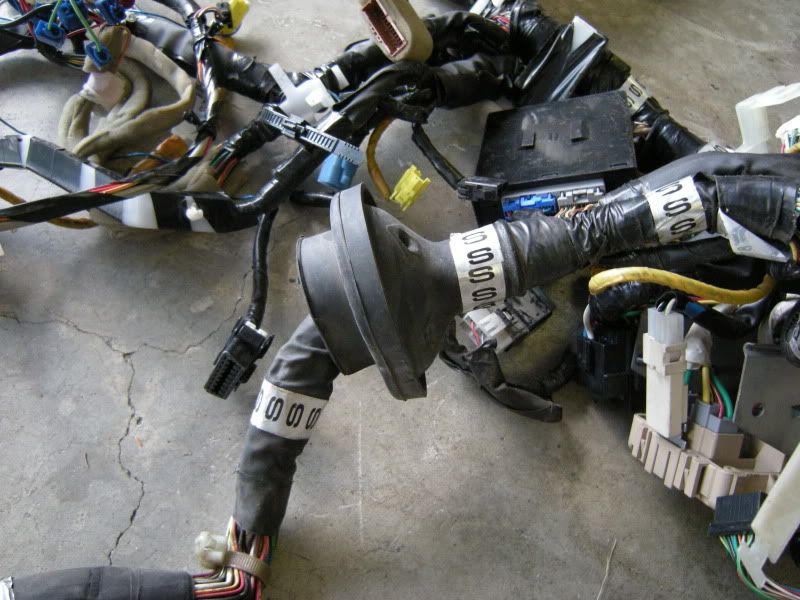
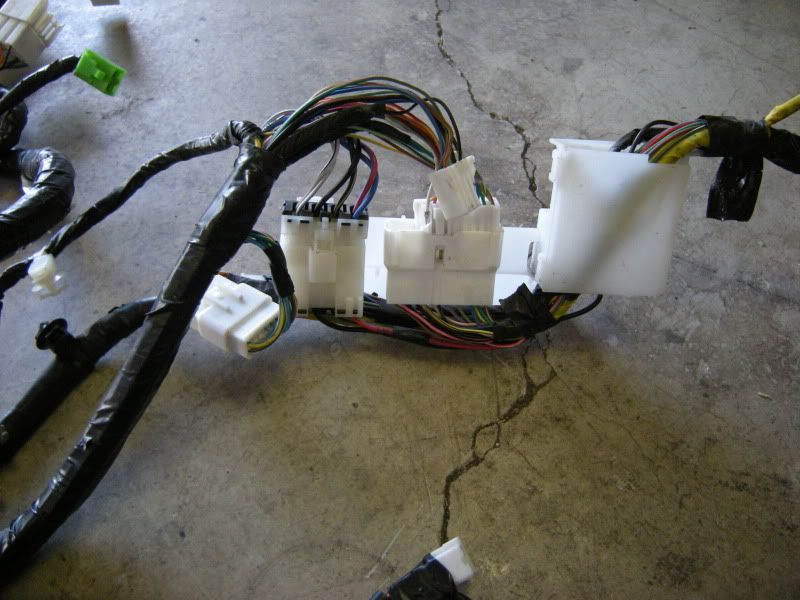
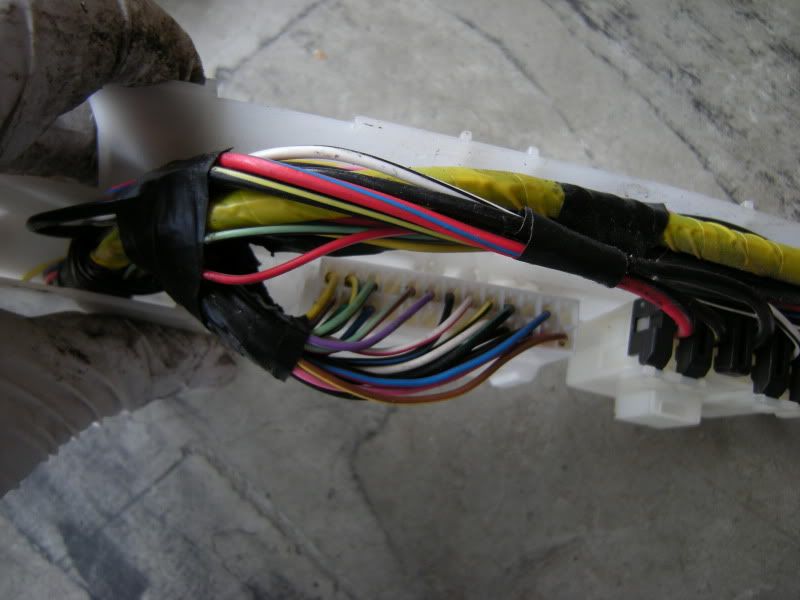
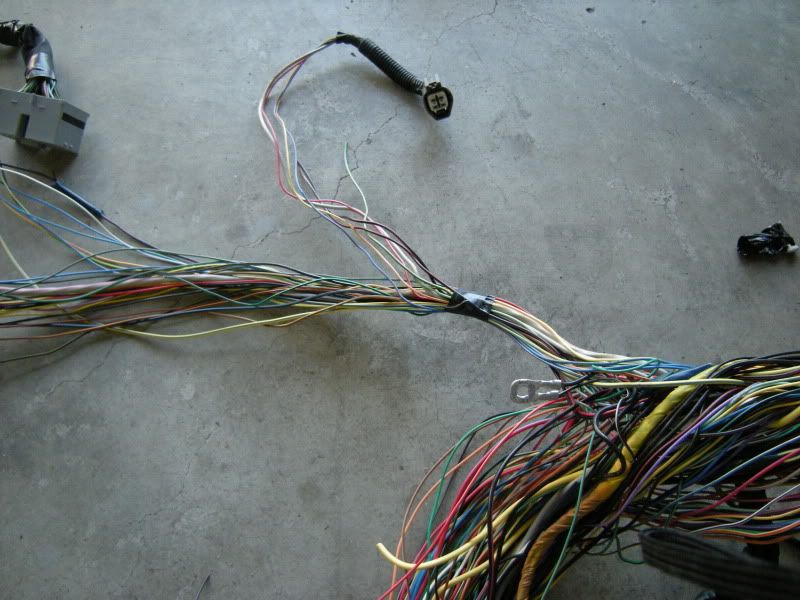
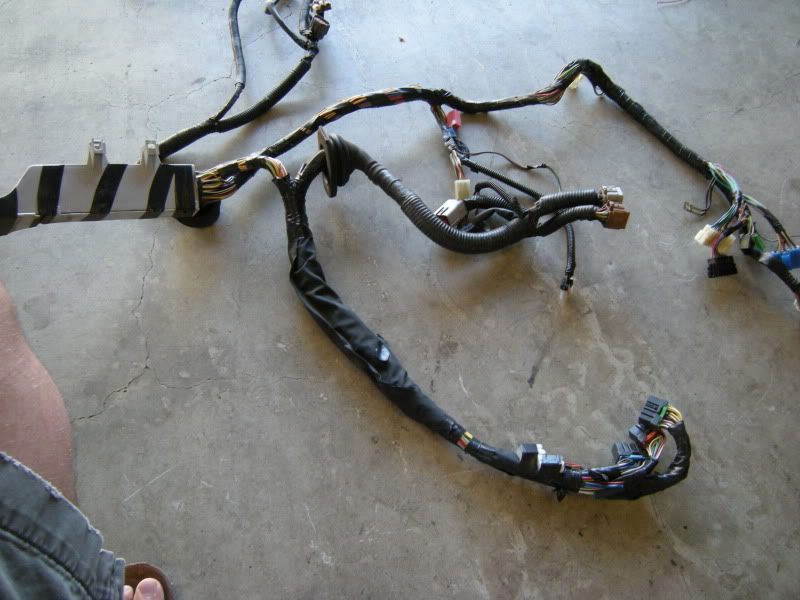
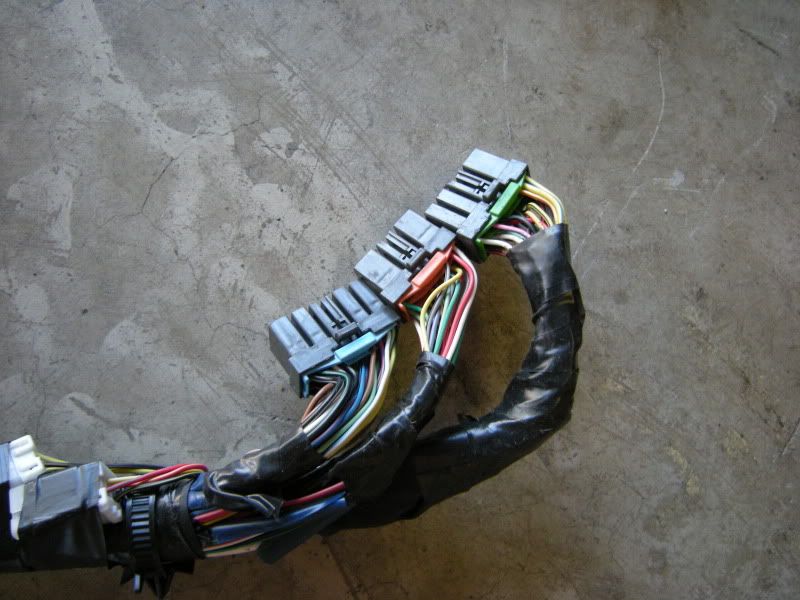
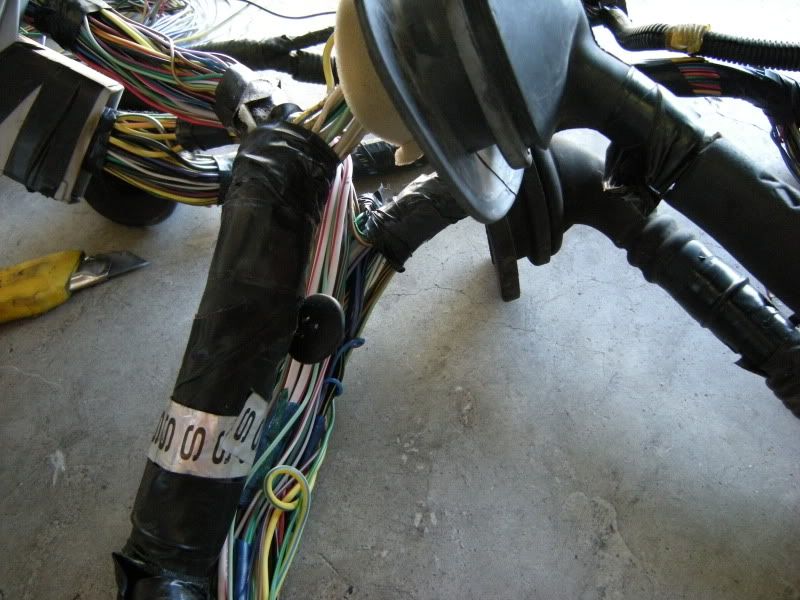
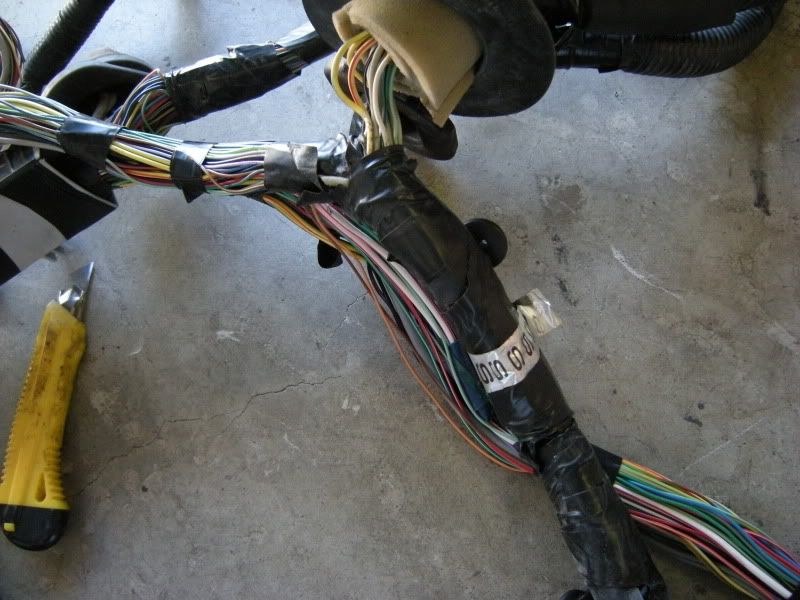
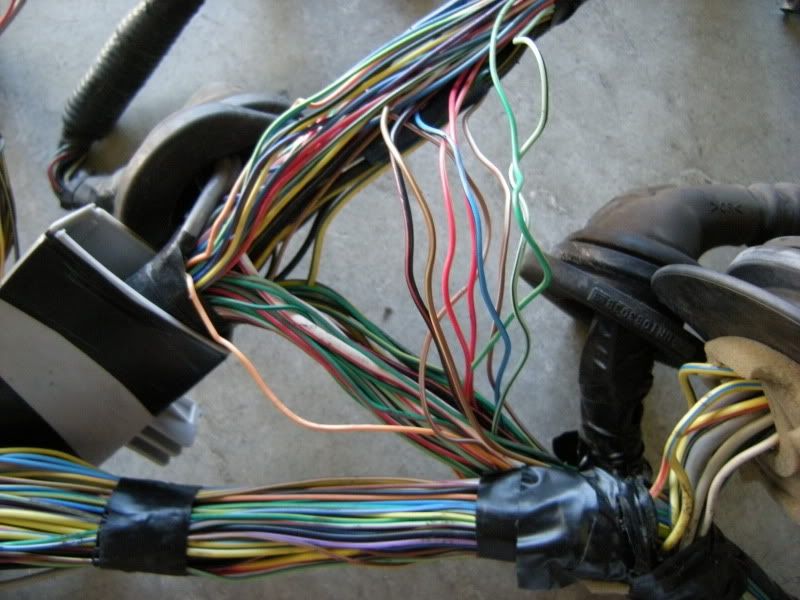
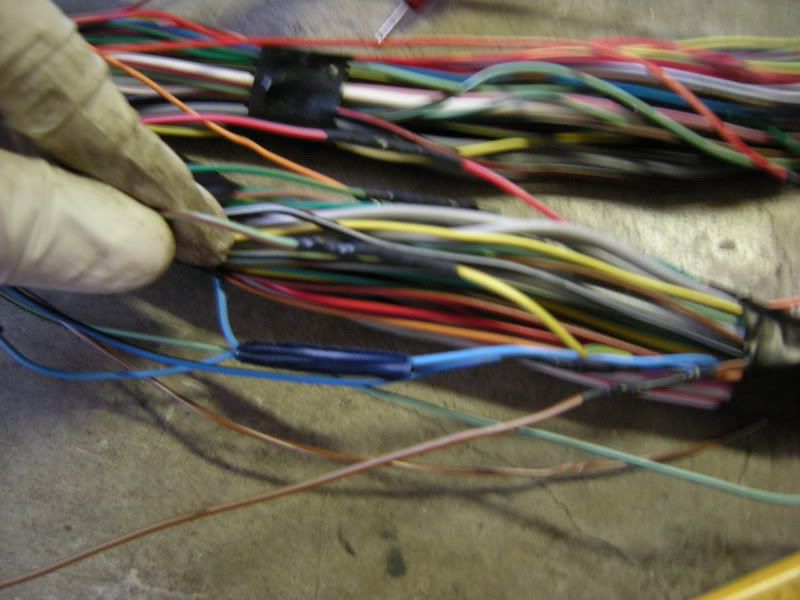
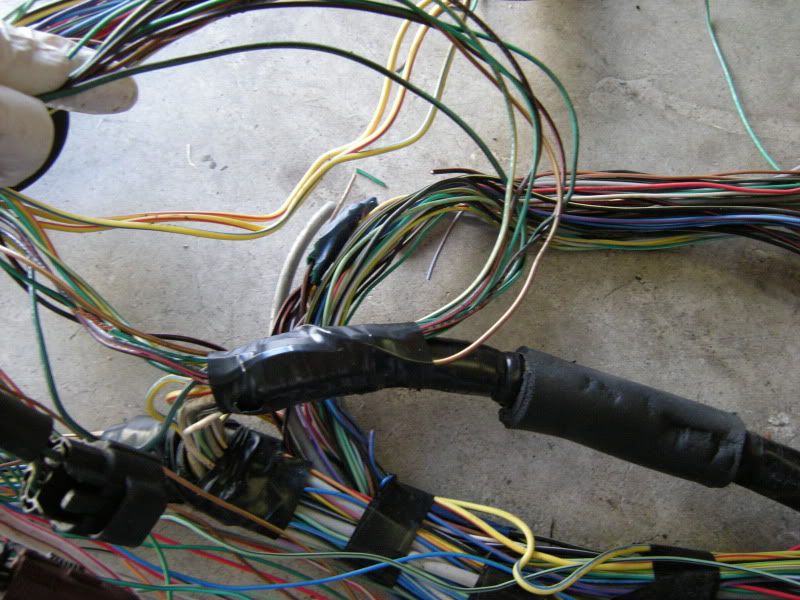
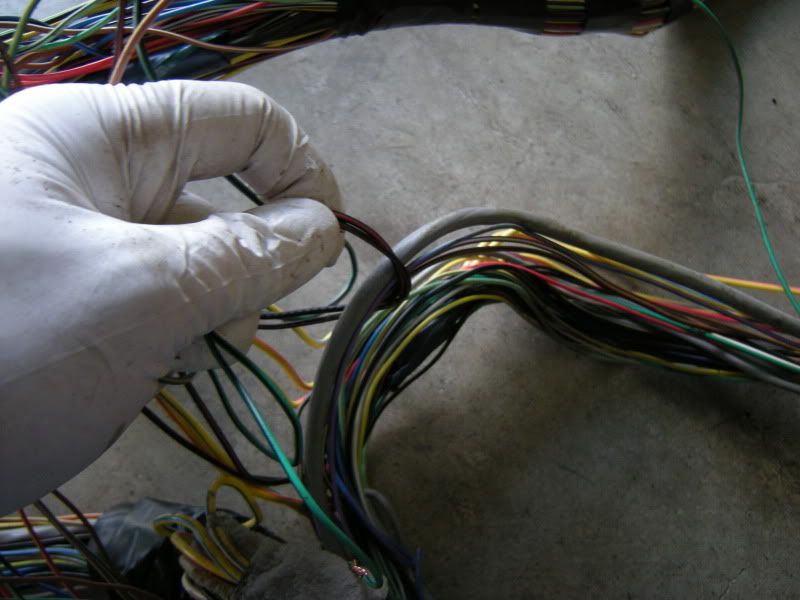
In the center of this bundle is the SMJ connection. It has a 10mm bolt that secures the connection together. Basically all the wiring that you need passes through this connector except one power wire which I will talk about later.
Same SMJ connector but from the side. This is basically where I start to pull the harness apart so it is important to locate it.
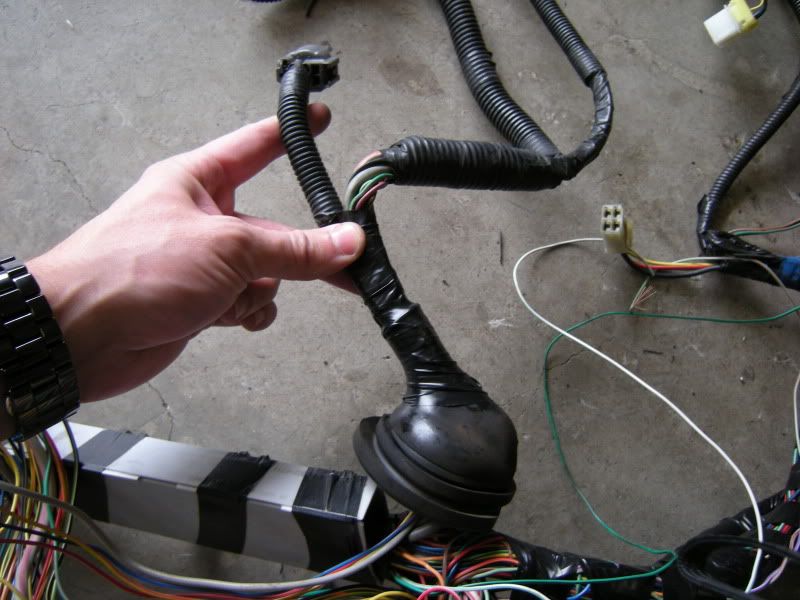
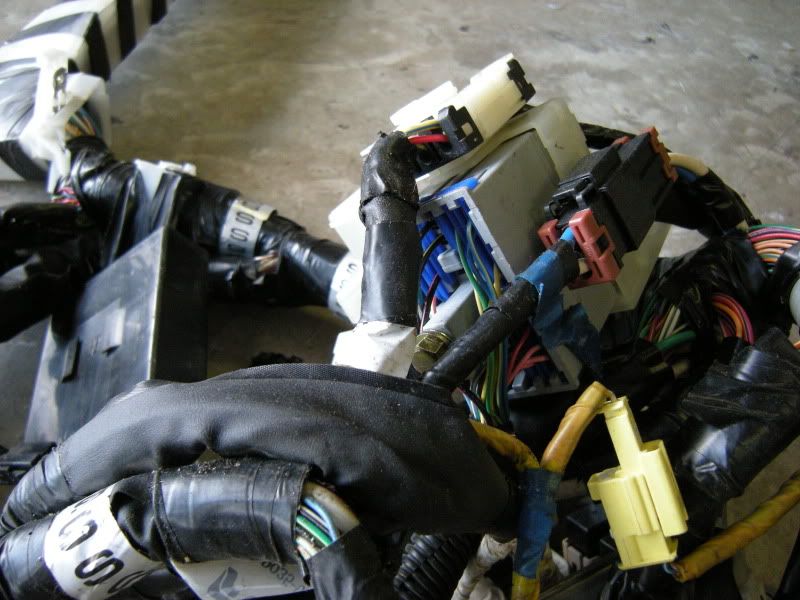
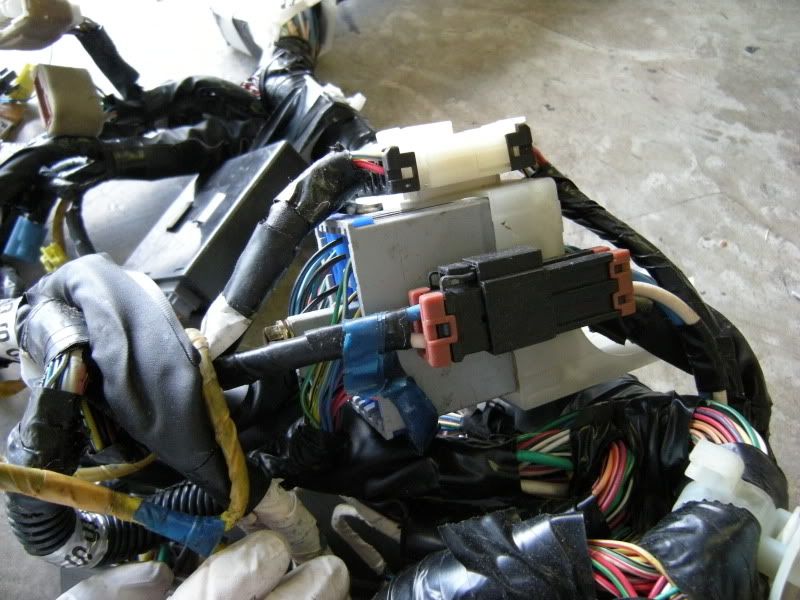
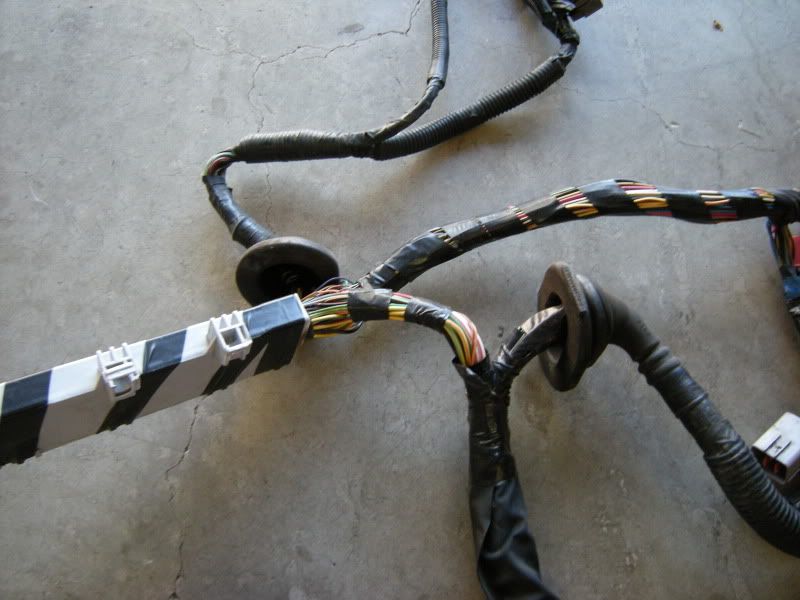
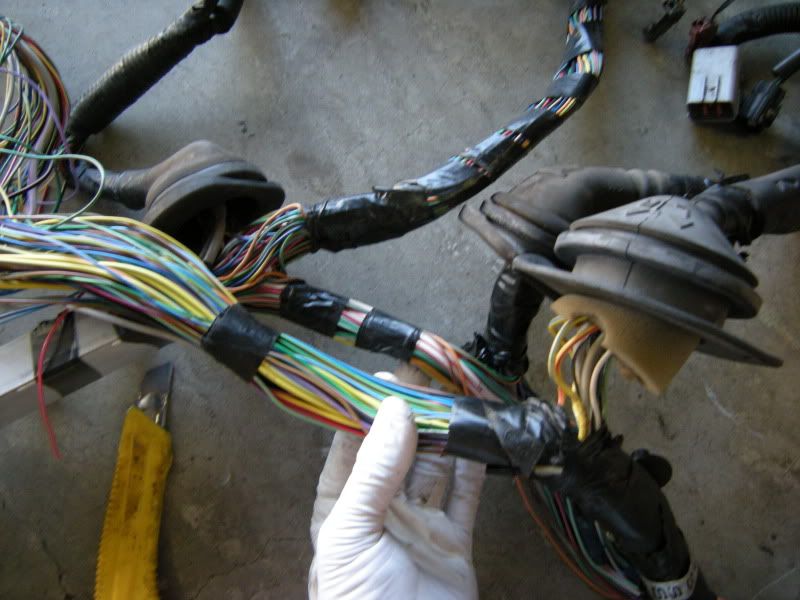
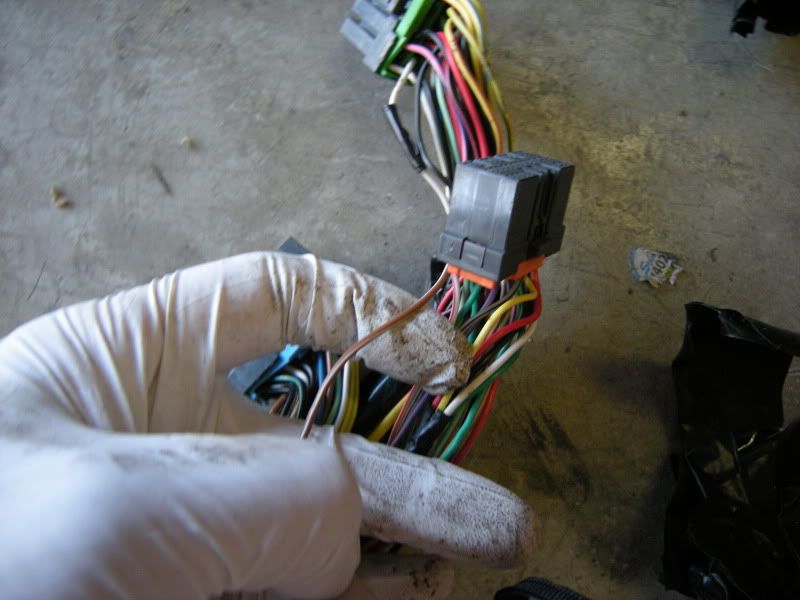
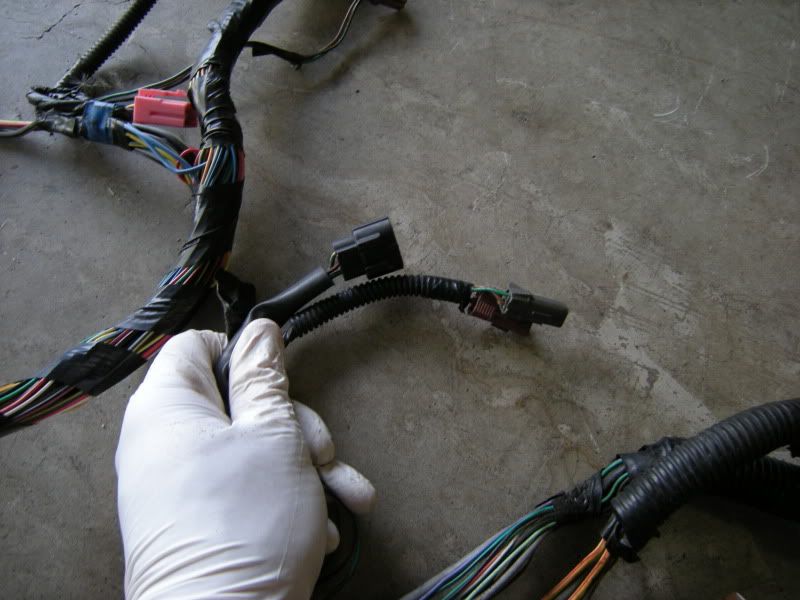
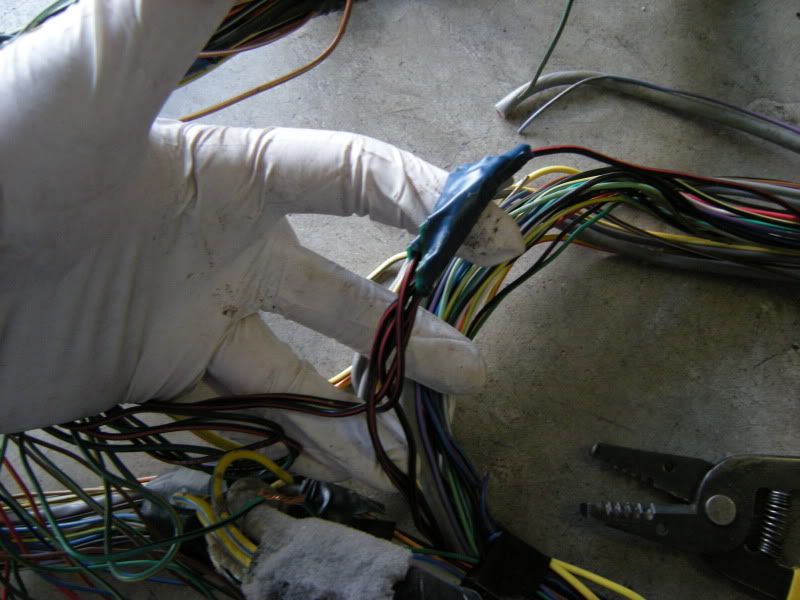
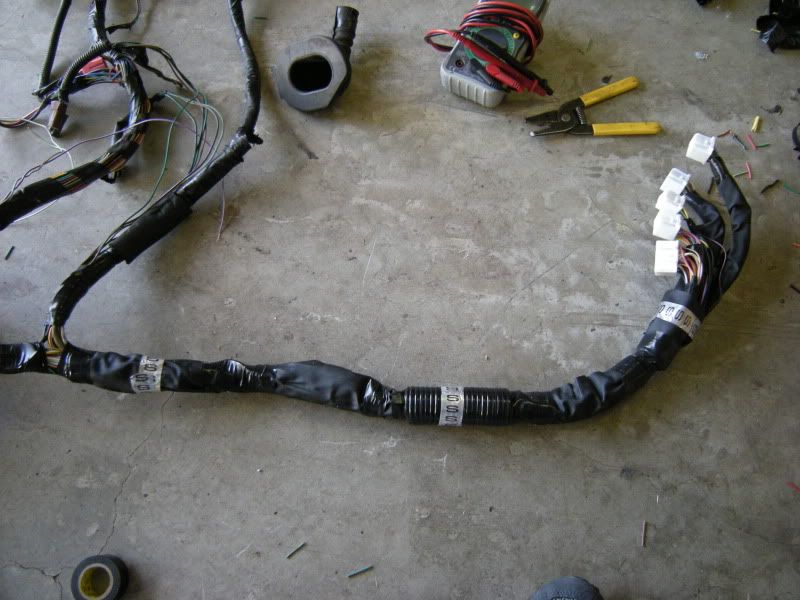
In the center of the bulkhead harness you will find this grommet. There are only a few wires that matter in it but this connection goes to the tranny for neutral switch, backup lights, and rear o2 sensor. Depending on what you are swapping, you may need all or just one of these plugs. This will be discussed when we start cutting.
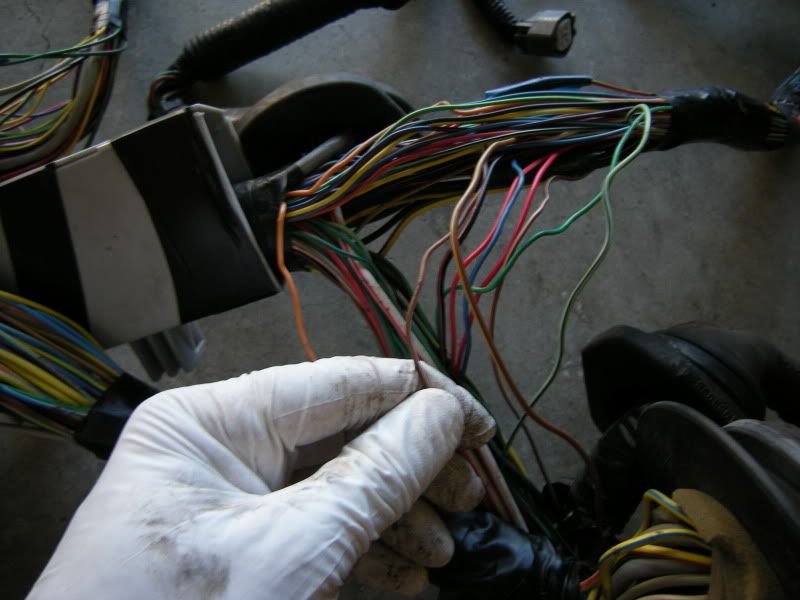
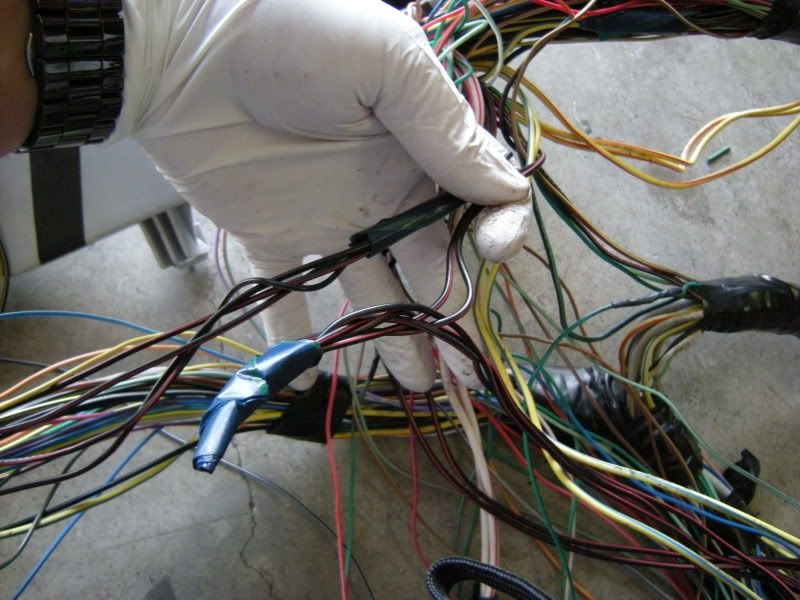
The last grommet is pictured left, then a second engine grommet center, then ecu right. The center grommet you will need all of the wiring from but the grommet itself is garbage.
The center grommet plugs into your MAF, Boost control soleniod, EGT, Front o2, and the passenger side of the engine. All very important stuff for a fully functioning engine.
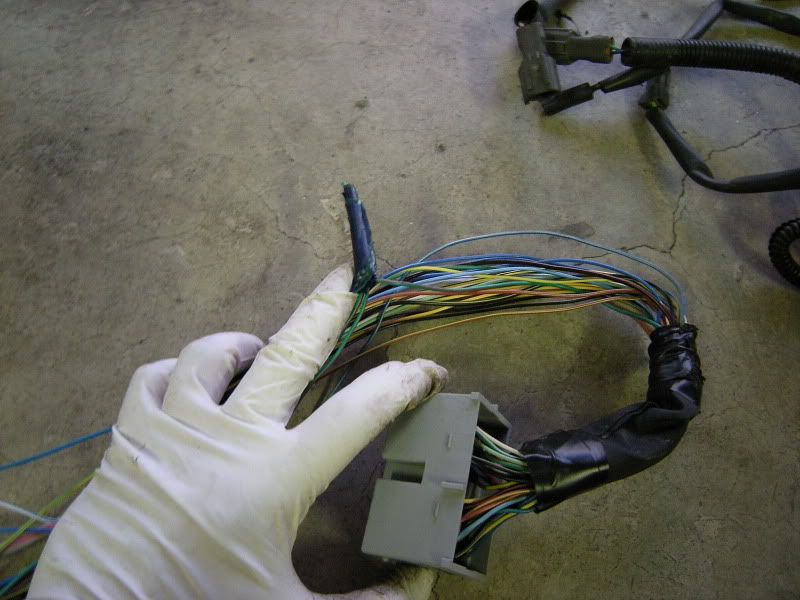
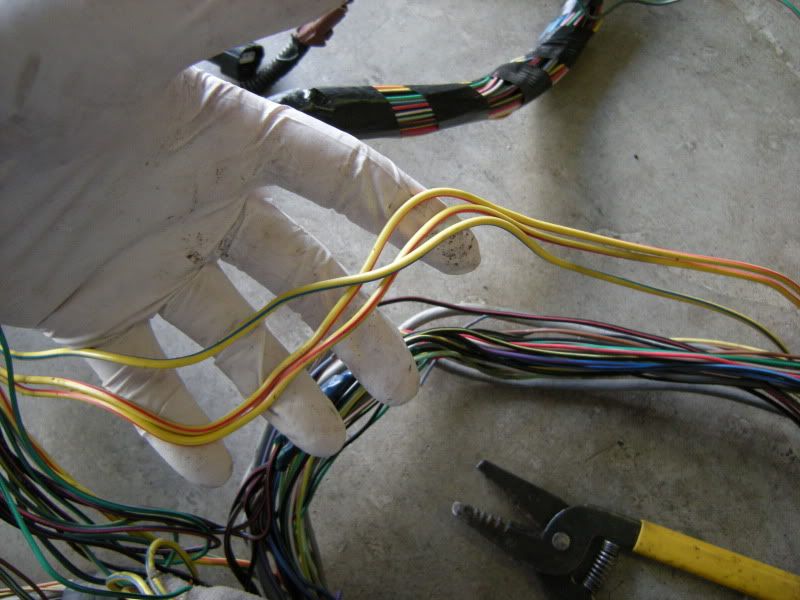
This is the connection at the passengers side where the front seat sits. It is the connection for the bulkhead harness to the rear harness. You need only two wires out of it for the FPC (fuel pump controller).
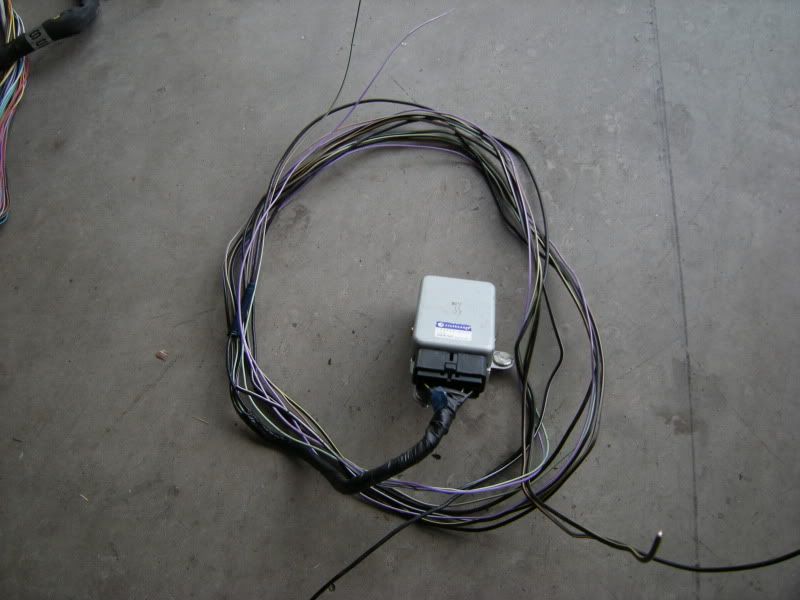
FPC which is located in the trunk of a WRX. I generally mount them in the factory location as subaru intended. Although I’ve seen them mounted all over on swapped cars.
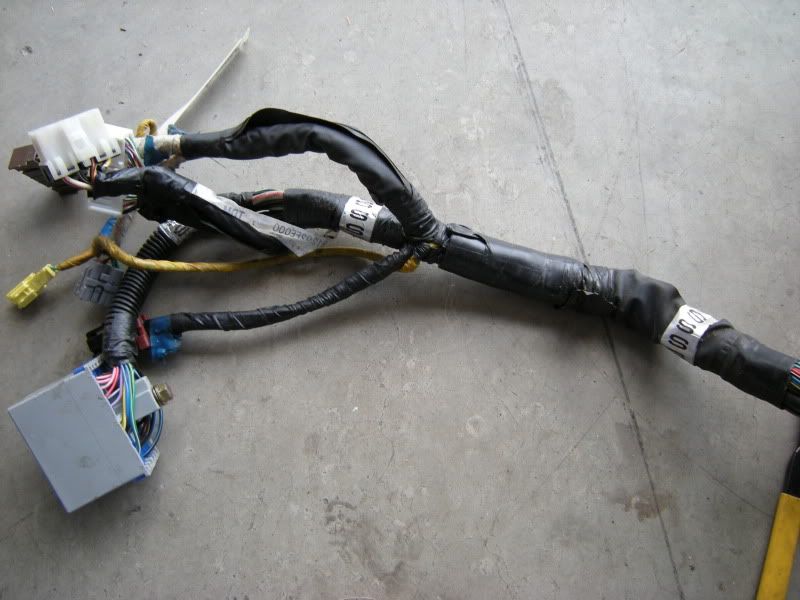
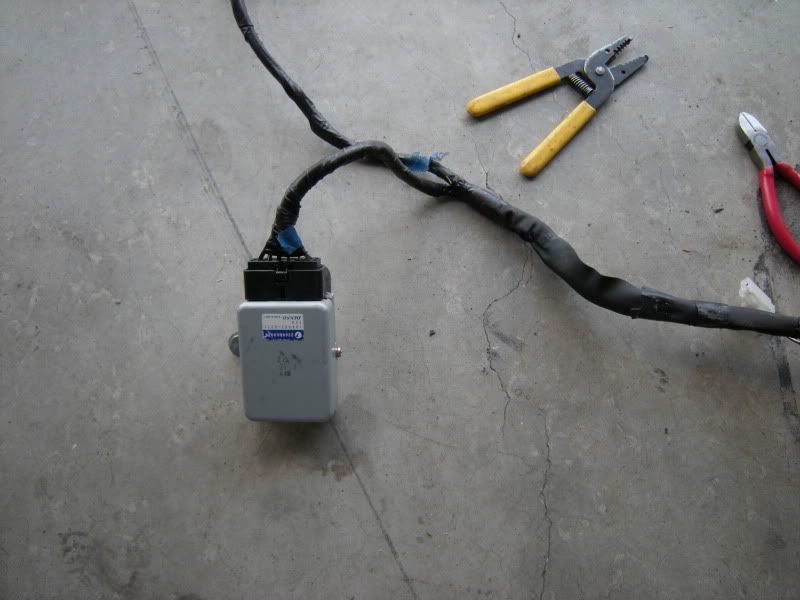
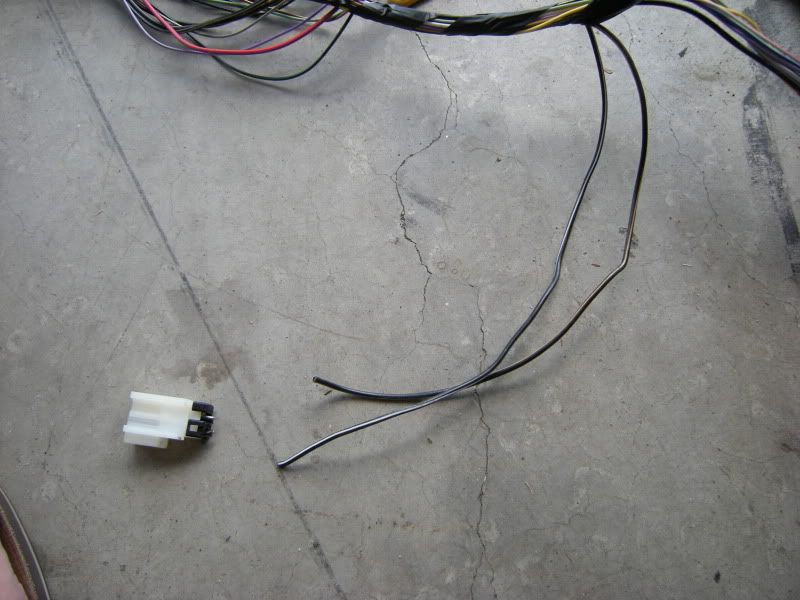
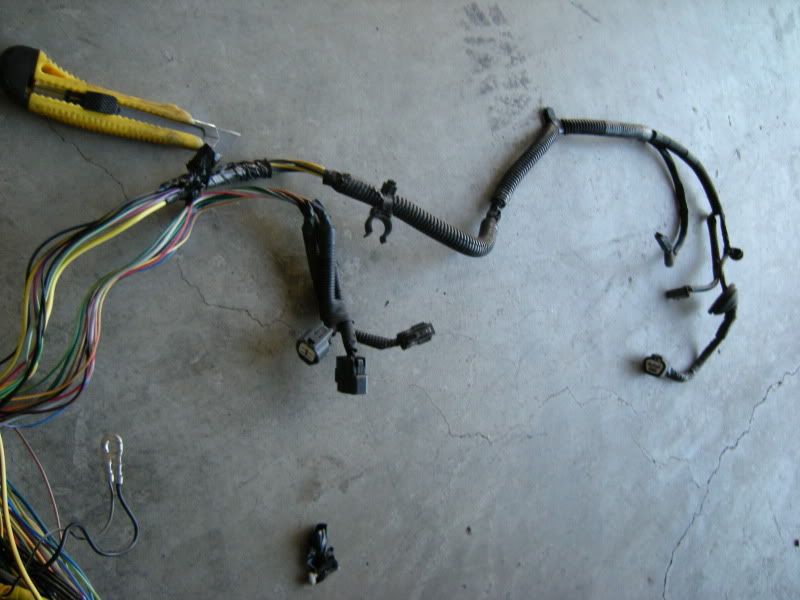
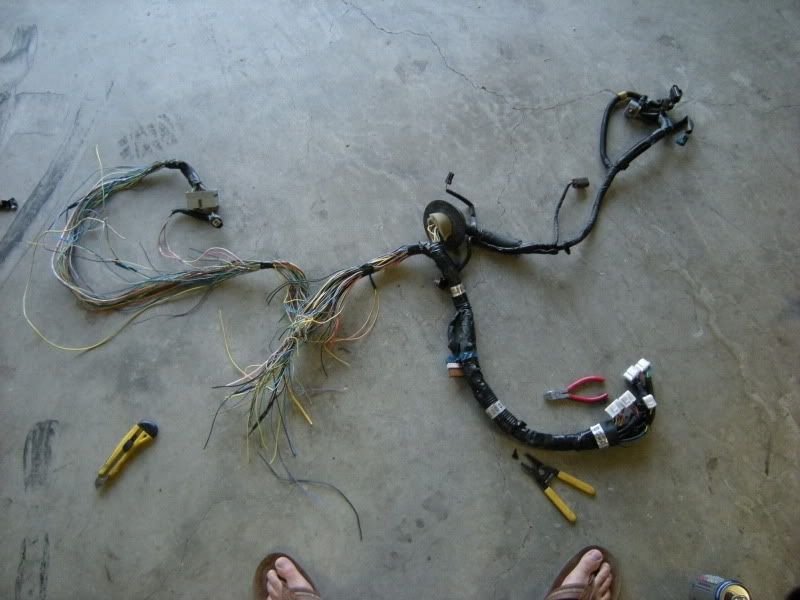
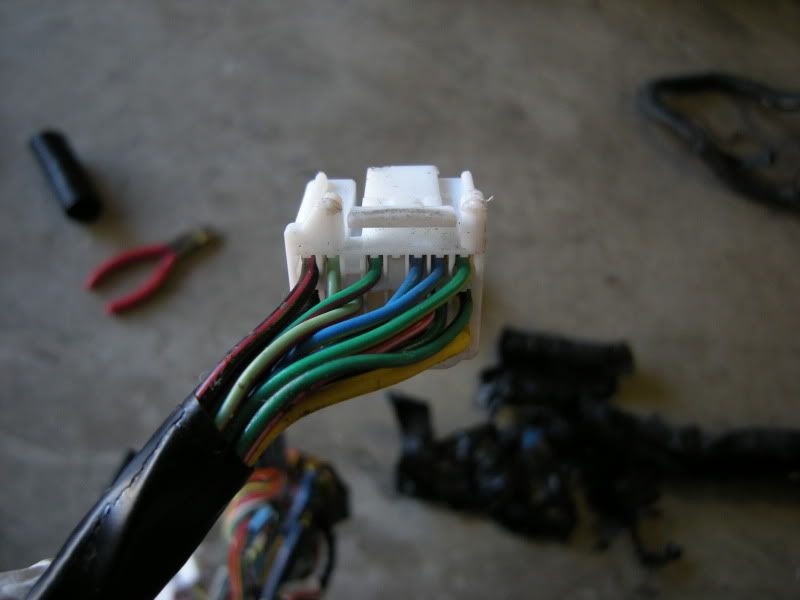
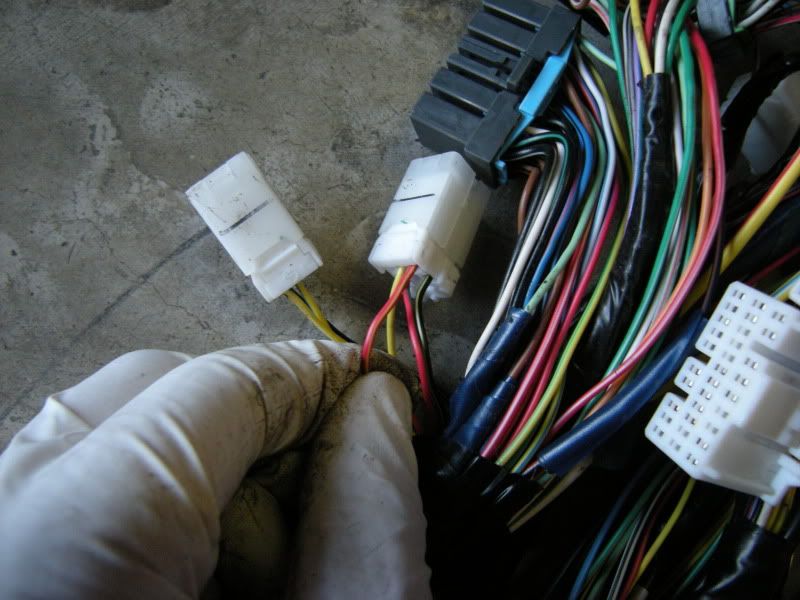
Now, that you know that parts we need we can start the fun part, cutting. I suggest starting with the front harness. Notice the two plugs right and the SMJ left. Those are the only two connections that matter out of the entire front harness.
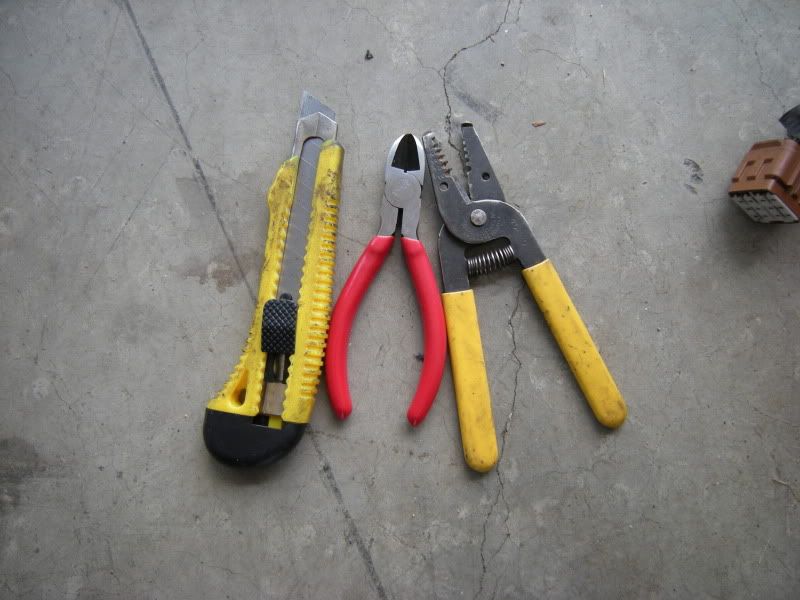
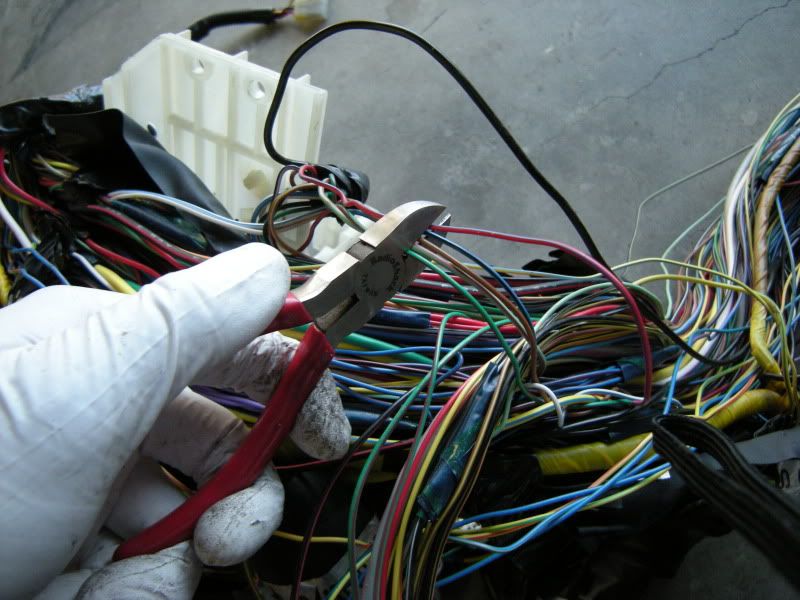
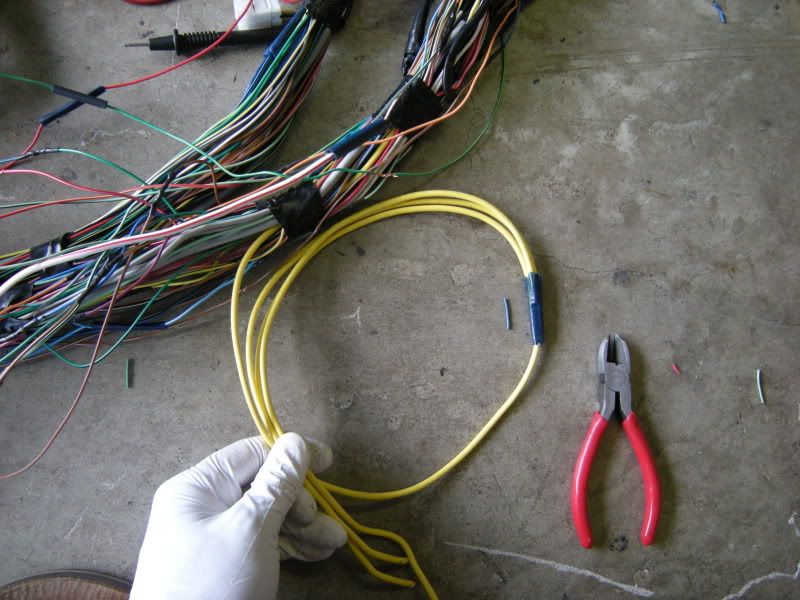
I use a cheap set of tools for this activity. These work great and are easy to source almost anywhere.
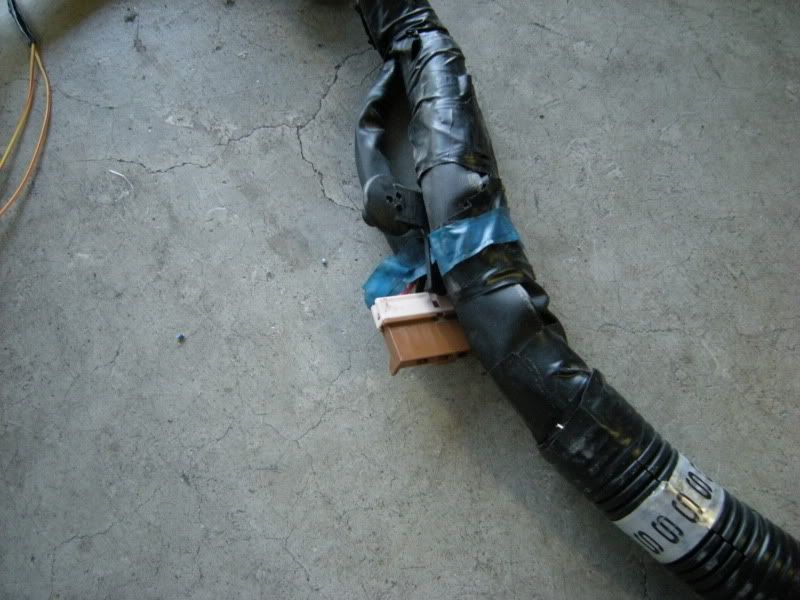
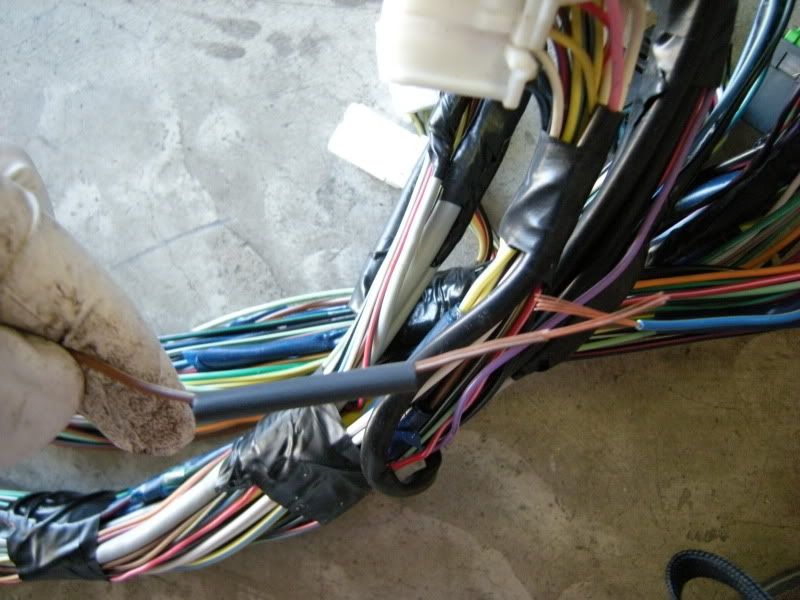
The large grommet by the SMJ connector needs to come off. I generally use all RS grommets later but this specific grommet is the same as the RS. You can cut it off and discard it or keep it for latter.
Razor blade easily cuts through the grommet. I always cut the bottom and most of the time I only cut them 90% of the way and then squeeze the plugs through. Then when I reuse them later I can easily epoxy them together and tape them to make sure they are 100% water proof and look factory.
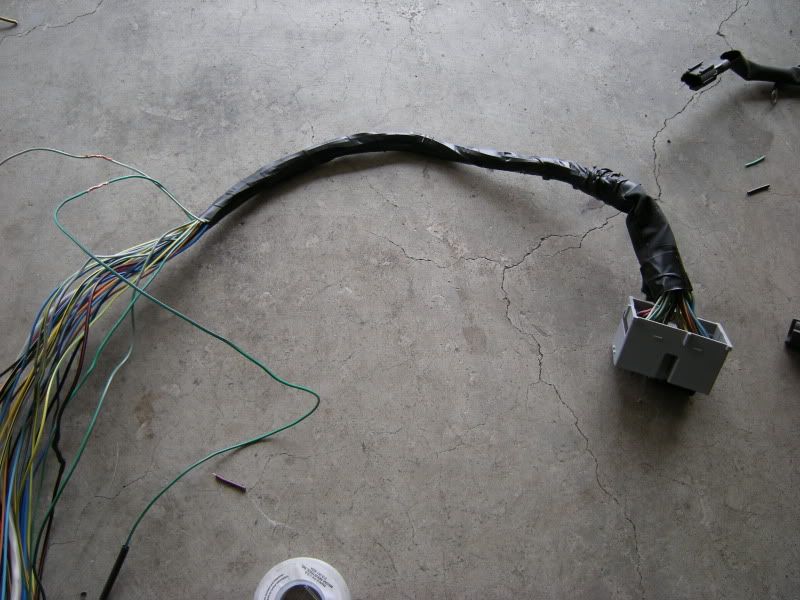
Now that that is off you can start to cut off the tape.
I start at the SMJ and work toward the engine plugs but at this point it really doesn’t matter. A razor blade makes short work of this. If you are trying to unwind the tape you are wasting your time. Nothing is reused so don’t worry about it.
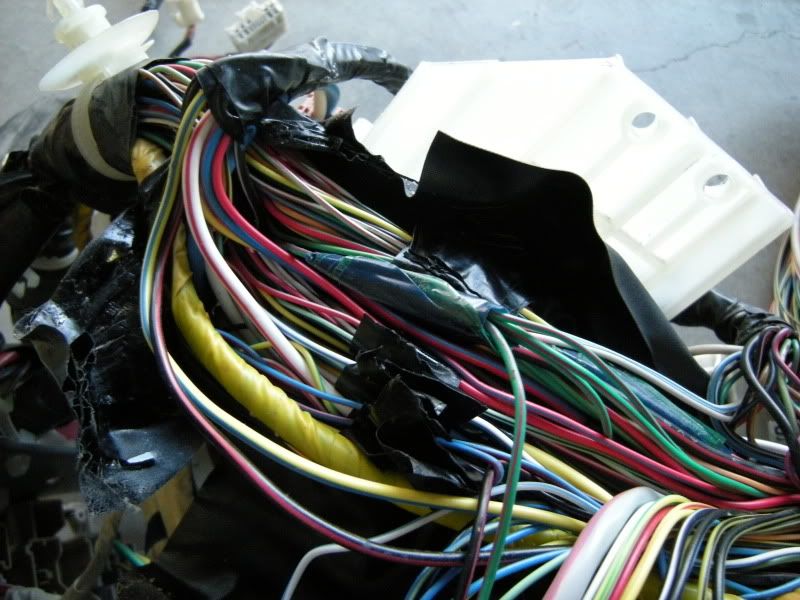
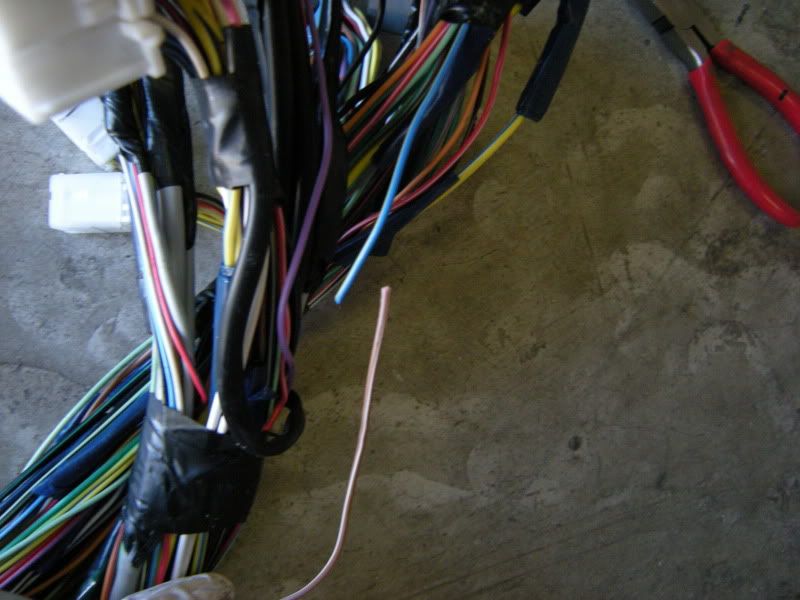
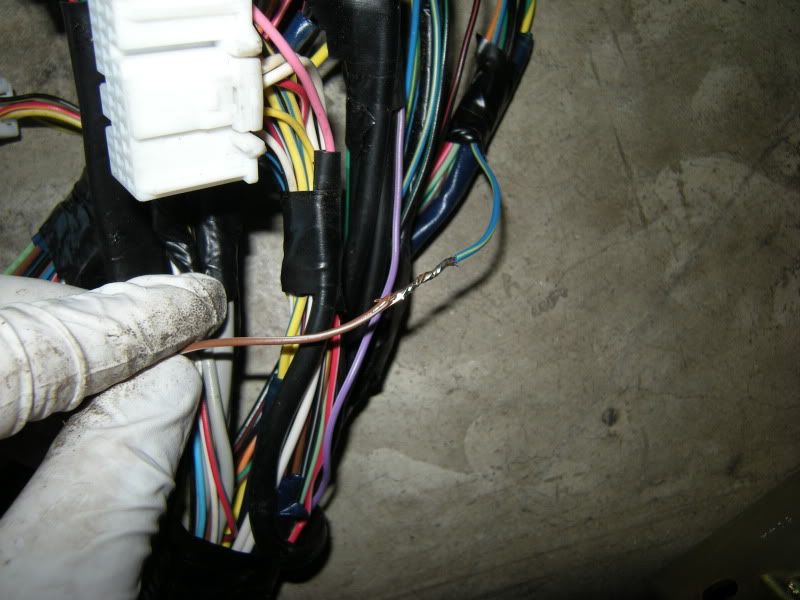
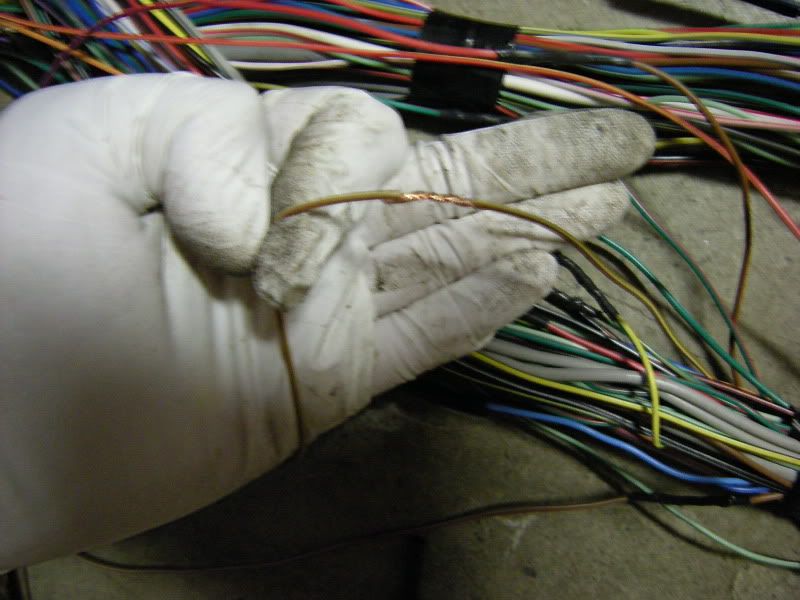
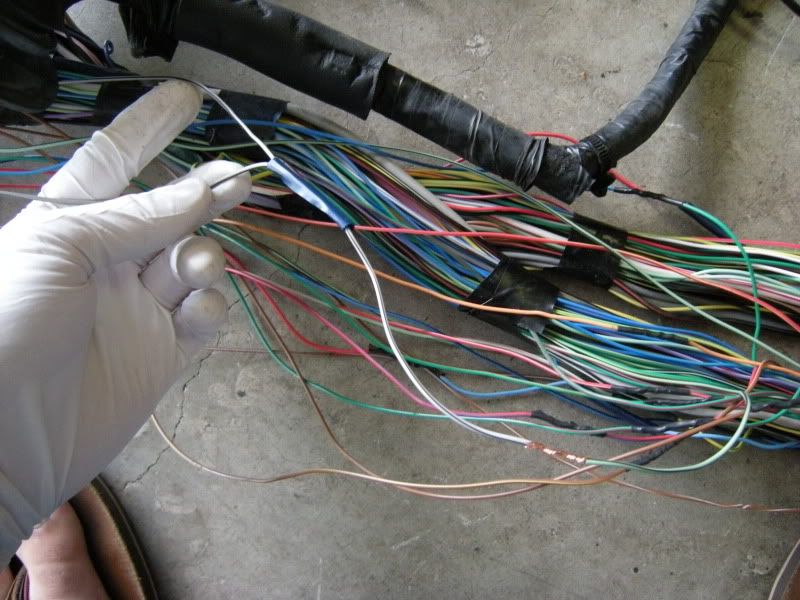
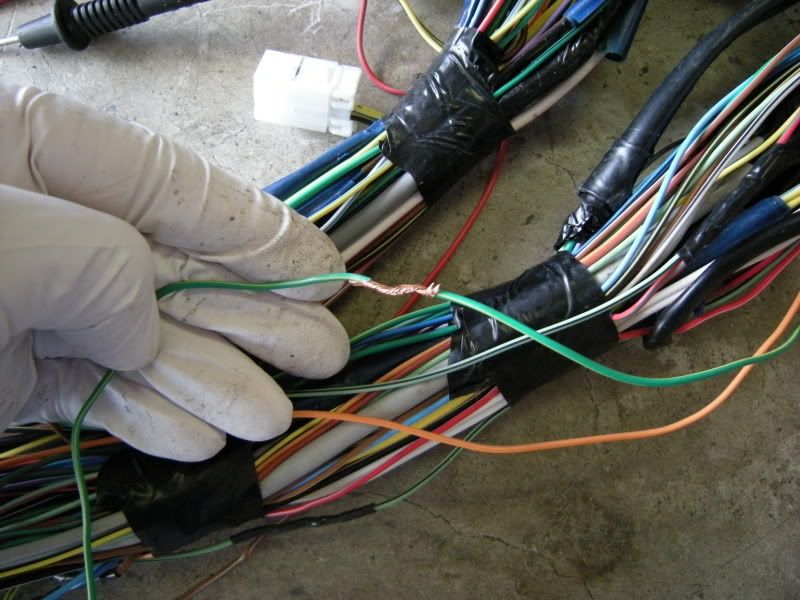
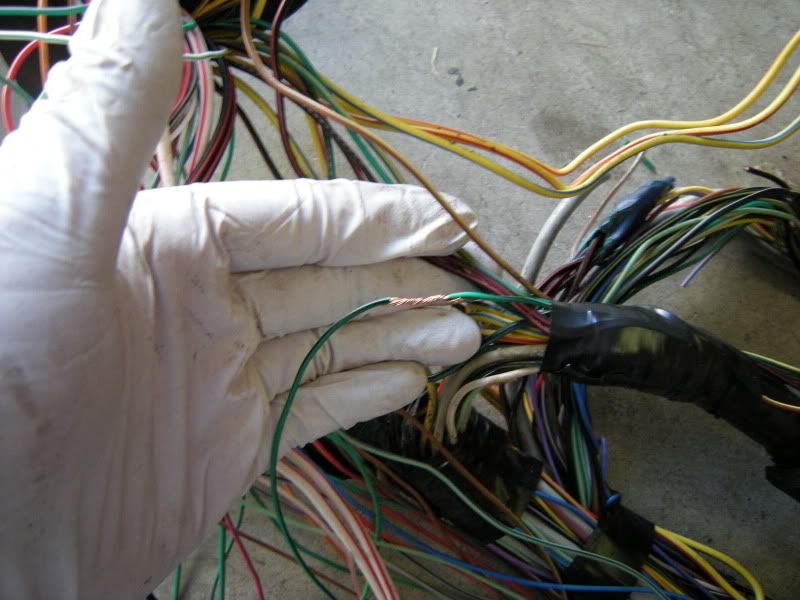
At this point you really start to realize how much you are throwing away. Notice that everything is self contained except the one wire leading off. That is the 12 volt power for the injectors/Ignitors.
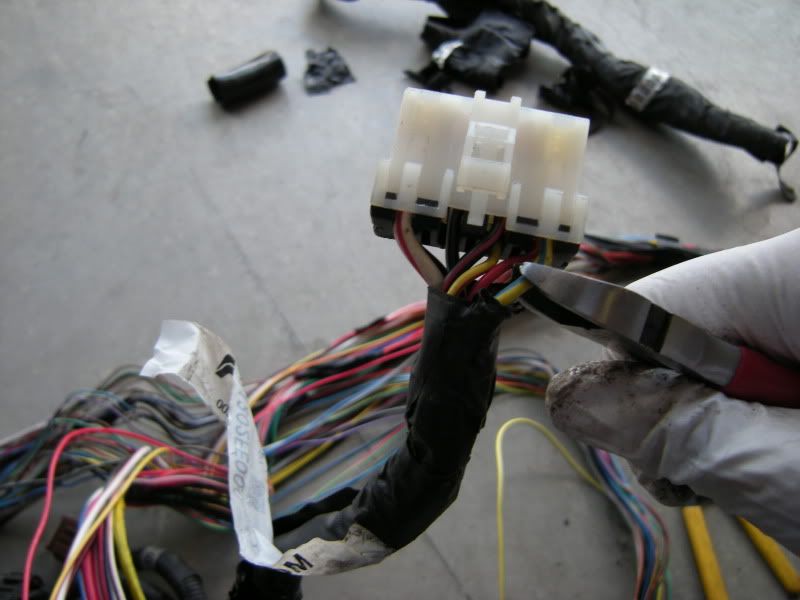
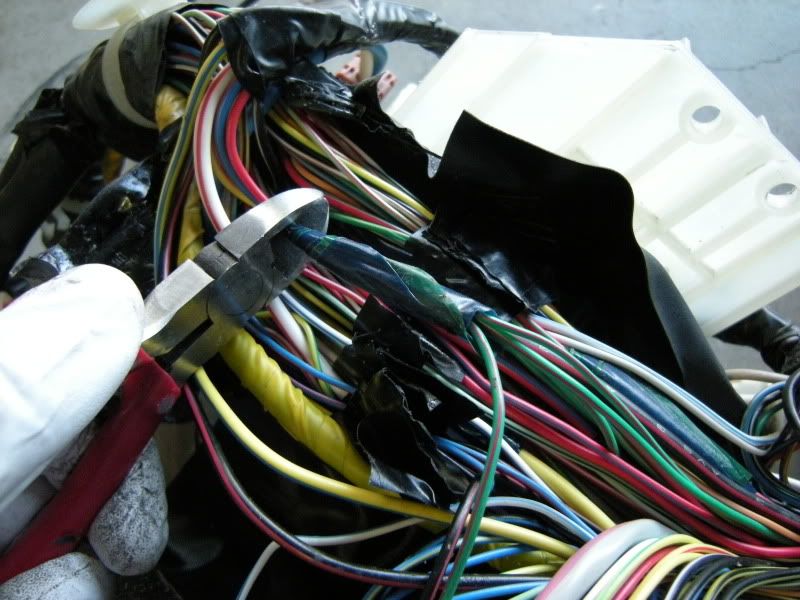
That same wire can just be cut off the plug because there is nothing else on that plug that is needed.
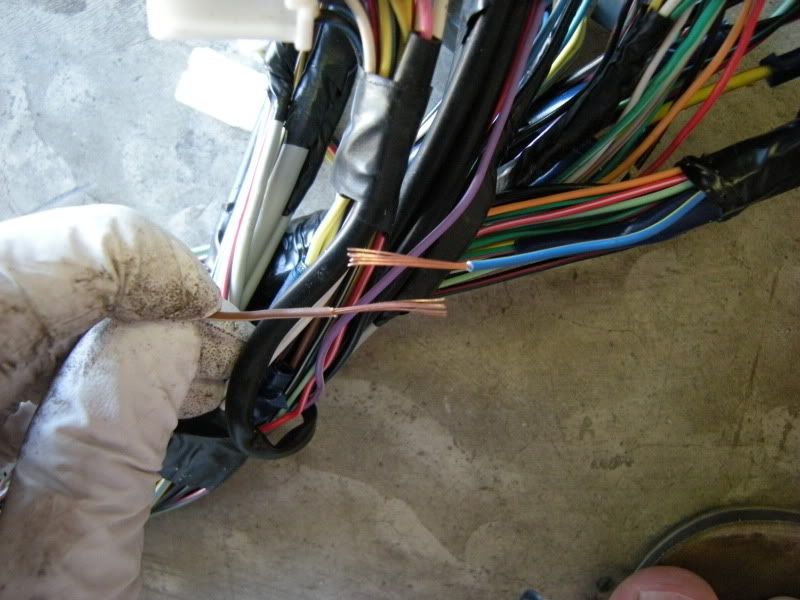
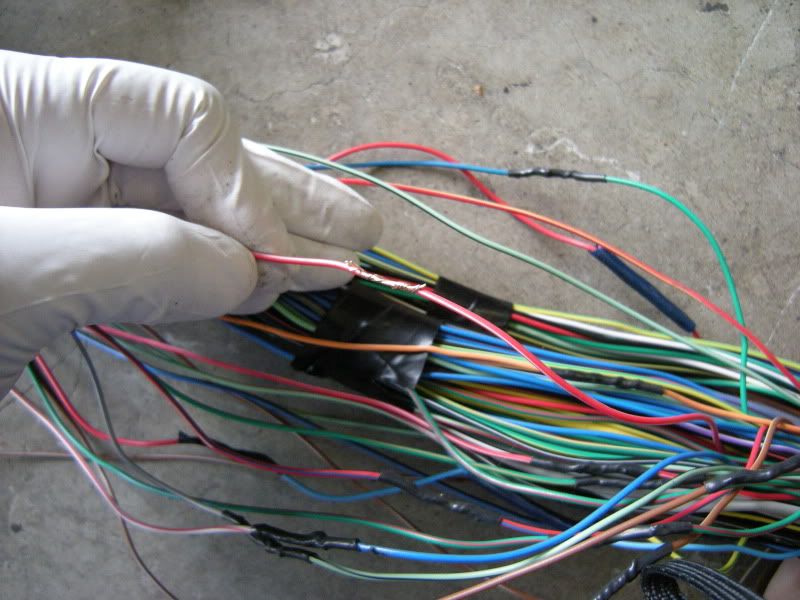
At this point you can cut the wire on the opposite side too. You will reconnect them later.
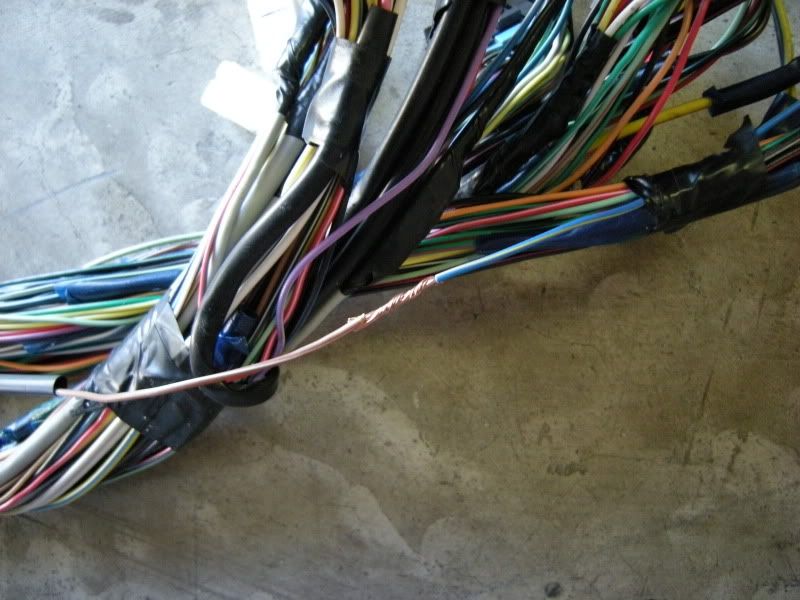
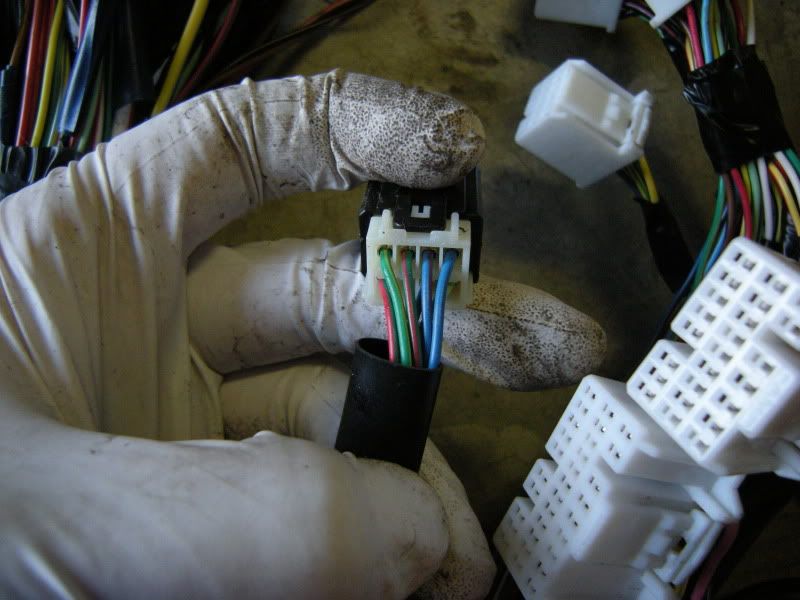
This is all you need from the front harness.
This is all the garbage that is not needed.
The next easiest thing to do is to start with the rear harness. Again, I start at the goal which is the FPC and work back towards the ECU.
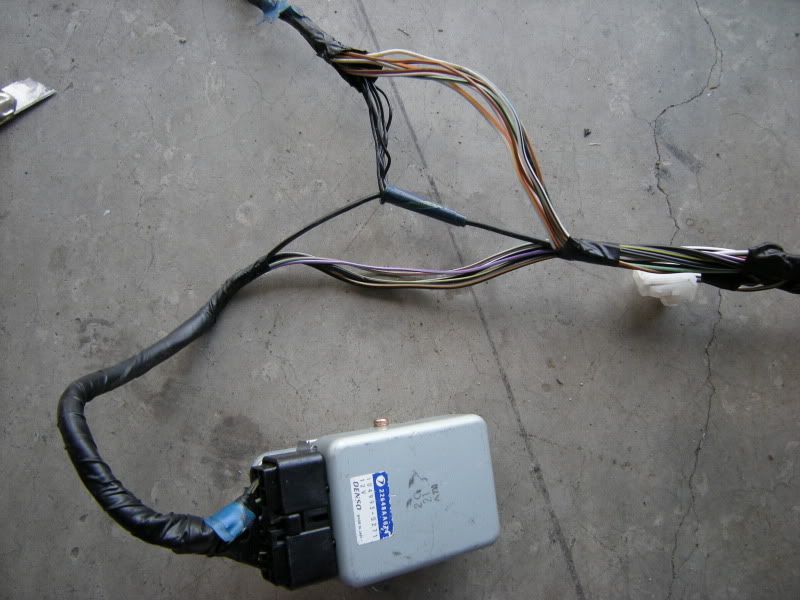
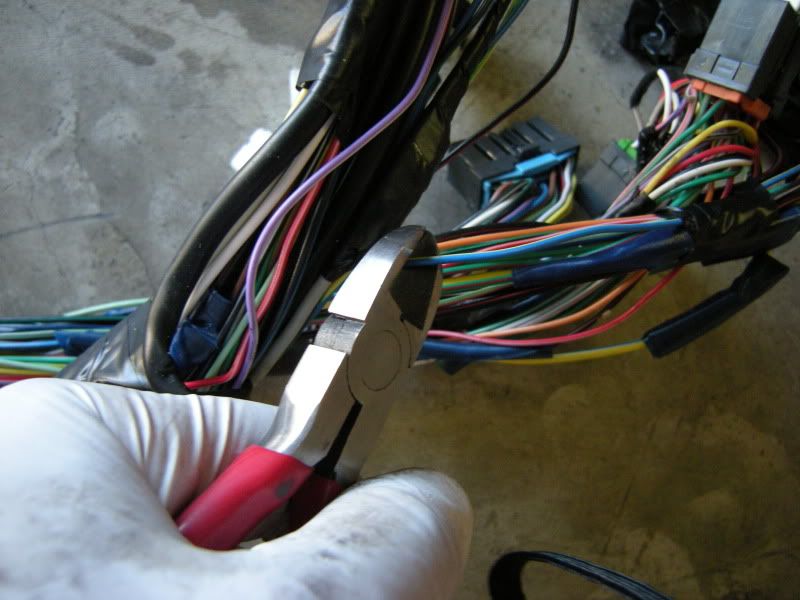
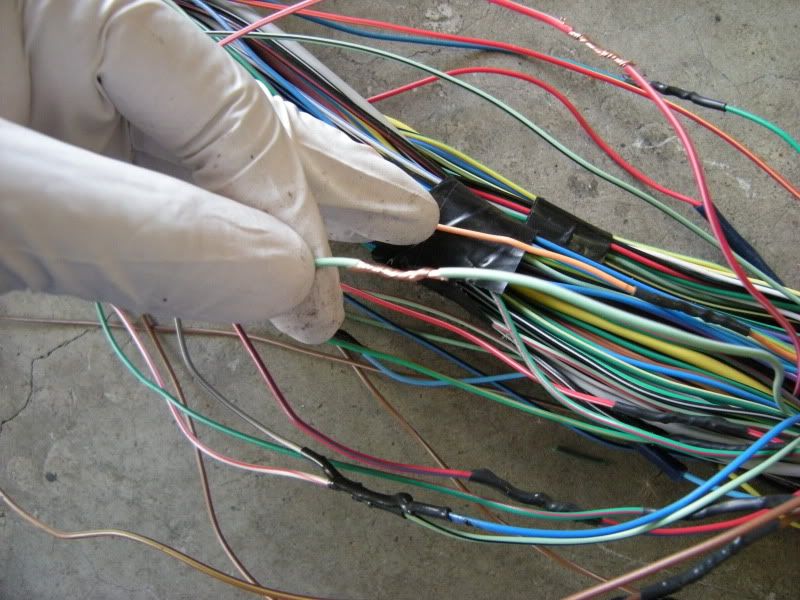
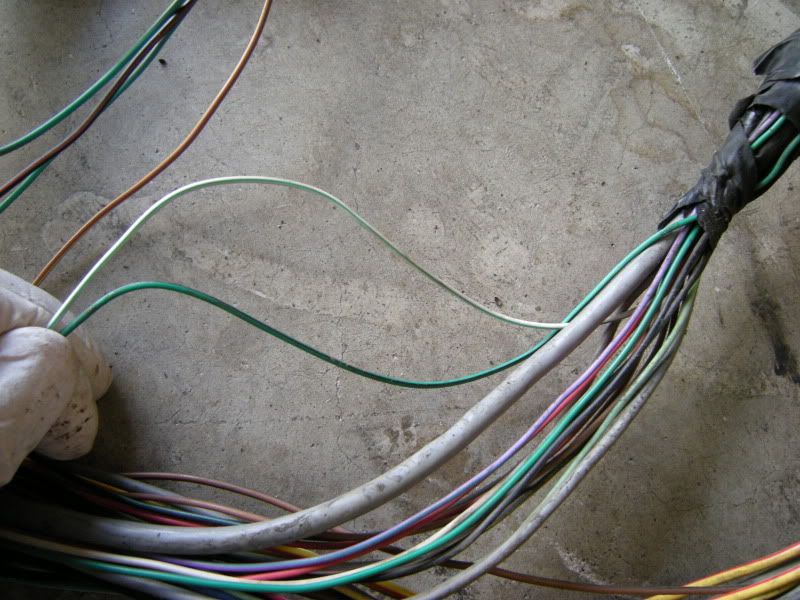
As you start to unwrap you will notice common connections like this ground. If the wire is not going the direction you want then cut it. This will be hard for you at first but becomes easier as we move on. Again we are traveling toward the ecu so wires leading away are useless. Do I know where these go? Yes, but you are just wasting your time tracing them. They don’t feed what you want so cut them.

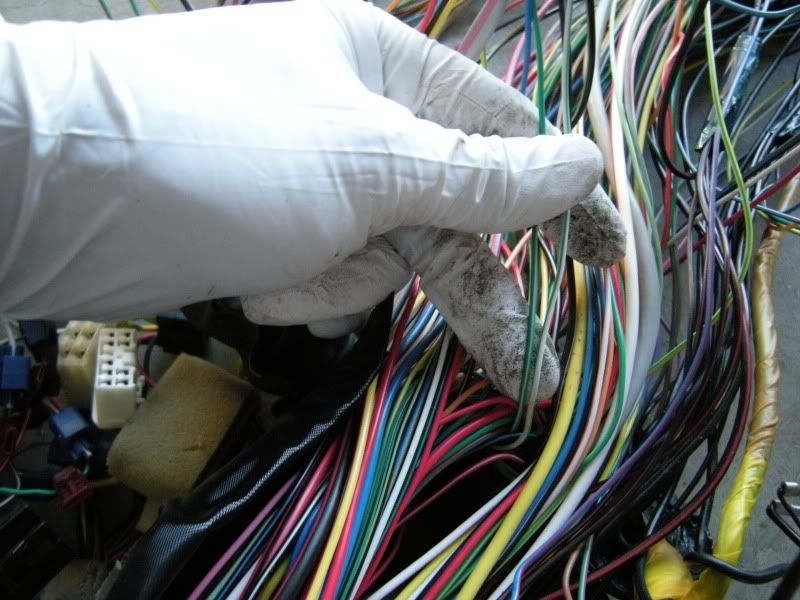
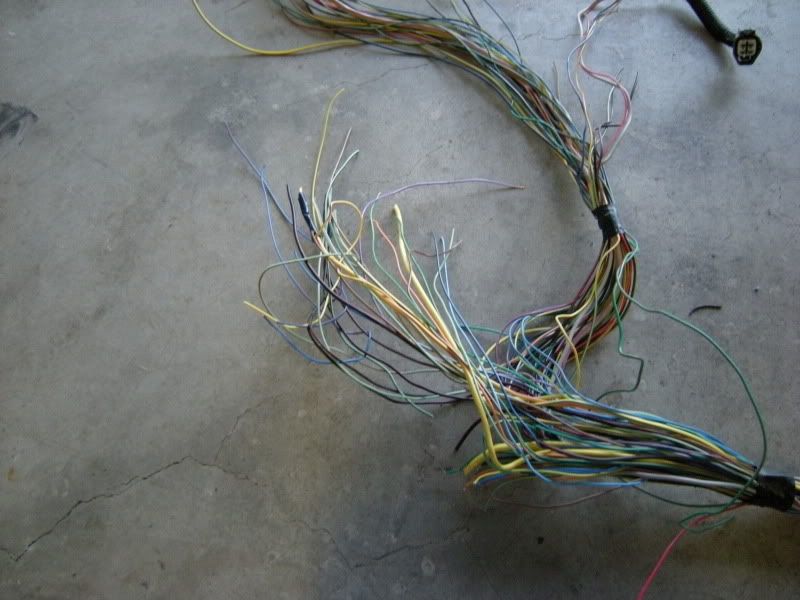
Lots-o-wires.
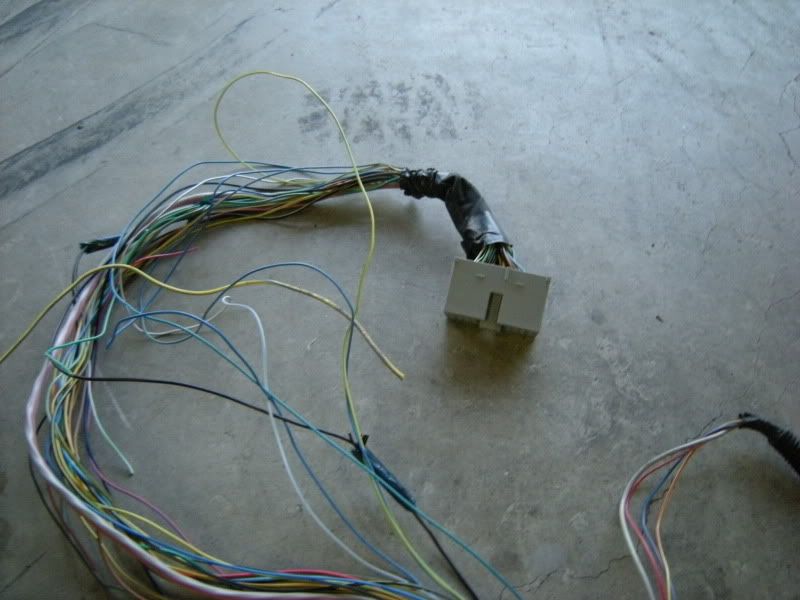
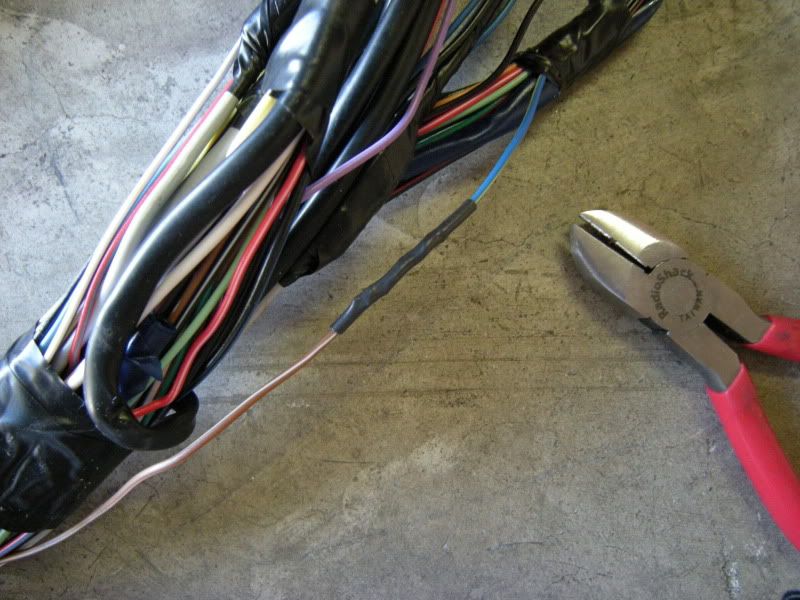
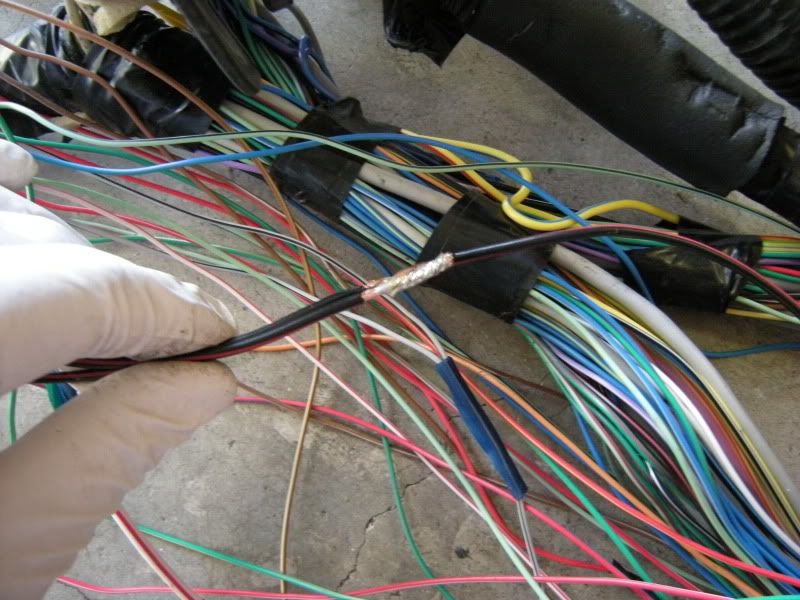
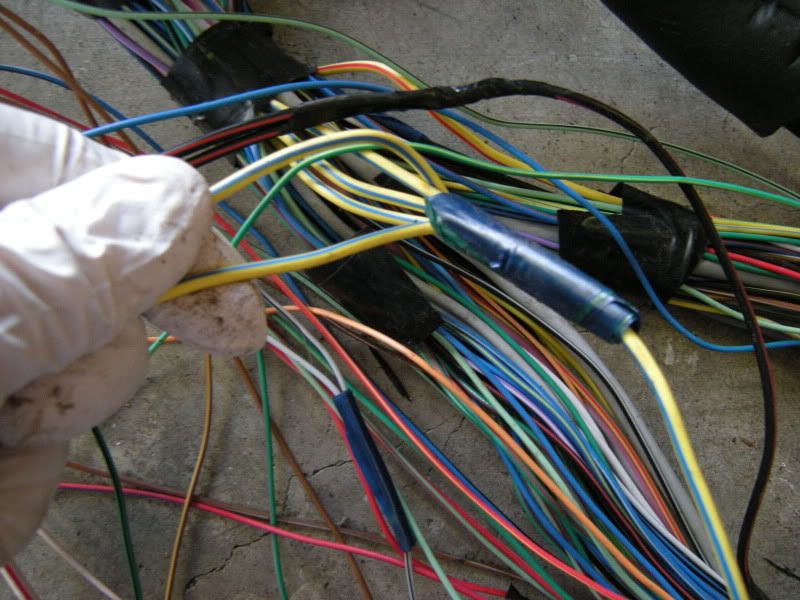
One wire. I resolder all these connections and shrink wrap them later.
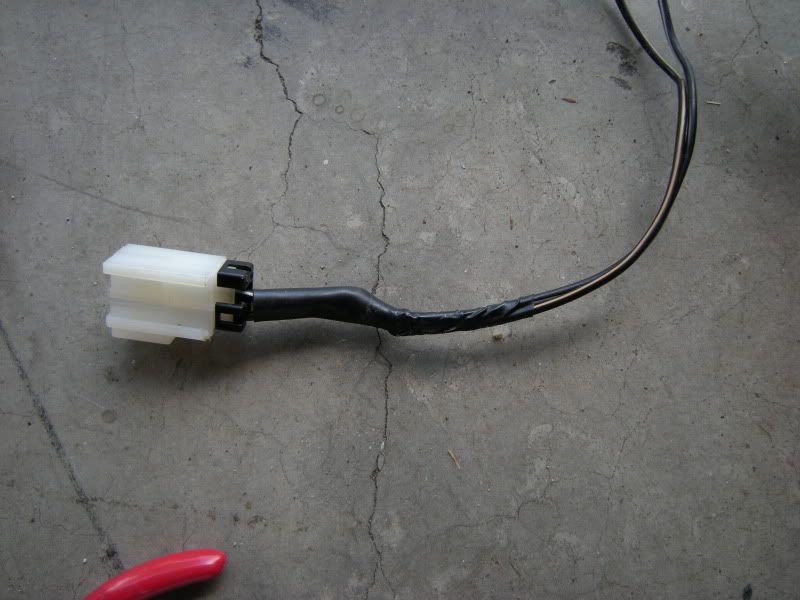
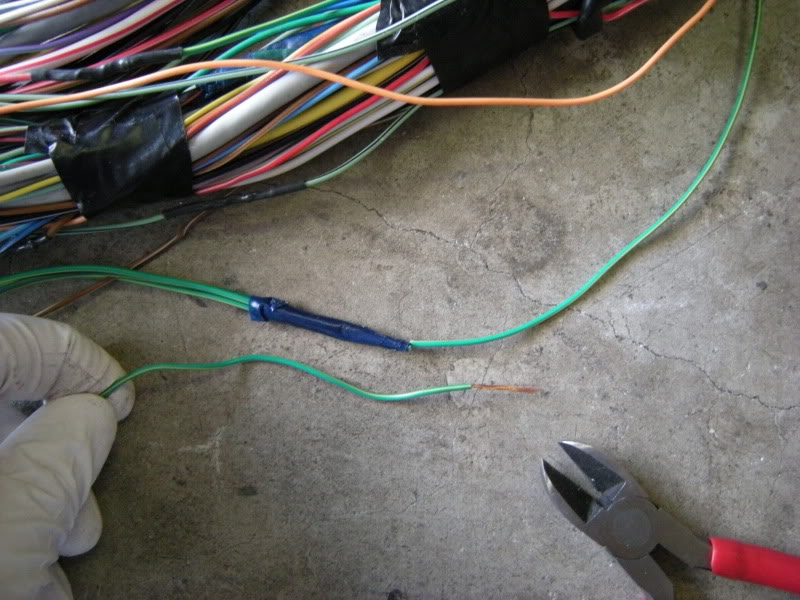
As you continue forward you will come to this plug that the FPC wires lead into. This is the fuel pump connection.
Simply cut off the connector because we will be using the RS connector.

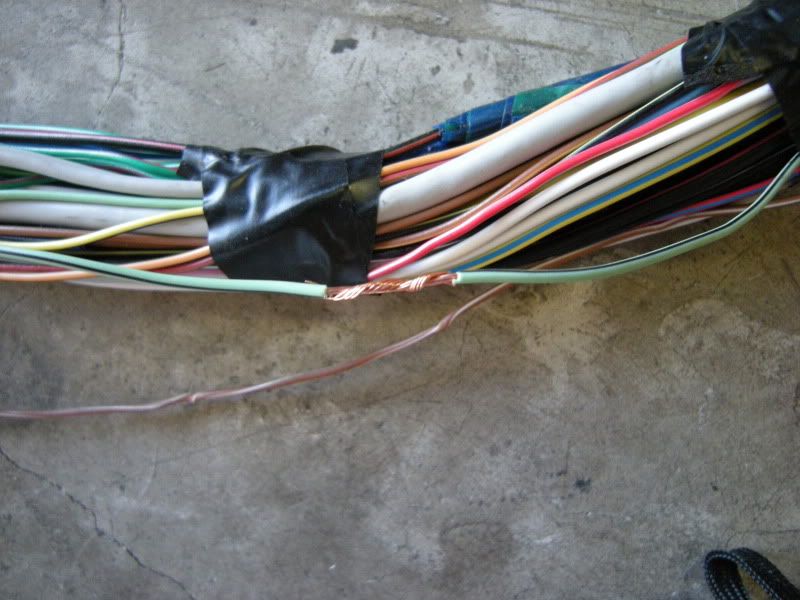
Cut the other two large gauge wires to about the same length. This becomes useful later and you don’t have to waste your time cutting them out of the rear harness.
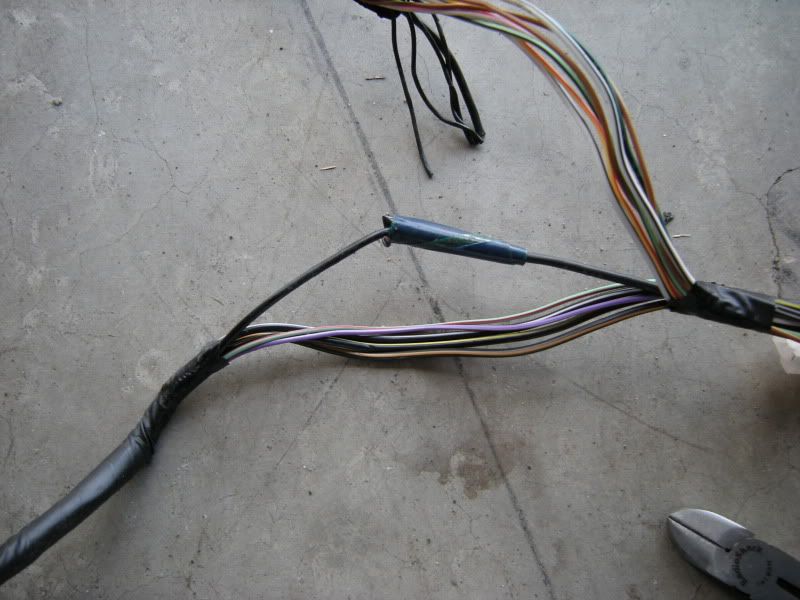
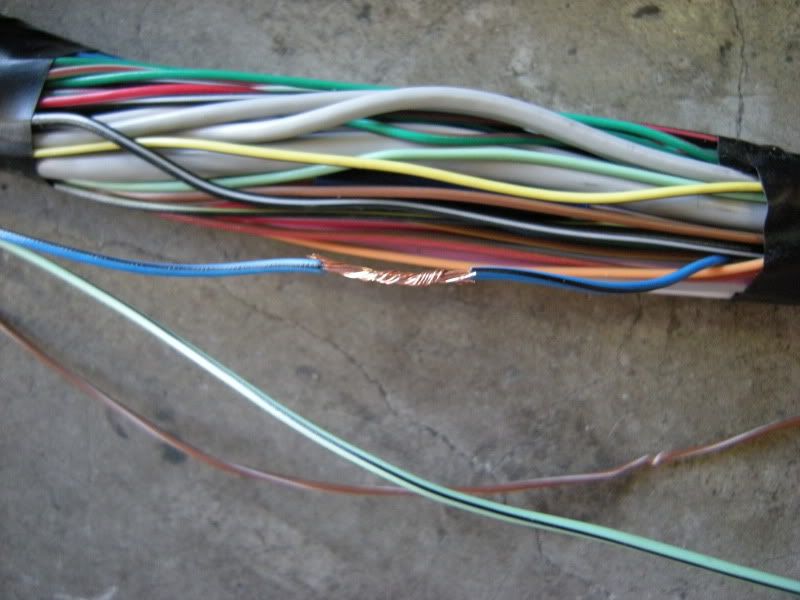
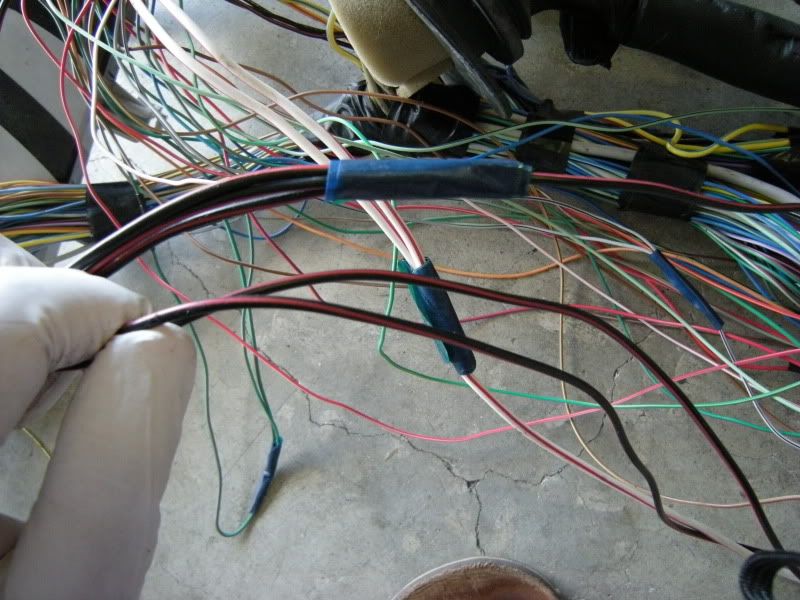
As you unwrap towards the ecu following your two remaining wires you will come to this connection. The FPC wires are the Lg/R and V/W. You can cut them and pull them back through the harness once you have taken most of the wrap and tape off.
You can also cut the wires on the other side of the connector.
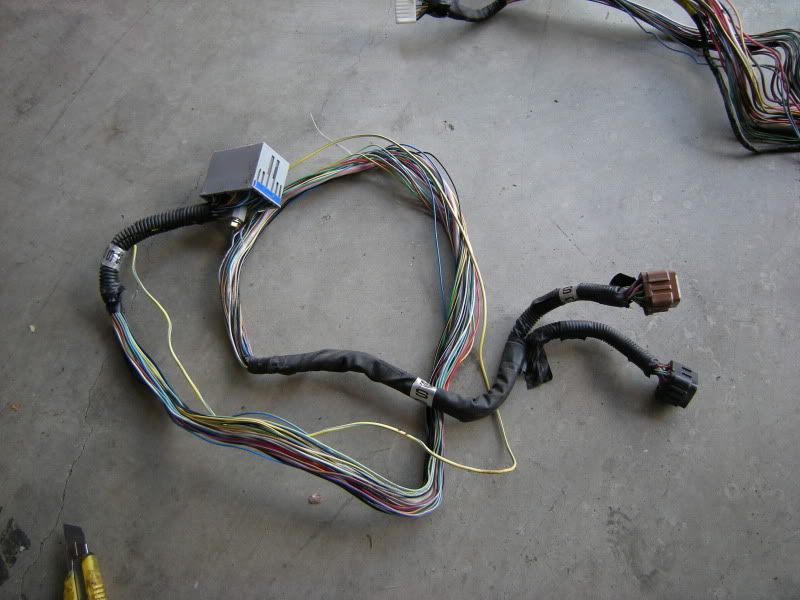
Once you cut them you have all you need from the rear harness.
This is the rear harness, front harness, and engine harness. Starting to look a little easier isn’t it.

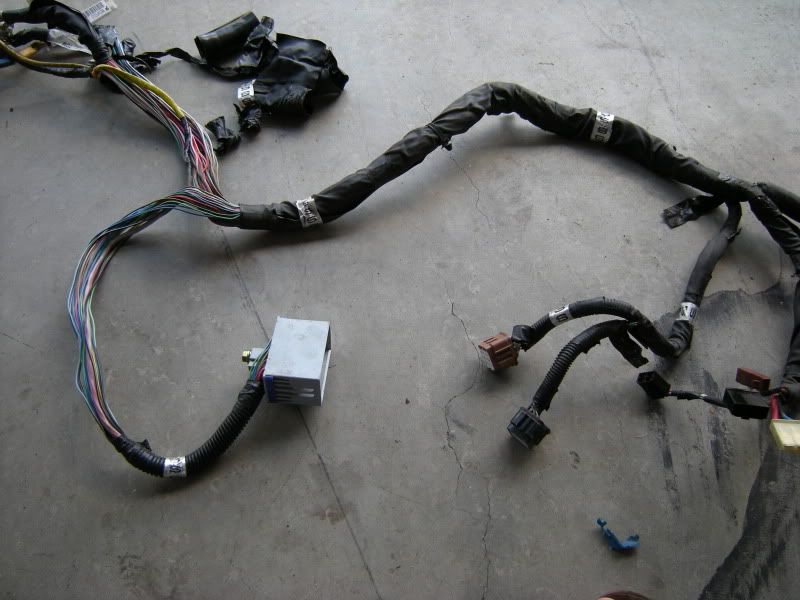
Now on to the main harness. Again I suggest starting at the SMJ and working toward the ECU connections.
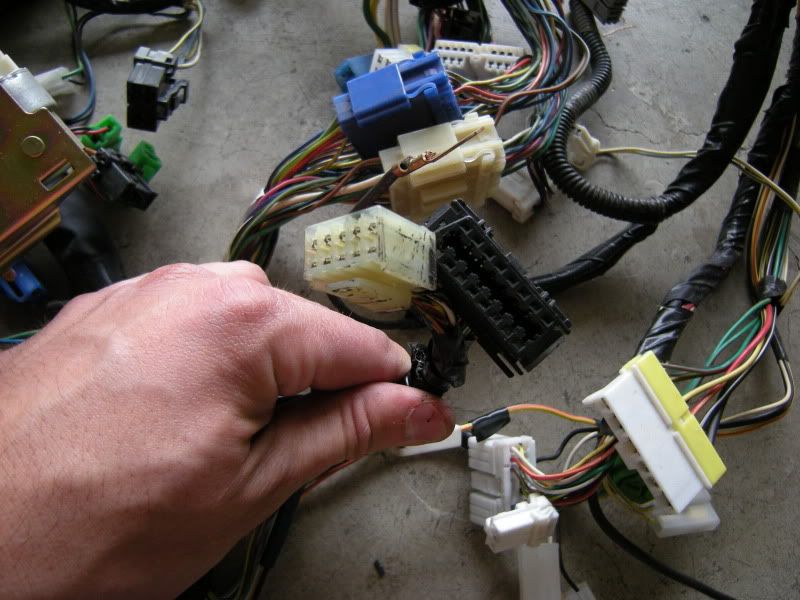
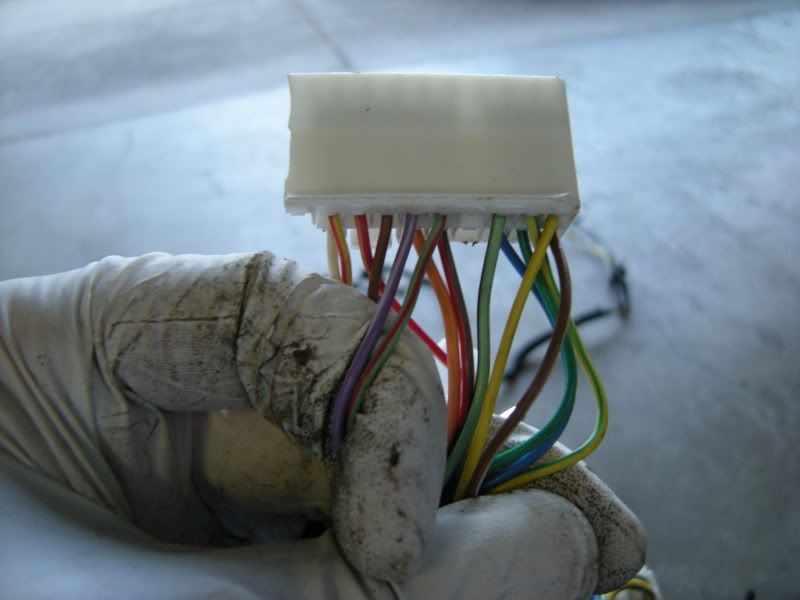
Here is your goal. The ECU connections.

Strip off all the plastic shields, tape and the grommet that was center top. At this point you do not need to strip anything from the MAF,Boost solenoid,front o2 grommet back to the ecu.
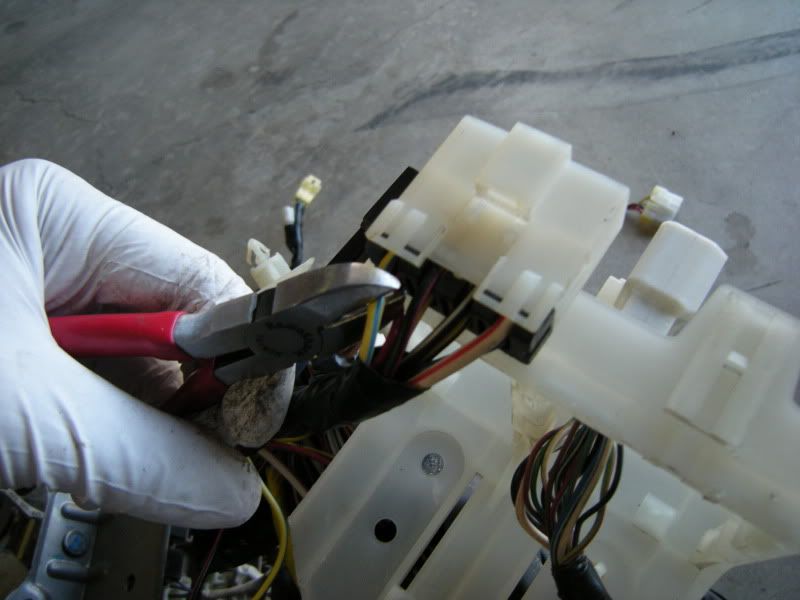
Once the tape is off when you pull on the SMJ you will first notice another common connection. Again, you do not need to know where this leads. If it leads away from the ECU then cut it.
Say good by.
As you continue to pull on the SMJ you will come to wires that just wrap across all the wires from the SMJ. Do I know where these wires come from or go? Nope, and I don’t care. They do not go to the SMJ so they are not needed. So just cut them to help you free the SMJ wires.
As you continue to pull out the SMJ wires you come to two wires that lead from the SMJ but away from the ECU. These two are the oil pressure light and the water temp gauge. You will solder them into the RS harness later so cut them as long as you can easily now. You don’t need to follow them to there plug just cut them here. This will save you wasting time.
Next you come to the middle engine grommet. Strip the grommet and tape off until you reach the first plugs as shown.
These three plugs are the Rear o2, neutral position switch, and back up light switch plugs. If you are swapping a WRX tranny at this point then you need these WRX plugs. Makes sense right? If you are leaving the stock tranny then all you need is the rear o2 sensor plug since you will want the RS tranny plugs.
I’m using the stock tranny so all I need is the Rear o2. I feel this is the most common scenario.
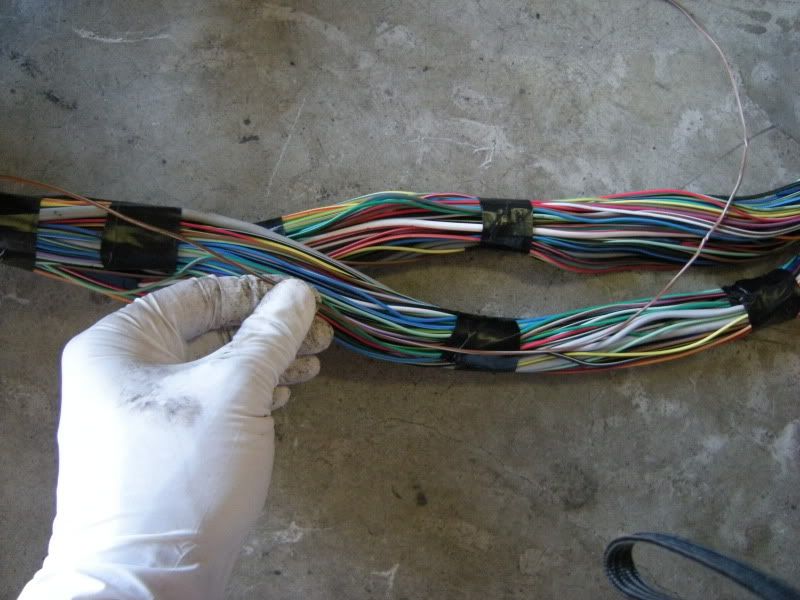
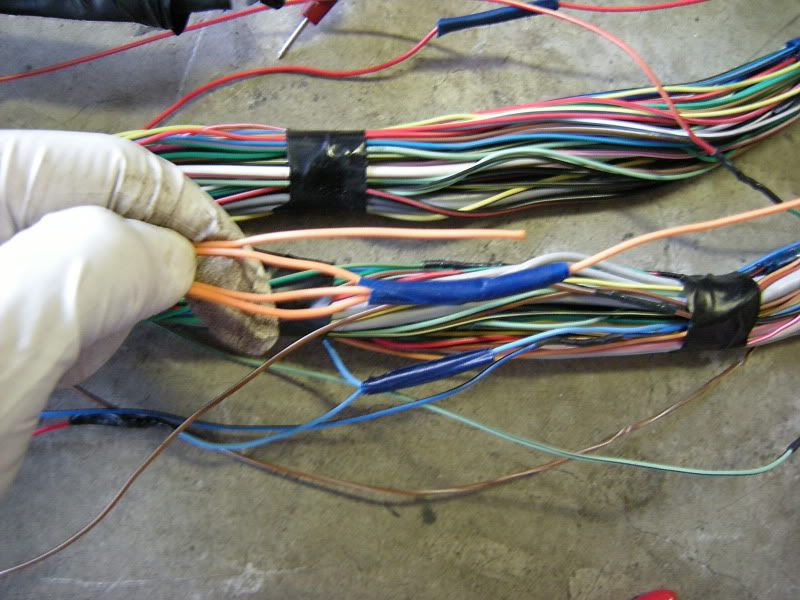
At this point I like to tape what is needed together to section it away from the rest of the harness that is unneeded.

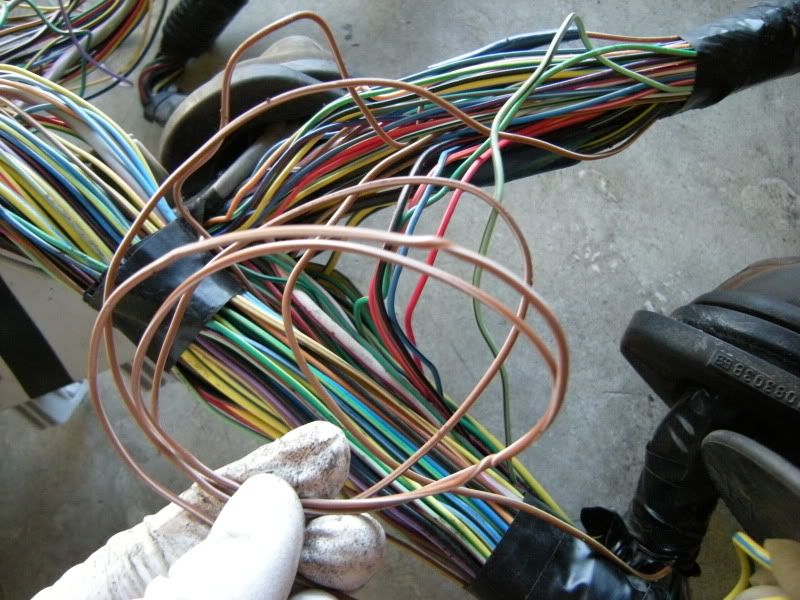
Notice how much is unneeded? Also make sure the Y/B 12 power wire is in the group. You can see it looped on the left there.

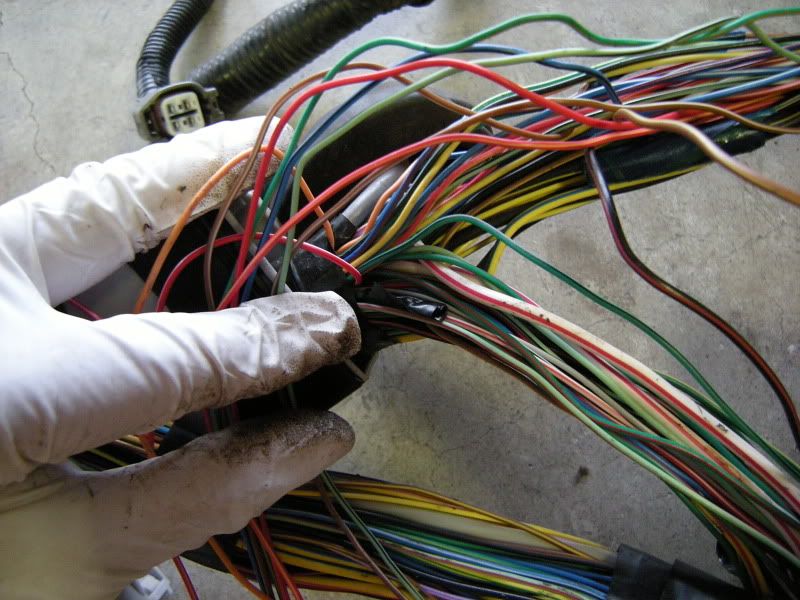
At this point I cut off all the unneeded wires that lead to the left of the last picture. This includes the fuse box. This clears out a lot and makes it easier to see what you are doing. Just cut, don’t think about where they go. I assure you that they are not needed. Once you are in this mind set this goes much faster.
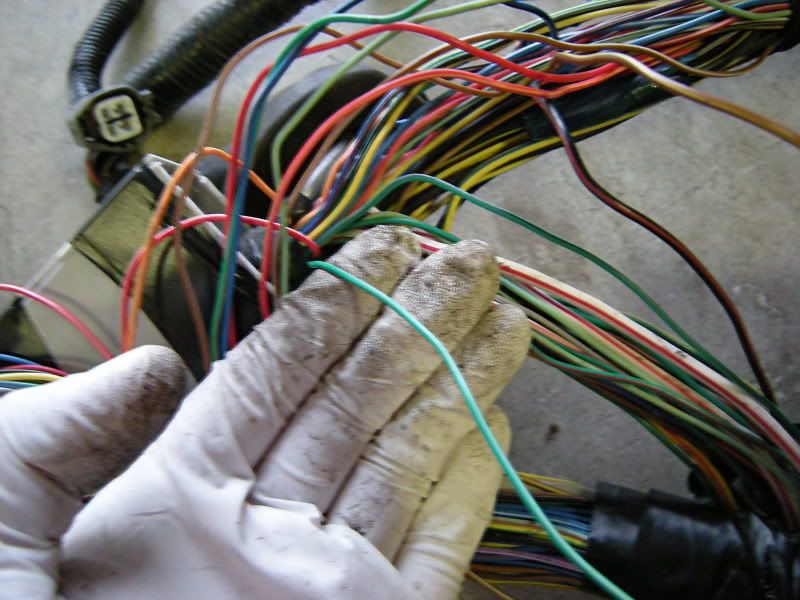
Remember these two wires you cut? Those are the only wires that lead toward the right side that are needed. Once you rescue those wires you can simply cut everything that leads right at this point too.
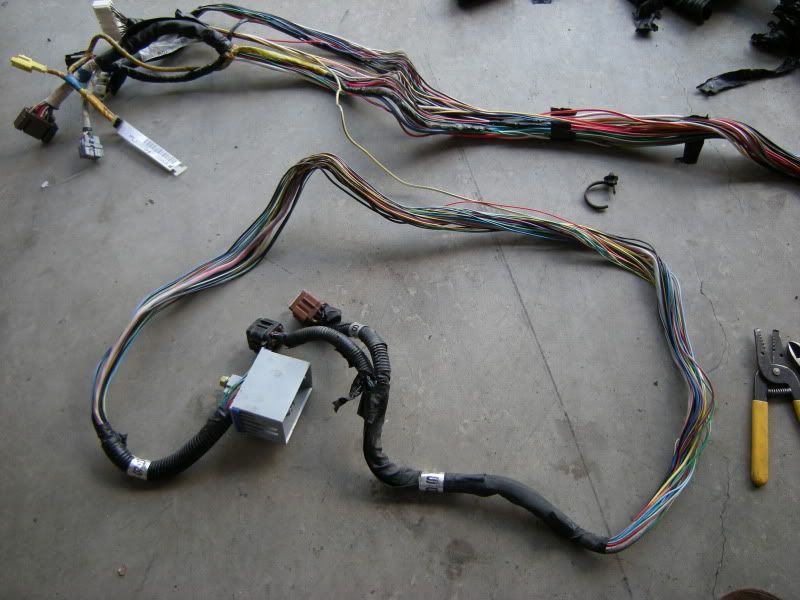
Once everything is cut you have this. You see all the plugs you need and a few you don’t. So know you are not quite ready to start.
This is a heater core plug. Pull on it and all of it’s wires will come out. You have already cut them so it is just taped there.
Cruise control plug. It is cut as well. Pull it out.

I think you know what to do here. Pull it out.
I think you also know what to do here. Pull it out.
Now everything looks nice and clean doesn’t it.
MAF plugs again.
ECU plugs again.
Firewall grommet. This will be cut off in a bit to use the RS but leave it for now.
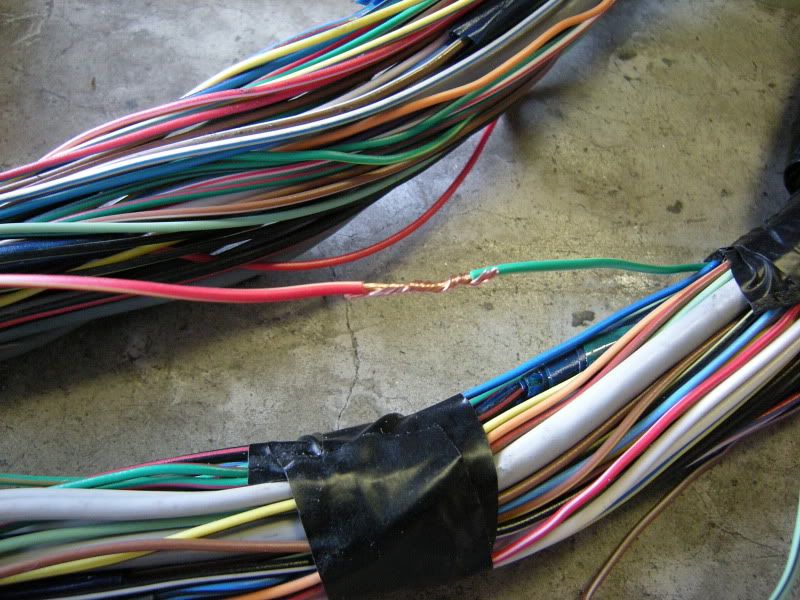
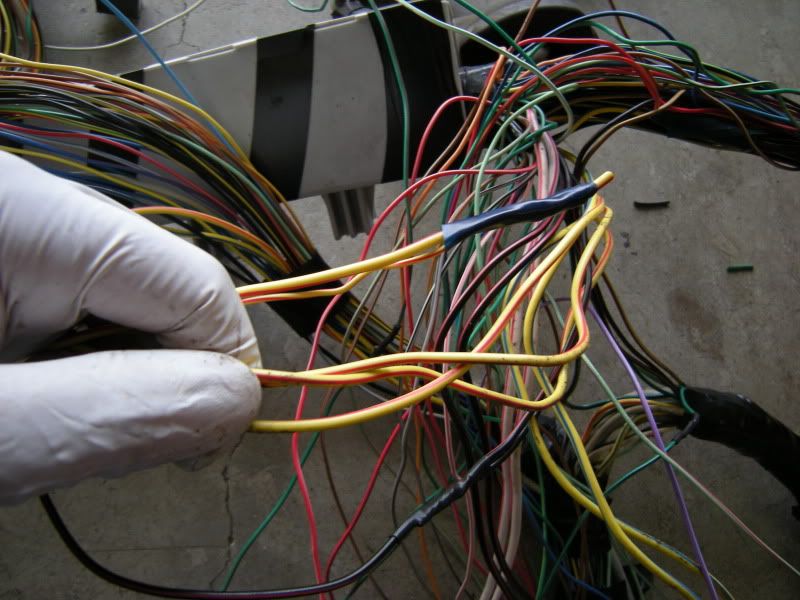
Wires that need to be spliced. These are all listed in my wiring guide. When I first wrote it I assumed that people could get his far but I’ve had so many questions that I’m now picturing everything.
SMJ connection freed.
Rear o2 Freed.
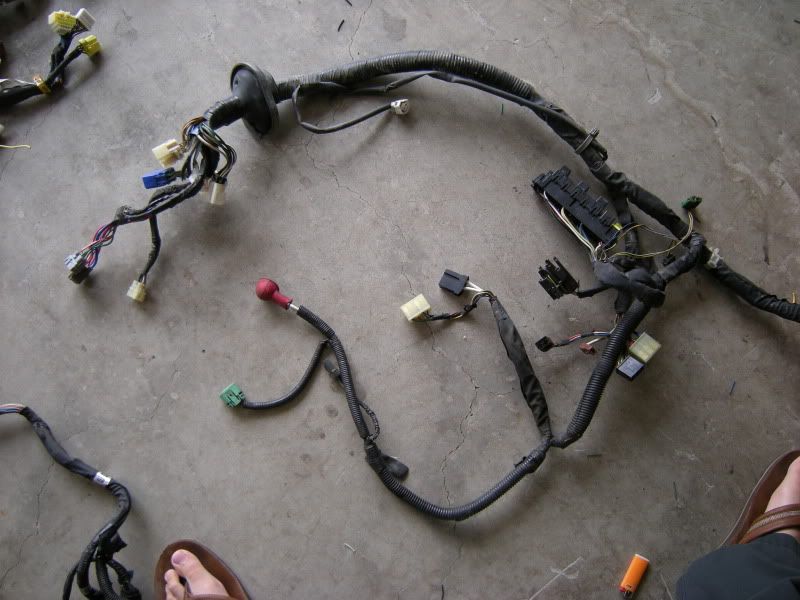
Now you can start to prep the RS harness to receive the WRX engine harness.
This is really the only section you will deal with. The RS ECU connectors and the grommets are all you need to look at.
This branch is very important it sets up a length for splicing the new harness in. More on that in a bit.
This grommet is where most of the wires from the RS ecu go through. You will need to save this grommet to put around the WRX harness but for now leave it on.

This is all the wiring for the RS ECU 95% of your work will be done right here.
ECU plugs, all the pins that you need are listed in my wiring guide.
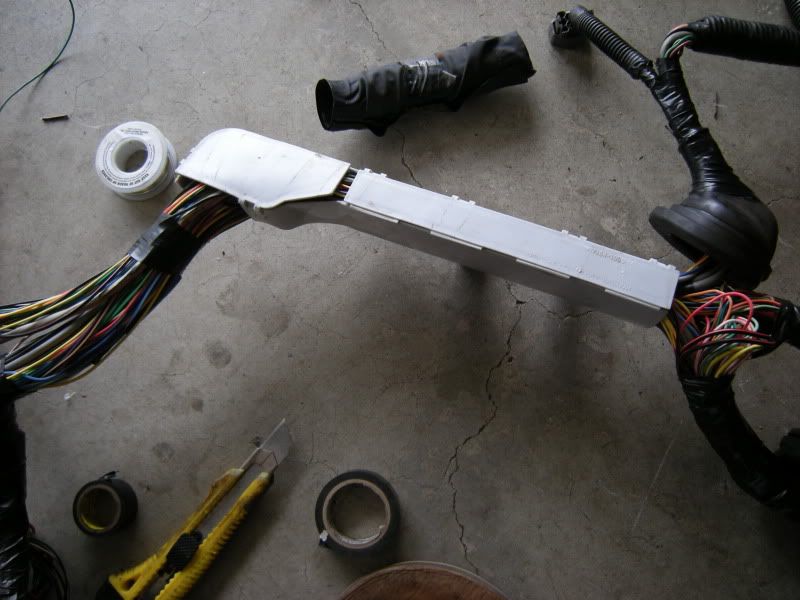
Start by taking off all the wrap on the RS wiring from the Engine grommet to the ECU plugs as pictured.
To get a reference, lay the WRX harness ECU plugs next to the RS ECU plugs as pictured.
You will then notice that the grommets basically line up. You want to keep this length the same so all the wiring and grommets will be in the right position when you are finished with the merge.
Again with the grommets on top of one another you notice everything bends the same after the grommet.
I like to now take the entire wrx wiring and put it on top of where it will be merged to.

Then tape it down to make sure your reference stays the same while you move on to unwrapping the WRX ecu wiring.
These next three pictures are for reference. When you are done it better look similar to these pictures. I like factory looking harnesses and I want to see them look like factory when you pull back the carpet. If it looks like somebody was in there then I have failed you.
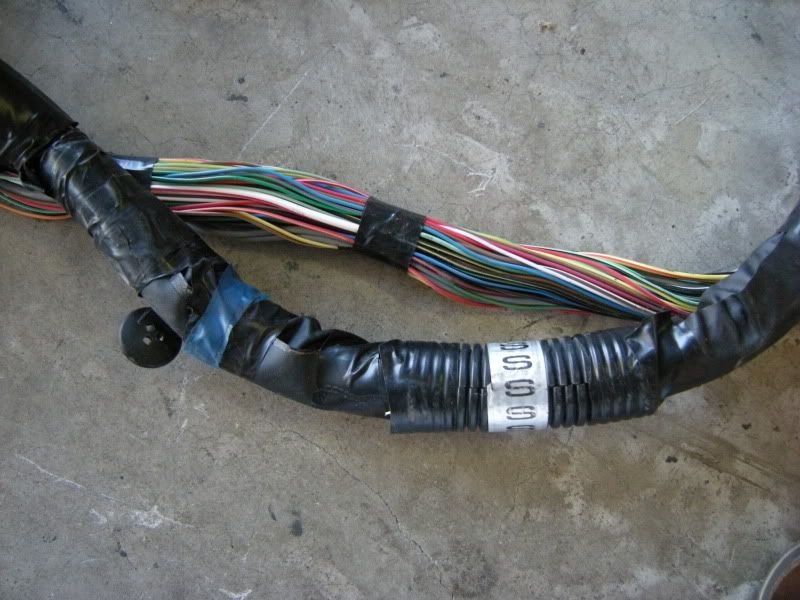
Further down the branch. Notice the “S” stickers. You will want to save those to put them back on later.
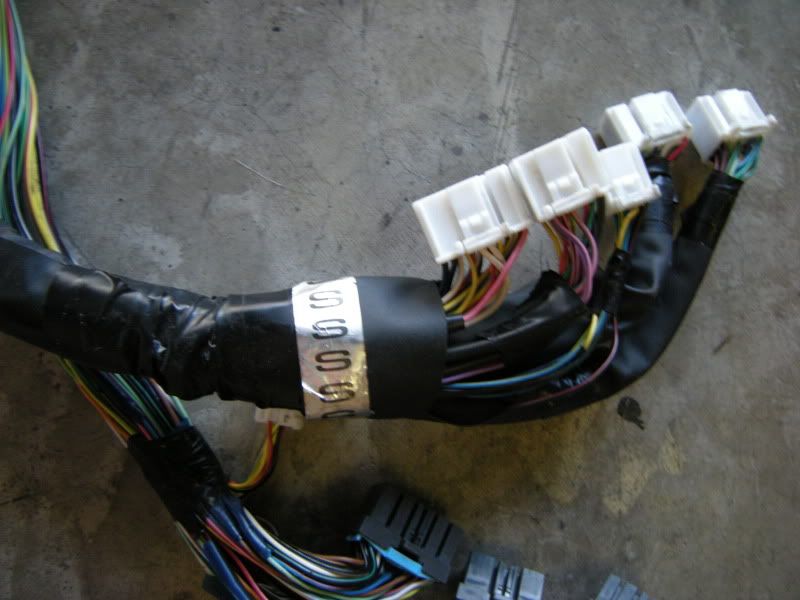
And finally down the the WRX ecu plugs.

On the longest plug you notice a plug taped to it. This is a common sensor ground plug. There is one wire that comes from the ecu that goes to this junction. Then many come out to go to various sensors for ground. Most of them go directly to the engine so there is no merging but there is one wire that you will merge later.
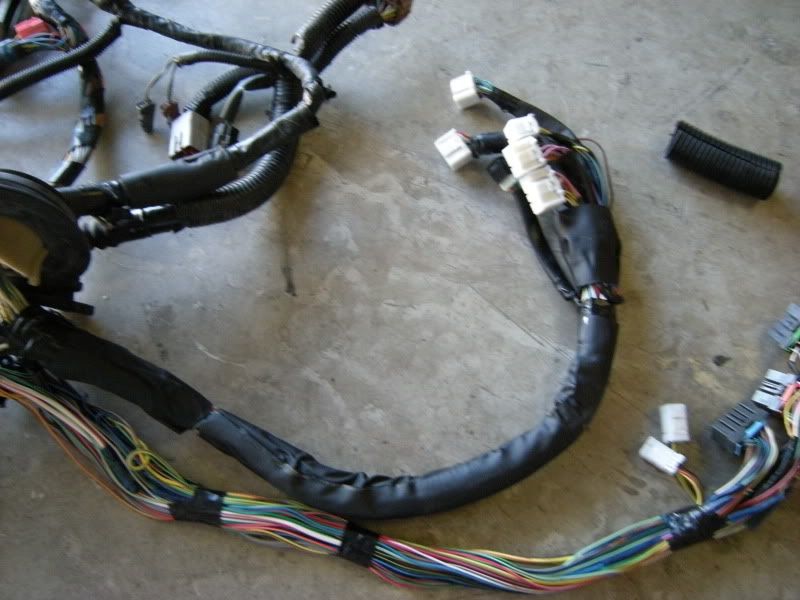
After you pull off all the outer tape you will want to remember where all the wrapping goes because you will be putting it back on later. The next two are closer pictures but you can take the wrap off now. These are only reference shots so you can make the harness look stock later.
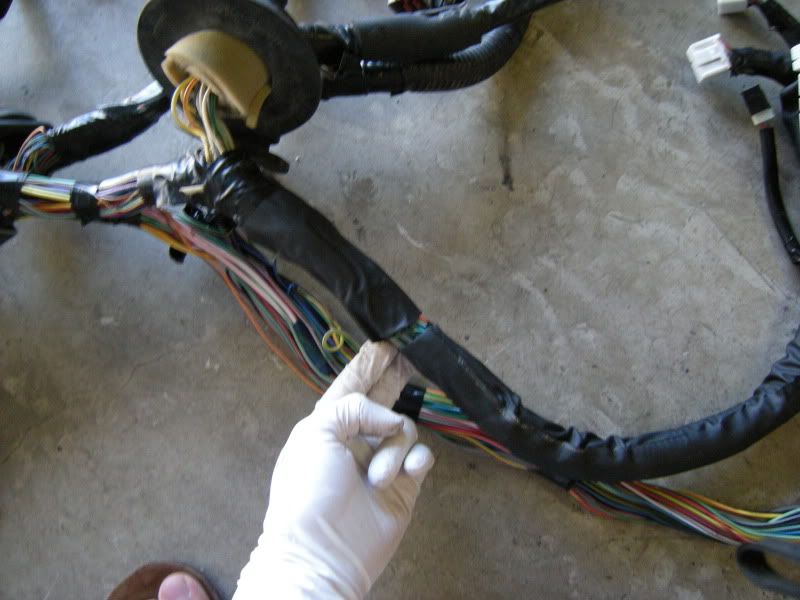
Again, the upper part with no tape.
And the lower part with no tape.
Now, it is finally time to start actually merging. Just like almost everything in the car world, spend the time prepping everything and the rest will go smoothly.
On the RS harness you see several wires that lead right towards the rear of the car and a bunch that lead left towards the fuse panel, gauges, etc. You can start pulling on wires at random but I generally start with the rear wires and then move to the others. It really doesn’t matter where you start.
At this point you will want to have my wiring guide open or printed. Simply click the link below and then select your car. If your car is not on the list you will have to acquire wiring diagrams for it.
Brydon’s Wiring Guide for Merging Two Harnesses
As always, please double check me. I’m not perfect so I might have made pinout mistakes. Please always have the wiring diagrams open checking that I didn’t make a mistake. If you do find mistakes please PM me and I will fix them in the thread above.
After you have picked a wire follow it down to the RS ECU plug. At this point you need to figure out what plug it is. My first wire happens to be plug B135 Pin 27. On my guide it says this is the AC switch.

First cut it. Make sure it is long. Remember you need nothing off the RS engine harness so don’t worry about cutting it close to the ecu. Later you will see this benefits you in another way. When the wire in question branches off to a bunch of things in the car you want to make sure you don’t cut any of them out. Cutting close to the RS ECU ensures all RS body wiring is not cut.
Next go back up to where the wires branch out and put the wire from the RS wiring.
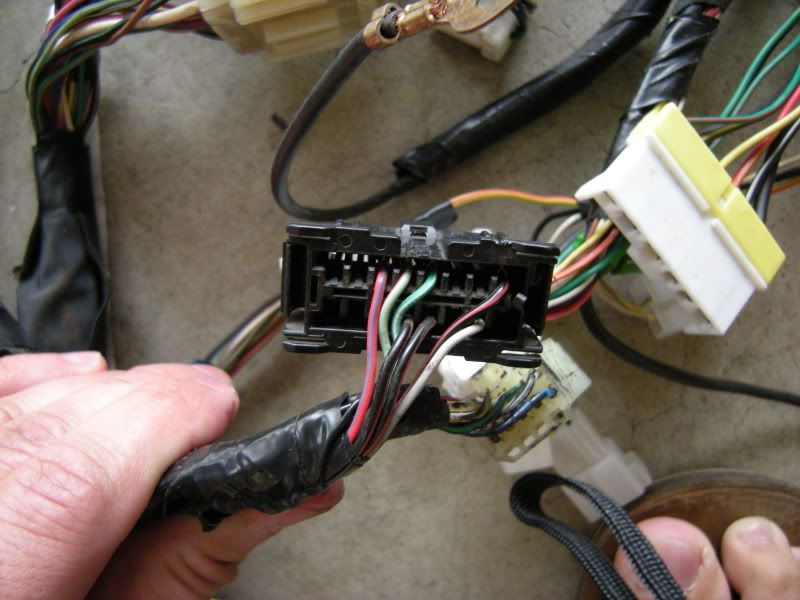
Next move to the WRX ECU plugs. My guide says that B135/27 goes to B134/2 on the WRX. This is plug B134 on the WRX. Pin two is top, then two from the right. In my guide the WRX picture of the plugs is pictured as looking at them from the front. While the RS is looking at them from the wire side. Be aware of this since it gets a little confusing when counting pins to find wires.
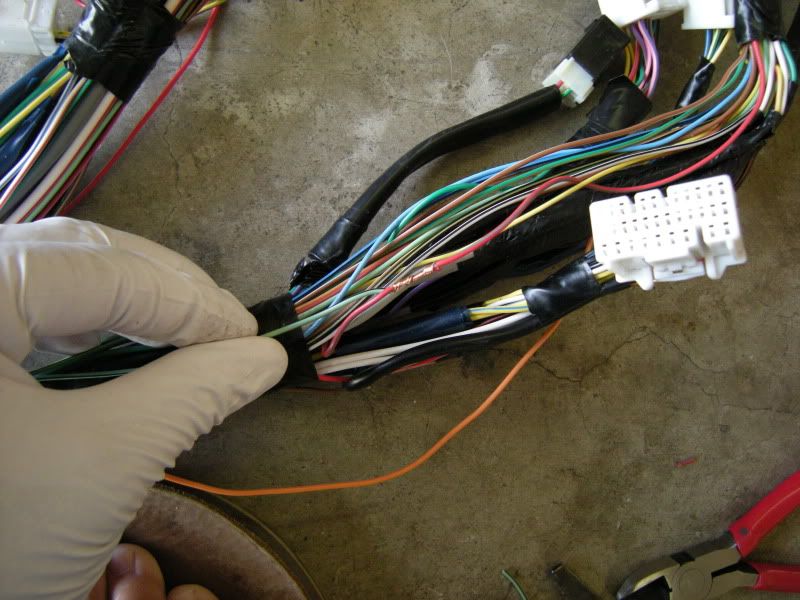
Now find a good place to merge the wire. I try to stay closer to the ecu but after all the plug wires come together. If that make sense. This way you can wrap it up easily later and if you do make a mistake all the merged wires can be accessed without pulling the heater core again. You can actually pull on the wire now to bring it to the top of the bundle. Then cut it where you want it. Remember this is all on the WRX harness at this point.
Then take your long RS wire and place it on top of the WRX bundle.
To ensure you have the right length so the wire wont sit to short or to long follow it down the WRX branch until you meet the wrx wire you will merge it with. Remember you have tied the RS and WRX wiring together so the the harnesses should be at the right lengths to merge them seamlessly.
once you meet the WRX wire with your RS wire cut the RS wire to length. Leave it a tiny bit longer then you think so you have extra to solder and slight movement later.
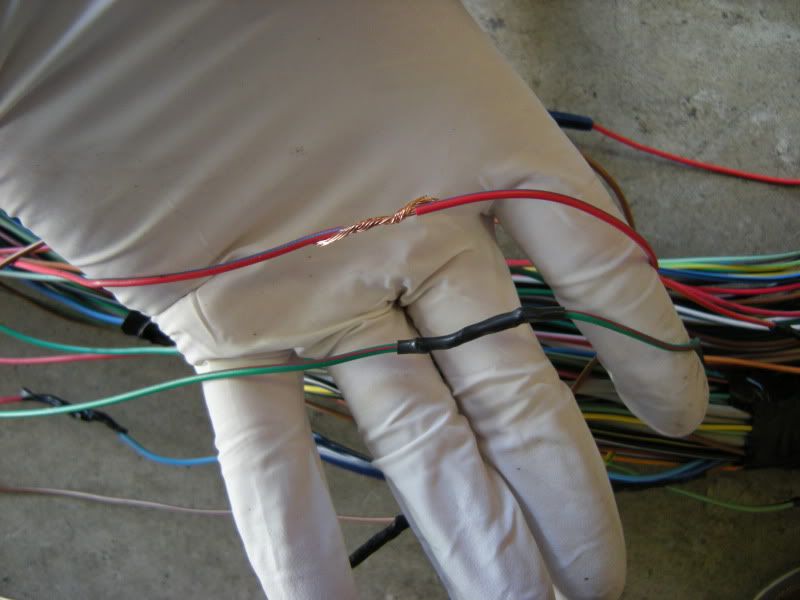
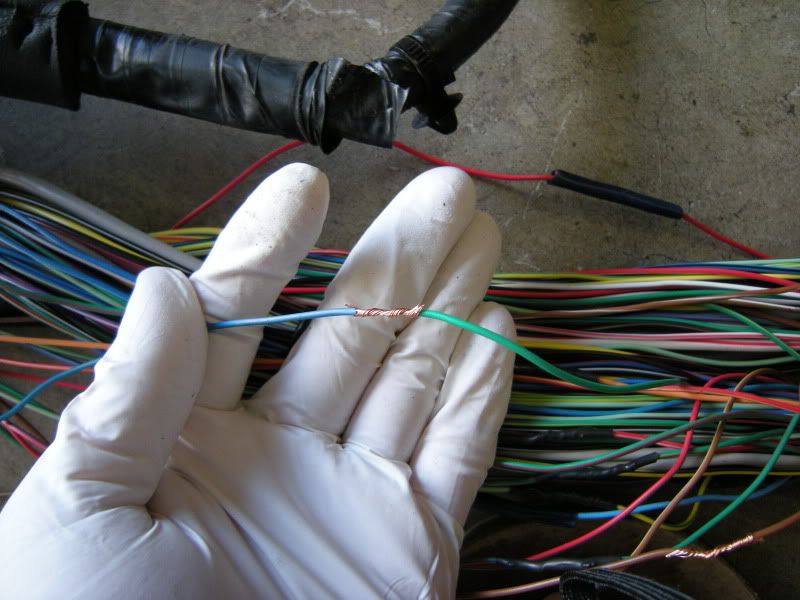
Strip the ends off both wires. Notice they are not the same color wires! Most of the wiring is the same but a few are not. This is important to pay attention to so you don’t make mistakes. I started with this wire to illustrate that to everyone.
Add a piece of shrink tube on to the wires before twisting them together.
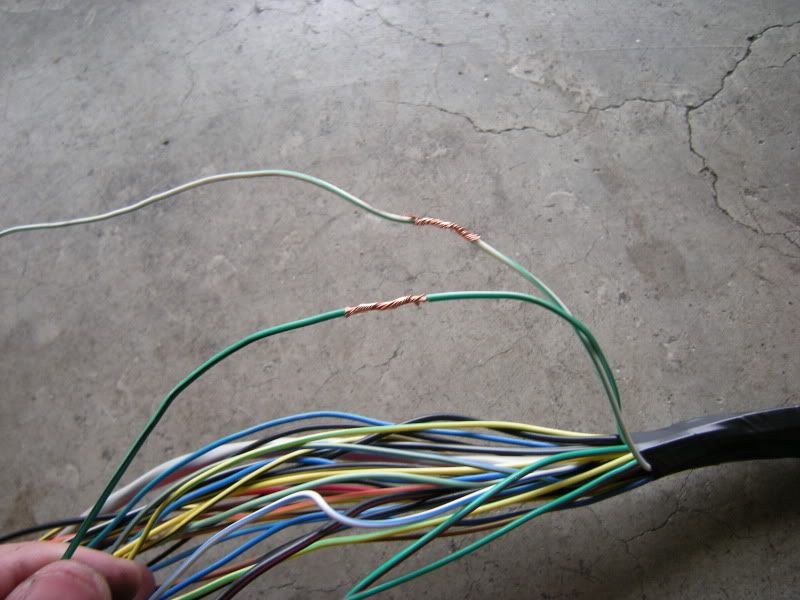
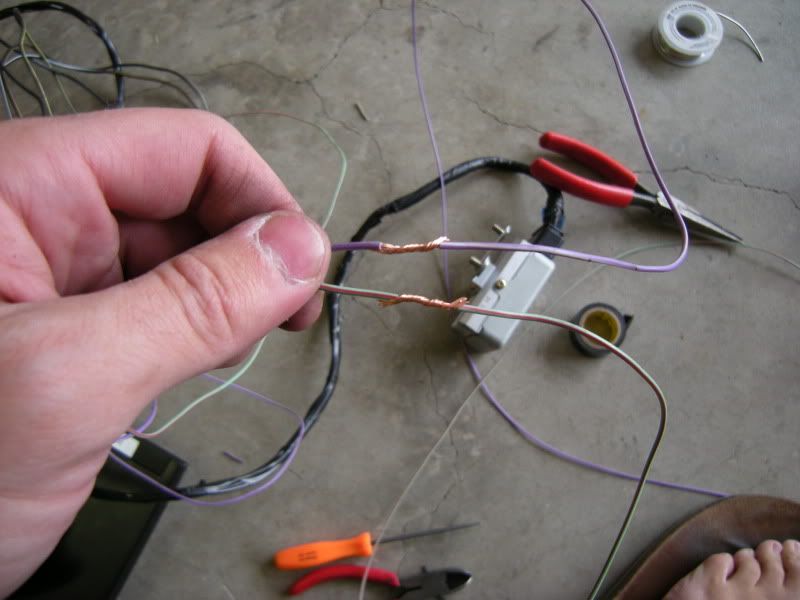
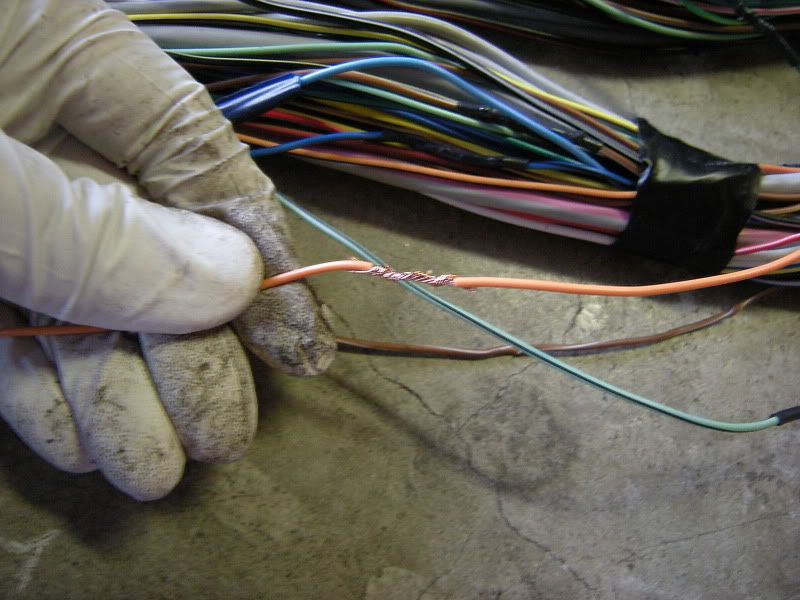
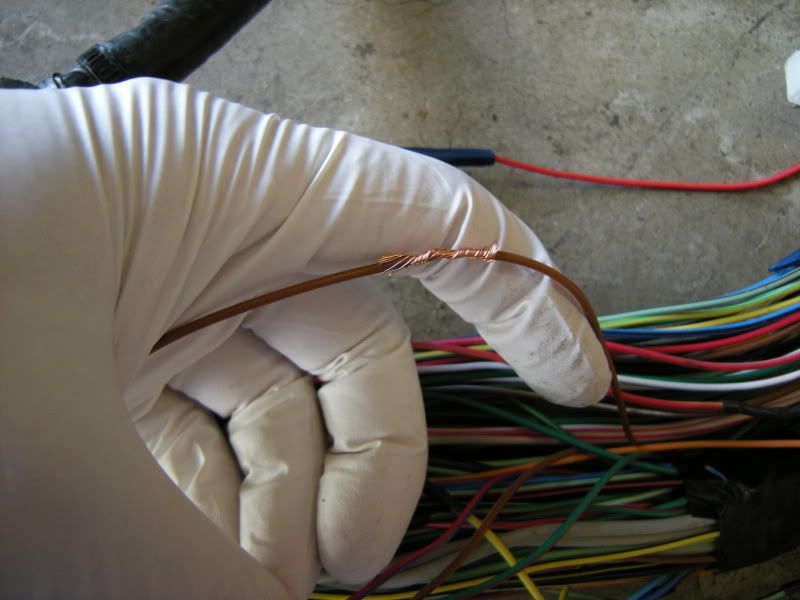
Twist the wires together. Make sure you have good contact. Solder is not made to conduct, only to old and maintain clean wires. This is very important for the life of your car and issues down the road. If they are not bonded well they will build up a oxide layer and you can have electrical issues later.
Solder the two wires together. You will notice that you can still see the strands of the wire. This is good. If you don’t get the wire hot enough the solder will puddle on the top of the wire and will not bond well. If this is your first time you might want to hold off soldering and shrink tubing anything until you are almost done. That way you know you have used every wire and did not make a mistake along the way.
Always shrink tube all wiring. Keeps corrosion out and ensures no contact between other wires.
Now that you seen one you really don’t need to see every step just follow the same proceedure. Pick a wire and follow it from the RS harness to the RS ECU. Cut the wire. Then find the corresponding wire on the WRX harness. Pull the RS wire over the top and merge it with the WRX wire. And so on until you are out of wires.
This is the Fuel tank pressure solenoid WRX B137/22 – RS B134/1
This is the Fuel temp sensor WRX B135/6 – RS B136/26
You then come to a wire that leads out to the RS engine bay on the RS harness. This is actually the back up light wire but since we are using the factory tranny we can leave this until later.
Simply move it aside. It will work itself out later.
The next wire goes down to this little plug on the RS harness. It is a common sensor ground junction. Just like the WRX one wire goes to the ecu and the rest go out to various sensors that need grounds. This one is Sensor Ground Joint Connector – Fuel Tank Pressure Sensor Ground (R/Y on RS) – (G/Y on WRX) as listed on my guide.
The G/Y wire pictured top left on the plug goes no where at this point. You need to take the sensor ground wire in the last picture and merge it to the ground wire in this picture.
This way the fuel tank pressure sensor has a sensor ground.
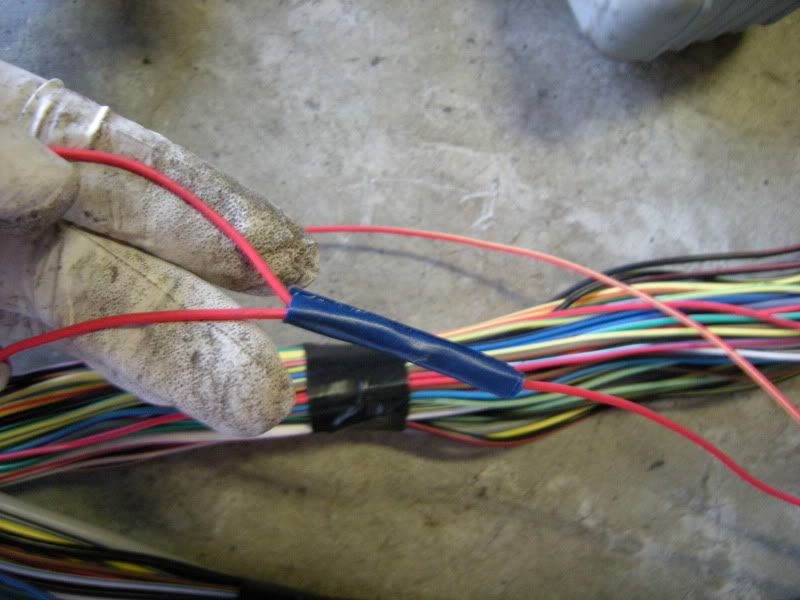
At this point you actually have to put on your thinking caps. This red wire is Sensor Power Supply WRX B135/9 – RS B136/15 … This wire branches into three wires. One wire goes to the ecu, one to the RS engine bay, and the other to the bulkhead of the RS. The WRX has the same thing but you have to think about what you need. If it goes to the RS ecu then you can cut it. Same goes for the RS engine bay. What ever this powers on the RS engine wont exist once you have a WRX motor in there so cut it.
On the WRX side you have the same three branches but only one is cut. The one that know needs to lead to the RS bulkhead harness. Splice this in at the junction.
This is the Fuel level sensor WRX B135/25 – RS B136/27.. It branches but both are already cut. Merge them into one wire.
This is the Test mode connector WRX B134/14 – RS B135/14 Again it branches but all the WRX ones are cut. Makes sure everything on the RS side is intact.
Although there was three wires now there is one. Make sure to make everything as clean as possible and get rid of all dead ends.
This wire leads to the OBDII Connector Pin4 B135/11 (G/W) – Not Used for the WRX… It can be cut.
I like to put a piece of tape on it and tuck it up in the harness. It is not plugged into anything at either end but to get it out requires to much work.
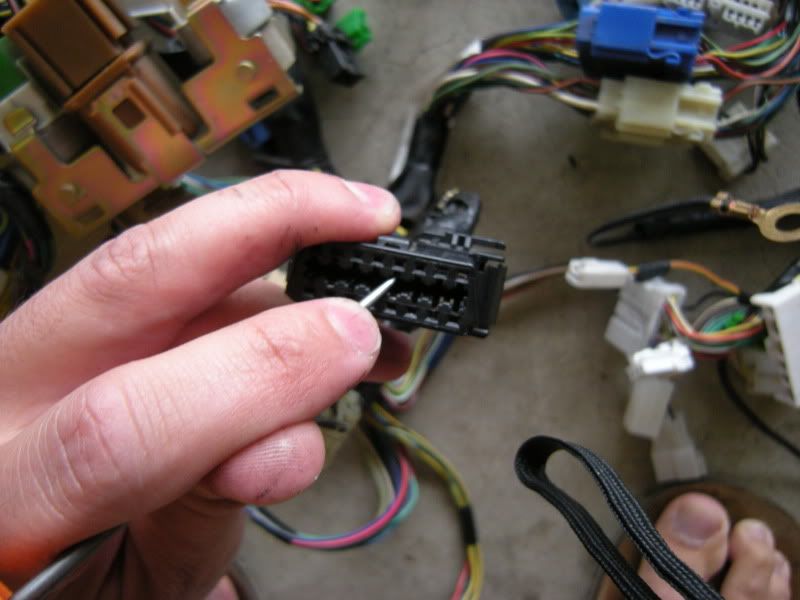
Sorry bad picture but this is the Line End Check 2 B134/20 – B135/12 This is the OBDII connector Pin 5 but needs to be moved to pin 8 to make reflashing possible (Doesn’t exist on the RS so you need to Repin the OBDII connector or try switching to a 2002+ OBDII connector.)
I will show this later after the harness is all wrapped up. If you want to reflash your ecu you need this pin to work.
Ignition Switch WRX B134/5 – RS B135/7… This is the joint connector on the RS. Power comes from it into the RS ecu and out to the RS motor. Again, don’t worry about the RS ecu. Just make sure it connects to all the wires on the WRX. Again pull out all dead ends.
Basically the same junction but on the WRX. You can resolder these to make a cleaner connection.
Drain valve WRX B137/11 – RS B134/10
Fan1 Relay WRX B137/17 – RS B134/3
Fan2 Relay WRX B137/28 – RS B134/12
A/C relay WRX B137/27 – RS B134/17
Tach WRX B136/9 – RS B134/30
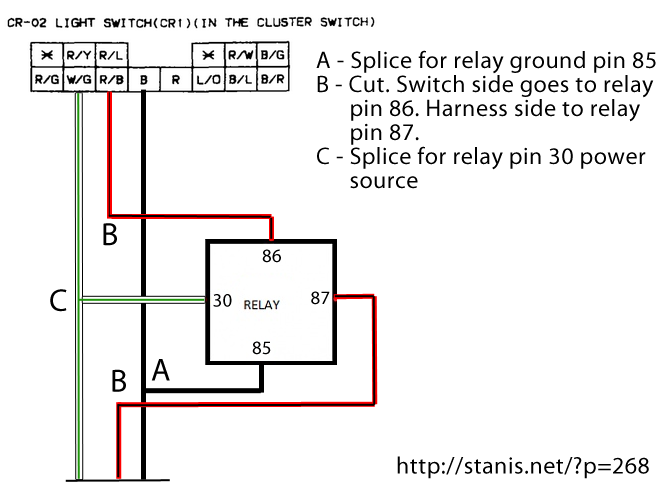
Fuel Pump Relay Control RS B134/16 – T’ed to B135/19 (This makes the relay on when the key is on.) just like shown. This needs to be T’ed because the WRX doesn’t have a fuel pump relay control. In order to get power to your pump this must be grounded.

Rear defogger Switch WRX B134/3 – RS B135/21
Line End Check 1 WRX B134/10 – RS B135/20
Self Shutoff Control WRX B134/6 – RS B135/19
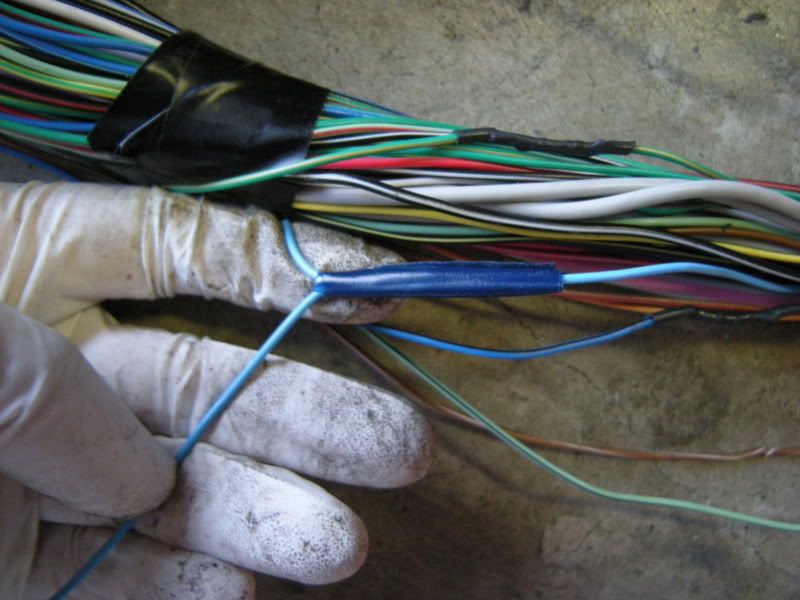
This is one of those trickier ones. From the RS engine grommet this G/Y wire branches to the ecu and into the harness it is the VSS (Vehicle Speed Sensor) WRX B134/1 – RS B135/24. You however can generally only see the one wire that leads down to the ecu. Check the RS pin position to make sure you are dealing with the right wire. The WRX has 3 wires that are cut. You can take the one that goes to the RS ECU and merge it to the WRX as a single wire as shown below.
And now you have a single wire leading to the WRX ecu but it still branches higher up to the rest of the harness but can sometimes not be seen so be aware.
Starter Switch WRX B134/16 – RS B135/28.. Although this is a large guage wire it is merged the same way. The dead leads on the WRX can be cut off to make just one connection as shown below

Make sure to solder and shrink tube this just like all the other wires.
Back-up Power WRX B137/10 – RS B136/9… There is also B/R wires that are grounds so don’t mix them up. Top is WRX bottom is RS. The two RS wires need to merge to the one WRX wire. The other 3 WRX wires are dead ends already.
As shown above they are merged to one. Again, make sure to shrink tube these also.
Now that most of the wires are done. It is a good time to take off the grommet at the RS firewall and free the Speed sensor, Neutral position switch and Back up lights.
To continue to keep a good reference of length, once the Speed sensor, Neutral position switch and Back up lights are freed from the RS harness I tape them in the same spot on the WRX harness.
These are the only three things you need from the RS engine harness section.
These two wires also lead out to the RS engine harness. The came from the oil pressure switch and water temp gauge. The WRX has those on the engine so cut these as close the RS engine plugs as possible and we will merge those in a moment.
You might also find wires that are just wrapped around the RS engine harness not allowing the harness to be disconnected. You can cut anything you want on the RS engine harness to get these wires free.
This is the ground (power supply) wires. Top right it leads to the RS engine wiring. Bottom right it leads to the RS ECU and bottom left it leads into the RS bulkhead harness.
After cutting it you have this. The bottom is the RS and the top is the WRX. There are three wires that lead to the RS ecu. You can cut those at toss them. The two that lead into the RS bulkhead harness are grounding wires that got there grounds from the RS engine. Literally bolted to the engine. These need to be merged with the WRX. The WRX engine has the same grounds that lead to the ECU from the SMJ connector. The RS wires can be soldered into the connection pictured above. This is one of the only wires where the WRX harness feeds the RS instead of the other way around. It is important that all these wires go somewhere.
These wires also lead to the RS engine harness. They are 12 volt powers for the o2 sensors and injectors/ignitors. Again cut these close to the RS engine plugs and we will merge them in a moment.
Neutral Position WRX B134/8 – RS B135/26… On the WRX harness you will find this wire that can now be connected to the RS Neutral position plug.
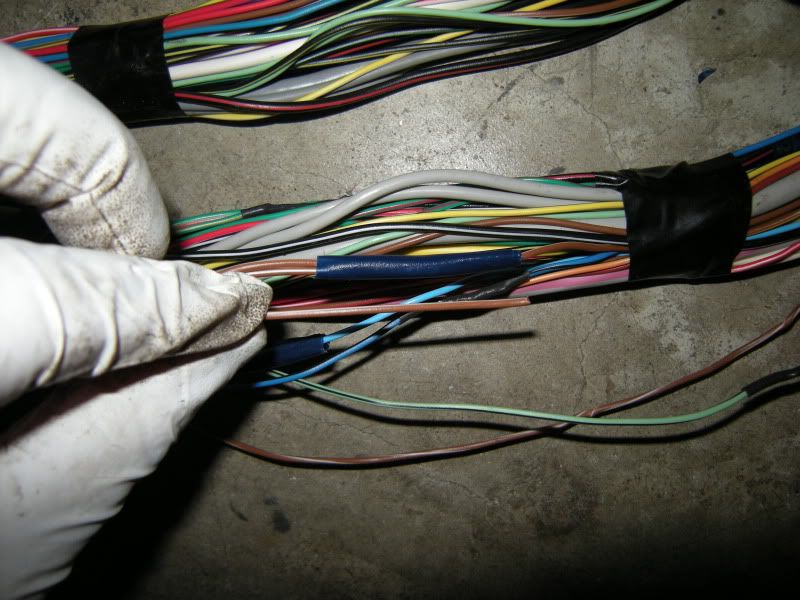
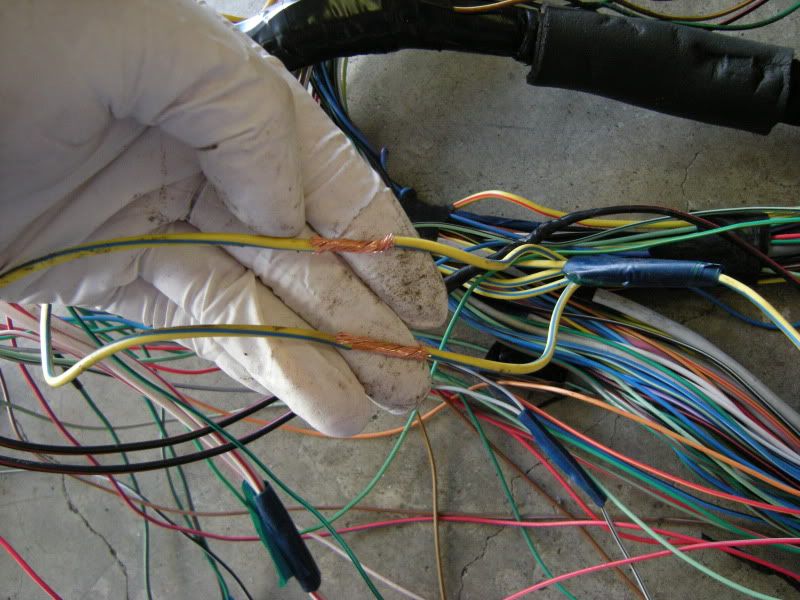
On the WRX harness you will find Control Power WRX B137/2 and B137/3. They need to be merged with the RS B136/2- RS B136/1. You can also merge your Y/B wire that ran to RS engine harness that was for injector/Ignitor power. This group of WRX wires also ties into the next picture from earlier. Which will power the injector/Ignitors of the WRX.
See the Yellow wire that isn’t connected to anything that runs towards the SMJ connector? Remember cutting that a million steps ago? We will be merging this guy to the WRX front harness in a bit but be aware that this has been tied to power on the RS bulkhead harness now.
So again, these will be connected from the RS bulkhead to the WRX harness.
Now that you have cut all the wires that lead to the RS harness it freely comes off. All RS wires now go somewhere. Because this is a 99 harness that I’m using there is a few wires that are left on the WRX harness.
First, there is a common sensor ground wire on the WRX harness that leads no where. This is ok.

These two wires are Small light B136/3 (Doesn’t exist on 99 RS only on 2000+) and Blower fan switch B136/30 (Doesn’t exist on 99 RS only on 2000+). They can be cut short at taped up.
Then you have the o2 power wires. Top is the WRX and bottom is the RS. These all need to be soldered together so your o2 heater work for both the front and rear o2s. The Power comes directly from the main relay just like the power for the ECU.
You are not quite done but you can start wrapping the harness back up to clean up the wiring and get a good idea what is left. Basically it is the reverse of how you took it apart.
Loosely tie the harness together with tape.
Make sure the branch that leads out into the engine bay is tightly T’d as shown. Pictured at the top you notice the four wires you have left. The two FPC wires and the two gauge wires.
Then put the original WRX wrap and “S” tape back on. You harness should now look like this. Very factory isn’t it.