So the story continues. After 3 days worth of work I have the motor out of the car. Unfortunate failure of the engine! I have plenty of pictures and will be taking more!


So the story continues. After 3 days worth of work I have the motor out of the car. Unfortunate failure of the engine! I have plenty of pictures and will be taking more!


This is my 1979 RX-7 project car. It was purchased in Feb-06 for $600. It has been sitting for many years. I have been tinkering with it since I purchased it. I was told the engine needed to be replaced and that it had bad seals. After bringing it home, I just had to see if I could get it to run. After playing with two different carbs and having them on and back off over 15 times, I was able to get a good working 1982 carb and manifold. Before trying to start the car for the first time, I changed the oil and put some atf fluid in each rotor housing to provide some lubrication after it’s 11 year sit. I was able to get it running right away after I put on the 82 carb, but then I found myself with ignition problems. The compute was causing the vacuum solenoid to open and advance the timing. I beat my head against the wall on this one, then it occurred to me to just unplug the vacuum line and see what happens. This seemed to fix it so I have left it there for now and just capped the hose. In addition to getting it running, I have also cleaned the interior and replaced the clutch hydrolics and lines with fresh ones from Black Dragon Automotive.
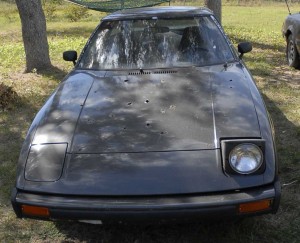
 Here you can obviously see that one headlight is not up. The motor is out of the car to clean and troubleshoot. You may also notice the many holes in the hood. I have no idea what they are from, but I will be locating a replacement.
In these two pictures you can see that the sides of the car are not all banged up or ripples from other car doors. The paint is also reflective still. I plan to repain it with the original color after everything has been taken care of mechanical and interior wise.
The car was last driven in North Carolina in 1995. It was driven to Florida where it found its’ resting place for the last 11 years. It is a California model and has the original emissions sticker still int he back quarter window. Since this car left California in its’ early life, it received a Racing Beat header and two presilencers followed by a regular muffler.
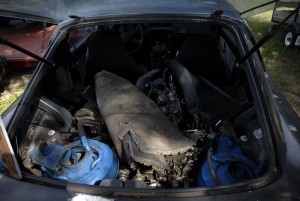
 In the trunk area sit two carbs, two intakes, and two air cleaners. These were the troubleshooting parts that came with this and another car. One of the manifolds was port matched too. Both of the carbs had stuck float valves and are in need of rebuild kits. I already have a kit to rebuild one of these carb, now I just have to pick the one to use. Also in the back of the car you can see some of the deck matte. This is not cracked and ripped too bad so it will be reused after some cleaning. Also, you will notice the stick to hold up the glass. This happens to all cars eventually.
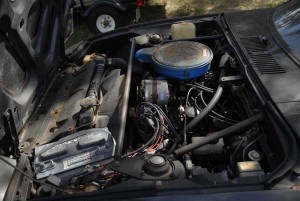
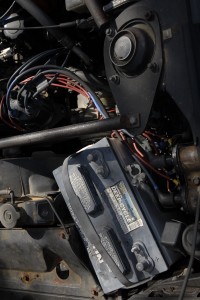
 Under the hood you will see a strut tower brace. This has been very convenient in helping me work under the hood. I have been able to hop up on the strut towers and squat down to work on some things. This was a little more comfortable then leaning against the fenders and putting a strain on the knees and back. Just for the sake of having a battery, I just used a large truck battery that was hanging around. The engine in the car was replaced by a Mazda dealership in NC in 1992 at 114k miles on the odometer. Now it has 169k in it.
 The car originally came with breaker or point type distributor for the ignition system, but the previous owner converted it to the electronic type at some point. Now there are ugly fat wires from the dizzy to the coils. Also the tachometer does not work. I think the problem is in the emission computer under the dash. I have hooked up another tachometer to the coil and I get an RPM signal fine. If the computer was broken, it would explain the vacuum advancement working the way it is as well.